 Last weekend we did some grinding and buffing and I got to use the bench grinder (woo!) but it was kind of scary. The grindstone and the buffer are both spinning at 6000 rpm and trying to concentrate over the noise while also knowing the fact that my fingers could get ripped off was – believe me – not easy. Anyway, I look forward to more grinding and buffing and blogging next time I have the chance.
Year: 2010
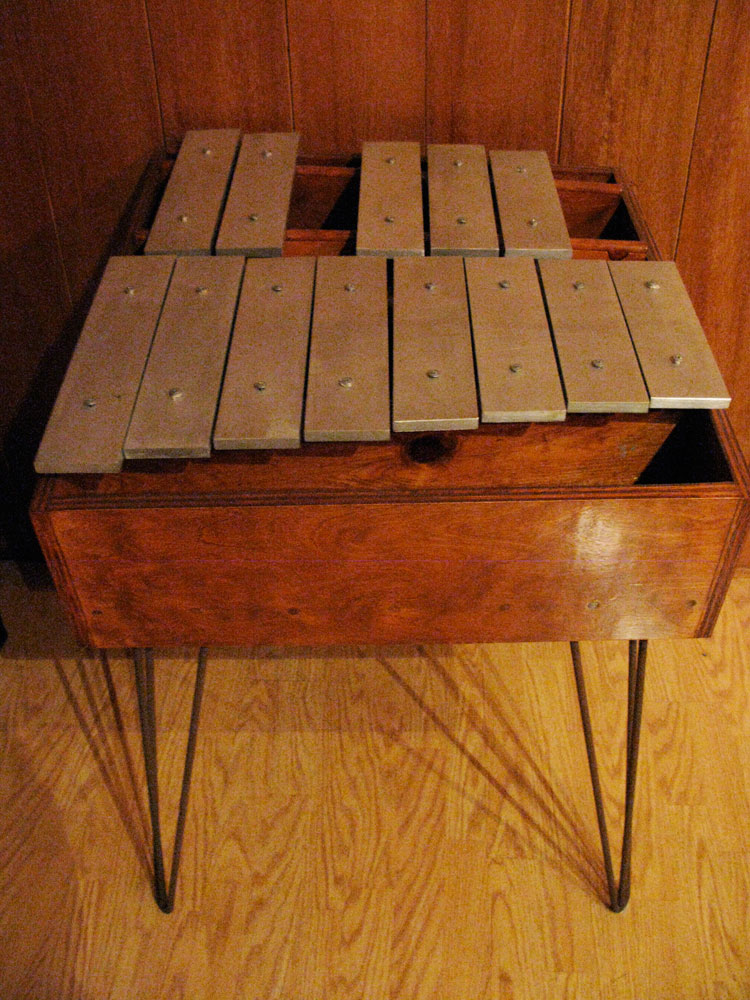
Step 2 – start cutting xylophone keys

We bought some aluminum bar (3″ x .5″), which has a nice, resonant tone without any nasty harmonics to it.
Also, it’s the lightest choice (brass and steel are MUCH heavier), which will become important when we have close to a hundred pounds of keys, steel framing and audio pickups hanging off the van.
I learned how to choose raw materials for this project eight years ago the first time I built a xylophone (this one), after downloading these instructions.
I spent a good deal of time hunkered down on my knees, balancing odd bits of aluminum, steel and brass on balled-up socks (per Jim Doble’s excellent instructions), whacking it and listening to it – which gets you stared at, but generally dismissed as not worth calling the cops on.
Eventually, you figure out what sounds best – and off you go.
MoreStep 1 – get enormous van

If you want to build a rolling xylophone that a lot of people can play on, you need to start large.
Garage-defyingly, big-elbowed, fat-assed gas-whale large.
I don’t even want to think of how thirsty this platform is, it’s stupidly gorgeous. Burly rhomboidal lines. Four rows of seating (that won’t last long). Brown/orange “sunset” striping. Eight lugnuts per beefy wheel. Go ahead, click to enlarge the pic. You’ll barf, it’s so large.
This, friends, is our pigheaded American folly.
This country once was great

Back in the day, a few burly trapezoids and some bitchin’ mags made your van a ride.
I’m buying the XyloVan’s base today. Can’t wait.
This is it – BEFORE
I biked past it this morning and snapped a cellphone pic. We don’t own it just yet. The owner is clearing the title and getting DMV papers in order. Details when it’s actually ours.
Soon. 
It’s kinda rusty, like this
Can’t find the Craigslist ad, but we’re on the verge of buying the foundation of XyloVan – a 1984 extended Club Van.
More about it when it arrives. And then some. We have plans. Anyway, it looks a little like this:
