(edit: I quit Facebook in 3/2018, which accounts for the missing videos.)
So, I make these musical drums out of up-cycled propane tanks. Click through for a demo video (and the build log) for Tonepod 2, the new model. Making this one, as with the others – gave me tremendous joy – which is good because the process takes about 40-60 hours and fills our basement shop with dust and noise. And yes, I might be able make one for you. Inquire here.
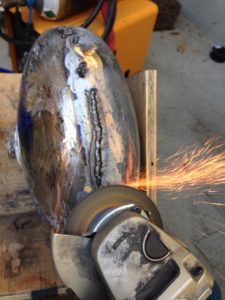
At this point, I have already safely emptied the tank of propane and washed out the residue of methyl mercaptan (the nasty stink agent that lets you know when odorless propane is leaking). (Seriously, don’t use any tool on metal until the propane is safely gone). I’ve cut off the handle from the top and the base ring from the bottom, and ground off the welds, and now I’m grinding off the rest of the paint before cutting …
Using an angle grinder with a cutting blade, I cut out the middle 12 inches or so of the tank cylinder, leaving the top and bottom domes of the container. Now, I weld the domes together.
 Then I grind my sloppy, excess welds down to make the surface smooth.
Here’s the welded, ground-off blank. Ready for marking, drilling, cutting and the rest.
Now I work out the scale on our marimba. I’m not enough of a musician to understand what I’m doing scientifically, but I chose 10 notes in C that allow for some nice major/minor suspension/resolution patterns when playing.
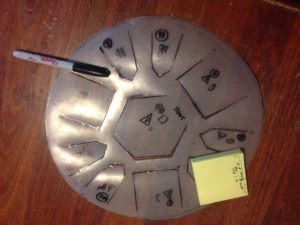 I’ve used this template for most of my drums, marking it up so as to play around with different major/minor/mutant scales.
Here’s the process (which Facebook automatically pickled into a video with a horrible soundtrack the first time I uploaded these – sorry) of marking and drilling the corners of the keys to make them ready for cutting.
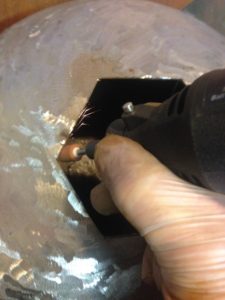
Cutting the tongues is a laborious, painstaking process. I go through six or seven Dremel cutting discs per tongue. The Dremel heats up so badly during work that it becomes too hot to use, so I hang it on a fan to cool it down and use my backup Dremel, switching back and forth between them so I can keep working. The general principle at work is that the longer you cut the tongues, the lower they sound when tapped.
Once the tongues are cut down to juuust sharp of perfectly-in-tune, I start fine-tuning with a hacksaw blade, checking carefully with a tuning app on my phone.The drum is mounted on a stand I built – a lazy susan with a pipe sticking up out of it that screws perfectly into the now-empty valve socket on what was once the propane tank’s business end. This keeps the drum stable and lets me rotate it to put each tongue in front of me while I work.
The process is quite laborious. Cut too far, and the key winds up flat – the only way out of that (to sharp it again) is to weld the cuts shut a half-inch or so up from the bottom, grind off the excess welds and start cutting again. I’ve gotten better at avoiding that nonsense, but I still goof up at least two or three times on each drum and have to correct the tongues.
Sound check! It’s a little hollow and tinny because there’s nothing damping the body. The body is *not* tuned, like the keys, and will overwhelm the actual musical notes until I damp it.
Now that it’s tuned, I cut out the valve socket to leave a nice resonator hole. This will make the sound richer.
 Grinding off the nasty sharp edges so I can work inside without accidental wrist-slashing action.
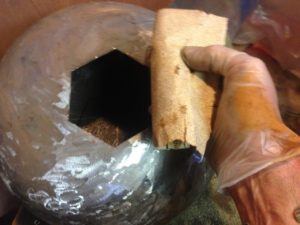 Sand-paper over an old sheet-metal-worker’s dolly makes a sanding block for scraping off the patina of internal rust that could otherwise shower out of the drum and make life nasty while playing.
Cleanup. I Dremel the burrs off the edges of the keys, removing any sharp nasties that could cut your fingers while playing.
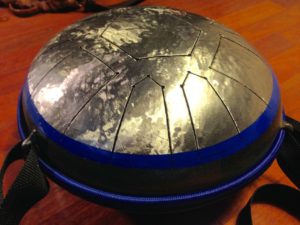
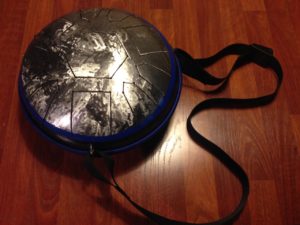
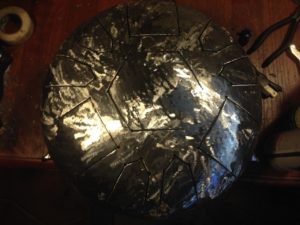 The finished product. Ready for modification.
I cut up a length of 1.5-inch steel chain to make lugs, which I then welded to the drum’s body for attaching things.
Now – decisions, decisions.
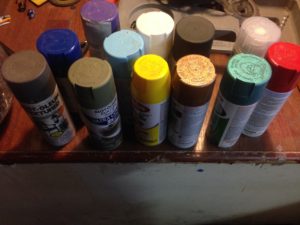
I laid down a base coat of black, which leaves a nice, sharp-looking edge where it meets the metal playing surface. Then I masked it off and painted the exposed area with XyloVan green, fading it up into the black. (Painter’s Touch “Oregano.”)
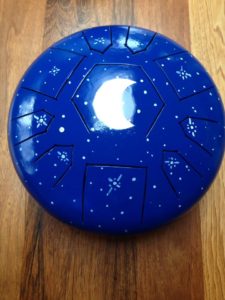
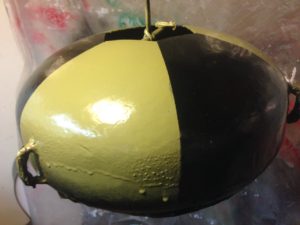 Here it is, hanging on the paint rig. I got a little globby with this coat, but finishing touches will hide the runs. I finished the painting by peeling off the masking, re-masking the green areas, then painting the unmasked black over with hammertone bronze seen in the demo video at the top of this post. Then I added a ring of blue around the top edge, and gave everything five coats of clear enamel. Not sure I’m in love with this paint scheme, but the finished product does look pretty sharp, as you’ll see in a sec …
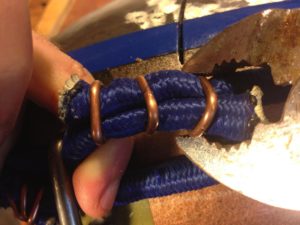 I wrap two bungees around the drum’s equator, threading them through the lugs – to damp the body of the drum from ringing when it’s played – and fasten them with hog rings.
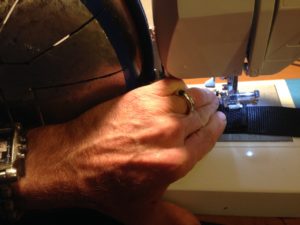 Now I sew the strap onto the lugs …
 … Â voila!
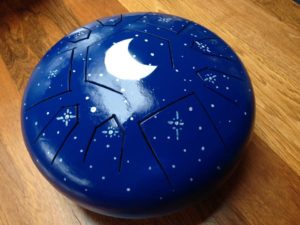
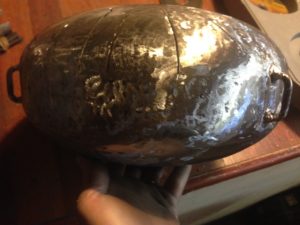
 Portable. Durable. Pretty. Noisy. I think I’ll keep this one.
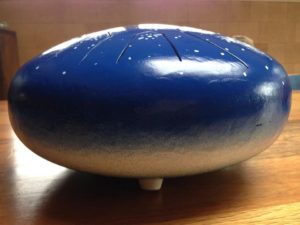 Bonus shots: Here’s Tonepod 1, which I made for a dear friend’s twin toddlers. This one is fully painted and has little rubber feet.