The old-timey title for this post could have been:
The Wisdom and Benefits of Contemplating a Temporary Shift from the Traditional Norm for This Institution in Materials, Methods, Design and Construction of Multi-Purpose Acoustic Percussion Instruments:
Or, a “Box to Bang On”
Because this post is about a kick in the head. A total world-shifting creative non-sequitur from all this demanding, burly, unforgiving metal I’ve been working with for so many years.
All of a sudden I’m building cajóns. Out of wood. Where did *that* come from.
Lemme back up a bit.
I’ve been goofing around with the idea of combining disc gongs with a sound box like the one I built a million years ago for my very first xylophone. I wanted to explore: disc arrays, resonance, materials, instrument playability.Here’s a sketch: —->
And then it occurred to me that the cajón (a sit-upon box drum with  roots in Peru and on loading docks everywhere) is such a perfect blend of structural integrity and resonance – like musical furniture – that if I could build one strong enough, it could do double duty as both metallophone and drum.
Gee, that sounds like a lot of work.
Maybe just start with building a good cajon to see if it’s easy enough. So, after digesting half a dozen how-to’s on YouTube and stealing some of the most interesting design ideas into my plan, I started my first.
Here’s a ragged build log:
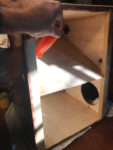
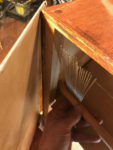
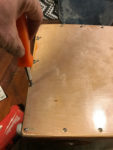
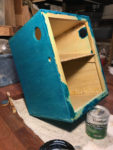
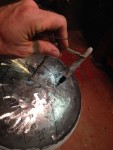
Here I’m cutting pegs. I pegged/glued together the box from 1/2″ plywood, then braced its front and rear openings with 1×1 square dowels (You’ll see these later in the log – wish I’d taken more photos of that process).
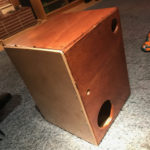
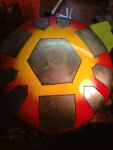
I cut sound ports into one side of the box – the bottom for bass and the top-rear for high-end (the little hole in the center-right is for the snare mechanism)
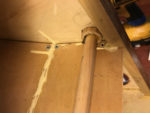
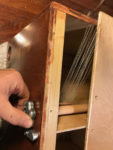
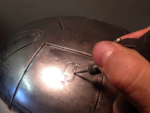
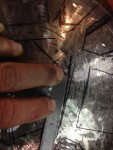
I then installed 1/4″ plywood divider panels the width of the box, dividing bass from high-end. I inserted this dowel, collared at both ends to hold it in place, so that it pivots in the little holes to allow the snares to move.
I screwed the snares (the cut halves of a whole 14″ drum snare) to the dowel and lined them up so that when the dowel rolls forward in its holes, the snares brush the inside of the playing surface.
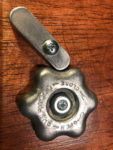
Screwed an old propane-tank valve-knob to the end of the control dowel
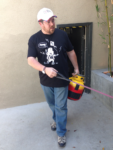
Tested it
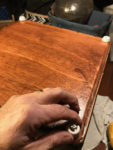
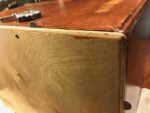
Stained (red maple!) and varnished the box and screwed on some li’l rubber feet
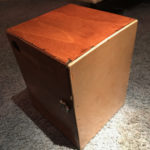
Screwed on the nicely-varnished tappa
I wedged coins behind one corner of the tappa so that it warped outward a little bit (and removed them after a few days.) Now, that corner of the cajón delivers a nice “crack” note when you slap it.
This, coupled with the snares on the opposite corner and the bass notes you get when you hit the center of the instrument help it live up to its name as “drum kit in a box.”
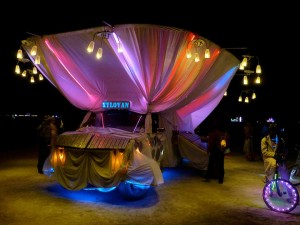
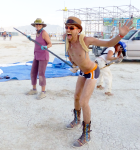
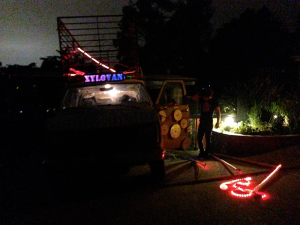
It’s been four years since I first mutated XyloVan as “the Light Fandango” and cruised the playa dressed as a glowing ballroom ceiling.
This year’s journey to Burning Man proved just as magical as the 2014 outing, thanks to amazing new campmates at OKNOTOK who helped me build and light it, a couple of excellent percussion cruises, and an endless stream of beautiful people who came to play the instruments.
More thoughts – and a question for you – below the images and videos:
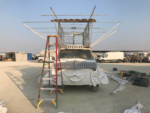
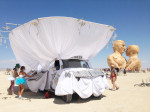
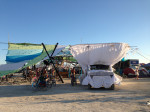
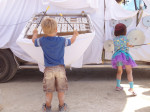
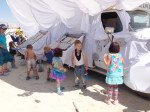
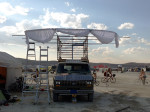
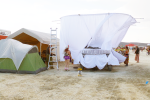
Building OKNOTOK
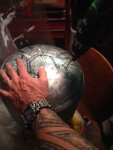
View of OKNOTOK’s tower, our bistro and our 4-foot-diameter disco ball
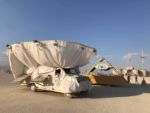
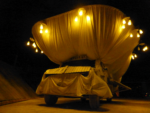
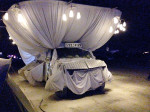
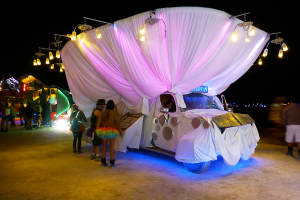
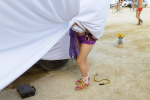
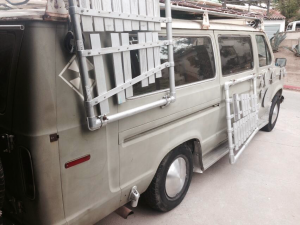
The body: draped. The bones: Passenger cage made of recycled security grates; a framework of 1.5-inch EMT bolted to the top.
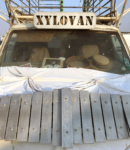
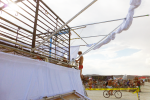
The business end of things.
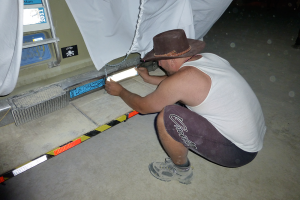
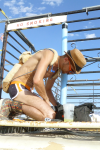
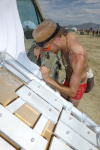
Adam and Bunny help bolt the wheel cover frames into place.
Finished and ready for inspection
In line at the Department of Mutant Vehicles
Day permit – approved!
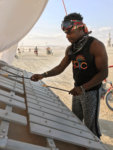
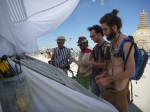
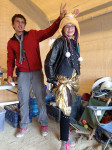
Chatted with this excellent guy, Reckless, who spent some happy time working out scales and rehearsal tunes from when he played vibes back in school.
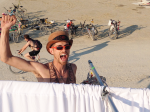
Portrait with the world’s largest disco ball, AKA The Orb.
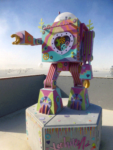
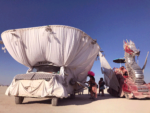
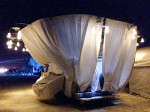
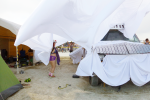
Baba Yaga’s House – gorgeous.
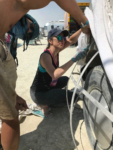
A couple of windy afternoons kicked the hell out of the canopy and connections. I spent a couple hours rewiring snapped chandelier leads, yanked LED strip connectors and redraping the entire ship’s bow.
At one point it was so dusty I pulled up next to a half-dozen art cars just to sit out the blow. Turns out it was a formal portrait of Las Vegas-area mutant vehicles. So XyloVan inadvertently photobombed it.
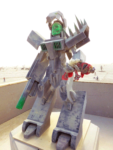
One of the many robots posted around The Man
KillBot and Elmo
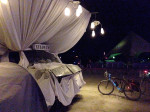
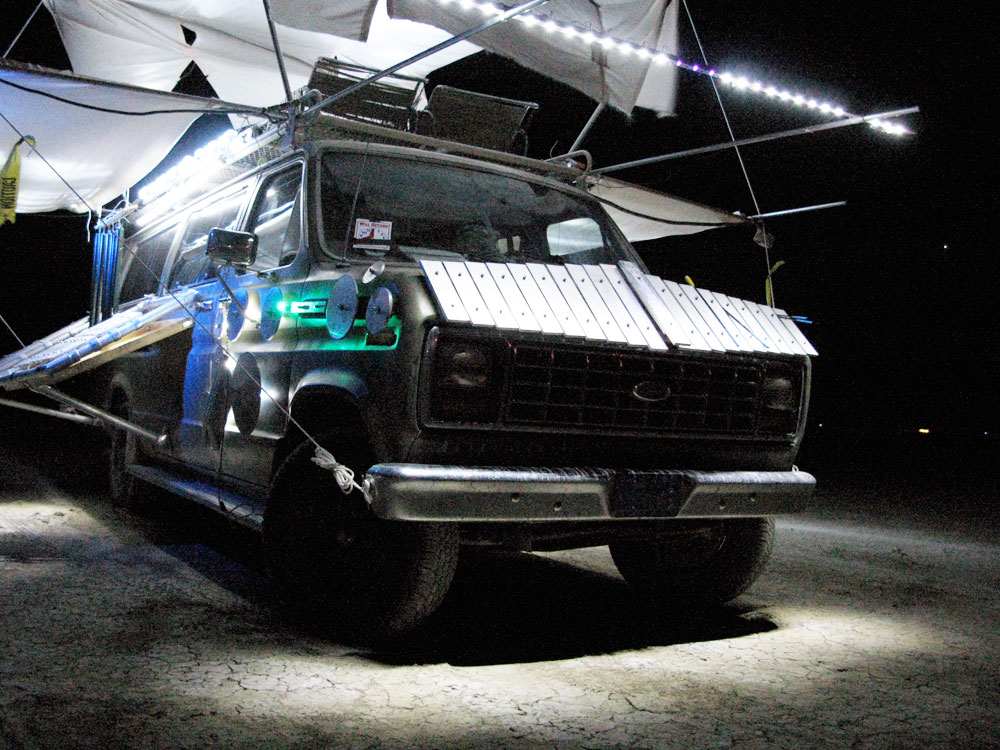
A little night music – chandeliers only
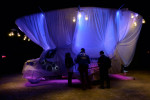
With chandeliers and LED strips lit.
With our mutant-vehicle campmates – Torch
Torch touches down briefly at home – OKNOTOK
Mesmerizing
Enjoying the view of 3:00 and A and the entire playa from OKNOTOK’s epic 3rd-story observation deck.
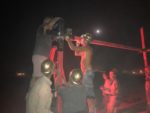
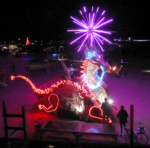
The Man Burn – the world’s gaudiest fireworks show – climaxes in massive fuel explosions.
Sunrise in the Sierras en route to home base in L.A..
Random notes from the keyboards.
Brief clip of art cars in line for night inspection at the Black Rock City Department of Mutant Vehicles.
The gorgeous RadiaLumia.
People question Burning Man – as they should.
Why bring millions of dollars of art, energy and resources into a godforsaken desert, run around like maniacs, burn a lot of it to the ground and then go home?
Why not put all that power and cash into solving problems, feeding the hungry, educating the young, improving humanity?
What the hell is all this for?
I think that, at some deep, cellular level, humanity needs to Burn. The immediate purposes – entertainment, inspiration, provocation, cross-pollination – are obvious, but the Long-Tail benefits remain hidden.
As a species, burning is a collaborative effort to evolve in some way as a species.
Whether it’s through living Ten Principles culture of participation, inclusion and immediacy, or trying to survive the brutally Darwinian process of designing an art car that won’t be kicked to pieces by 60mph winds or drug-crazed revelers, we’re trying to Go Somewhere Different with all that we bring to Burning Man.
Is Black Rock City’s increasingly global culture spiritual exploration, artistic experimentation, radical interaction, human stress-testing or just blatant, party-brained fuckery?
The answer is yes – all that and something more.
The question remains – why?
Your thoughts on this are welcome. (Just register to comment).
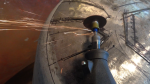
A percussion cruise is a pretty simple pleasure: Invite people onto the roof to play the drums and gongs, and drive across the Black Rock Desert.
As I drive, happy sounds drift down – people lazily striking the gongs, and chatting passionately about their burns.
The first part of this clip is the sound of a cruise we did on Tuesday afternoon, and the latter part is part of XyloVan’s set at Sonic Runway – friends from Liminal Labs joined random Burners on the roof and around the xylophones to play.
Unfortunately, the mixer crapped out so the roof percussion drowned out the xylophones, but the sound was enough to trigger some beautiful patterns on the Runway.
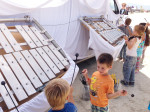
I built XyloVan to give others the joy of playing music. More often, they give me the joy of hearing amazing talent. This guy – who told me his name was Austin – really brought it.
Preparing for Burning Man – the Thing in the Desert – consumes you. You sacrifice all your time to it, and much of your sanity. I’ve been too busy to even blog about this year’s preparations, which have included a slew of new instruments and a complete teardown/rebuild of the Arduino-controlled canopy-light system. As I’m probably overfond of saying, a mutant vehicle is a hole in the playa into which one pours money, blood and tears.
But it’s still a mutant vehicle. And I’ve got a schedule to keep.
So here, this’ll catch you up:
I’ve been BUSY.
I cut two new tank drums, to be mounted to the left side the van, fore and aft of the 2.5 octave keyboard.
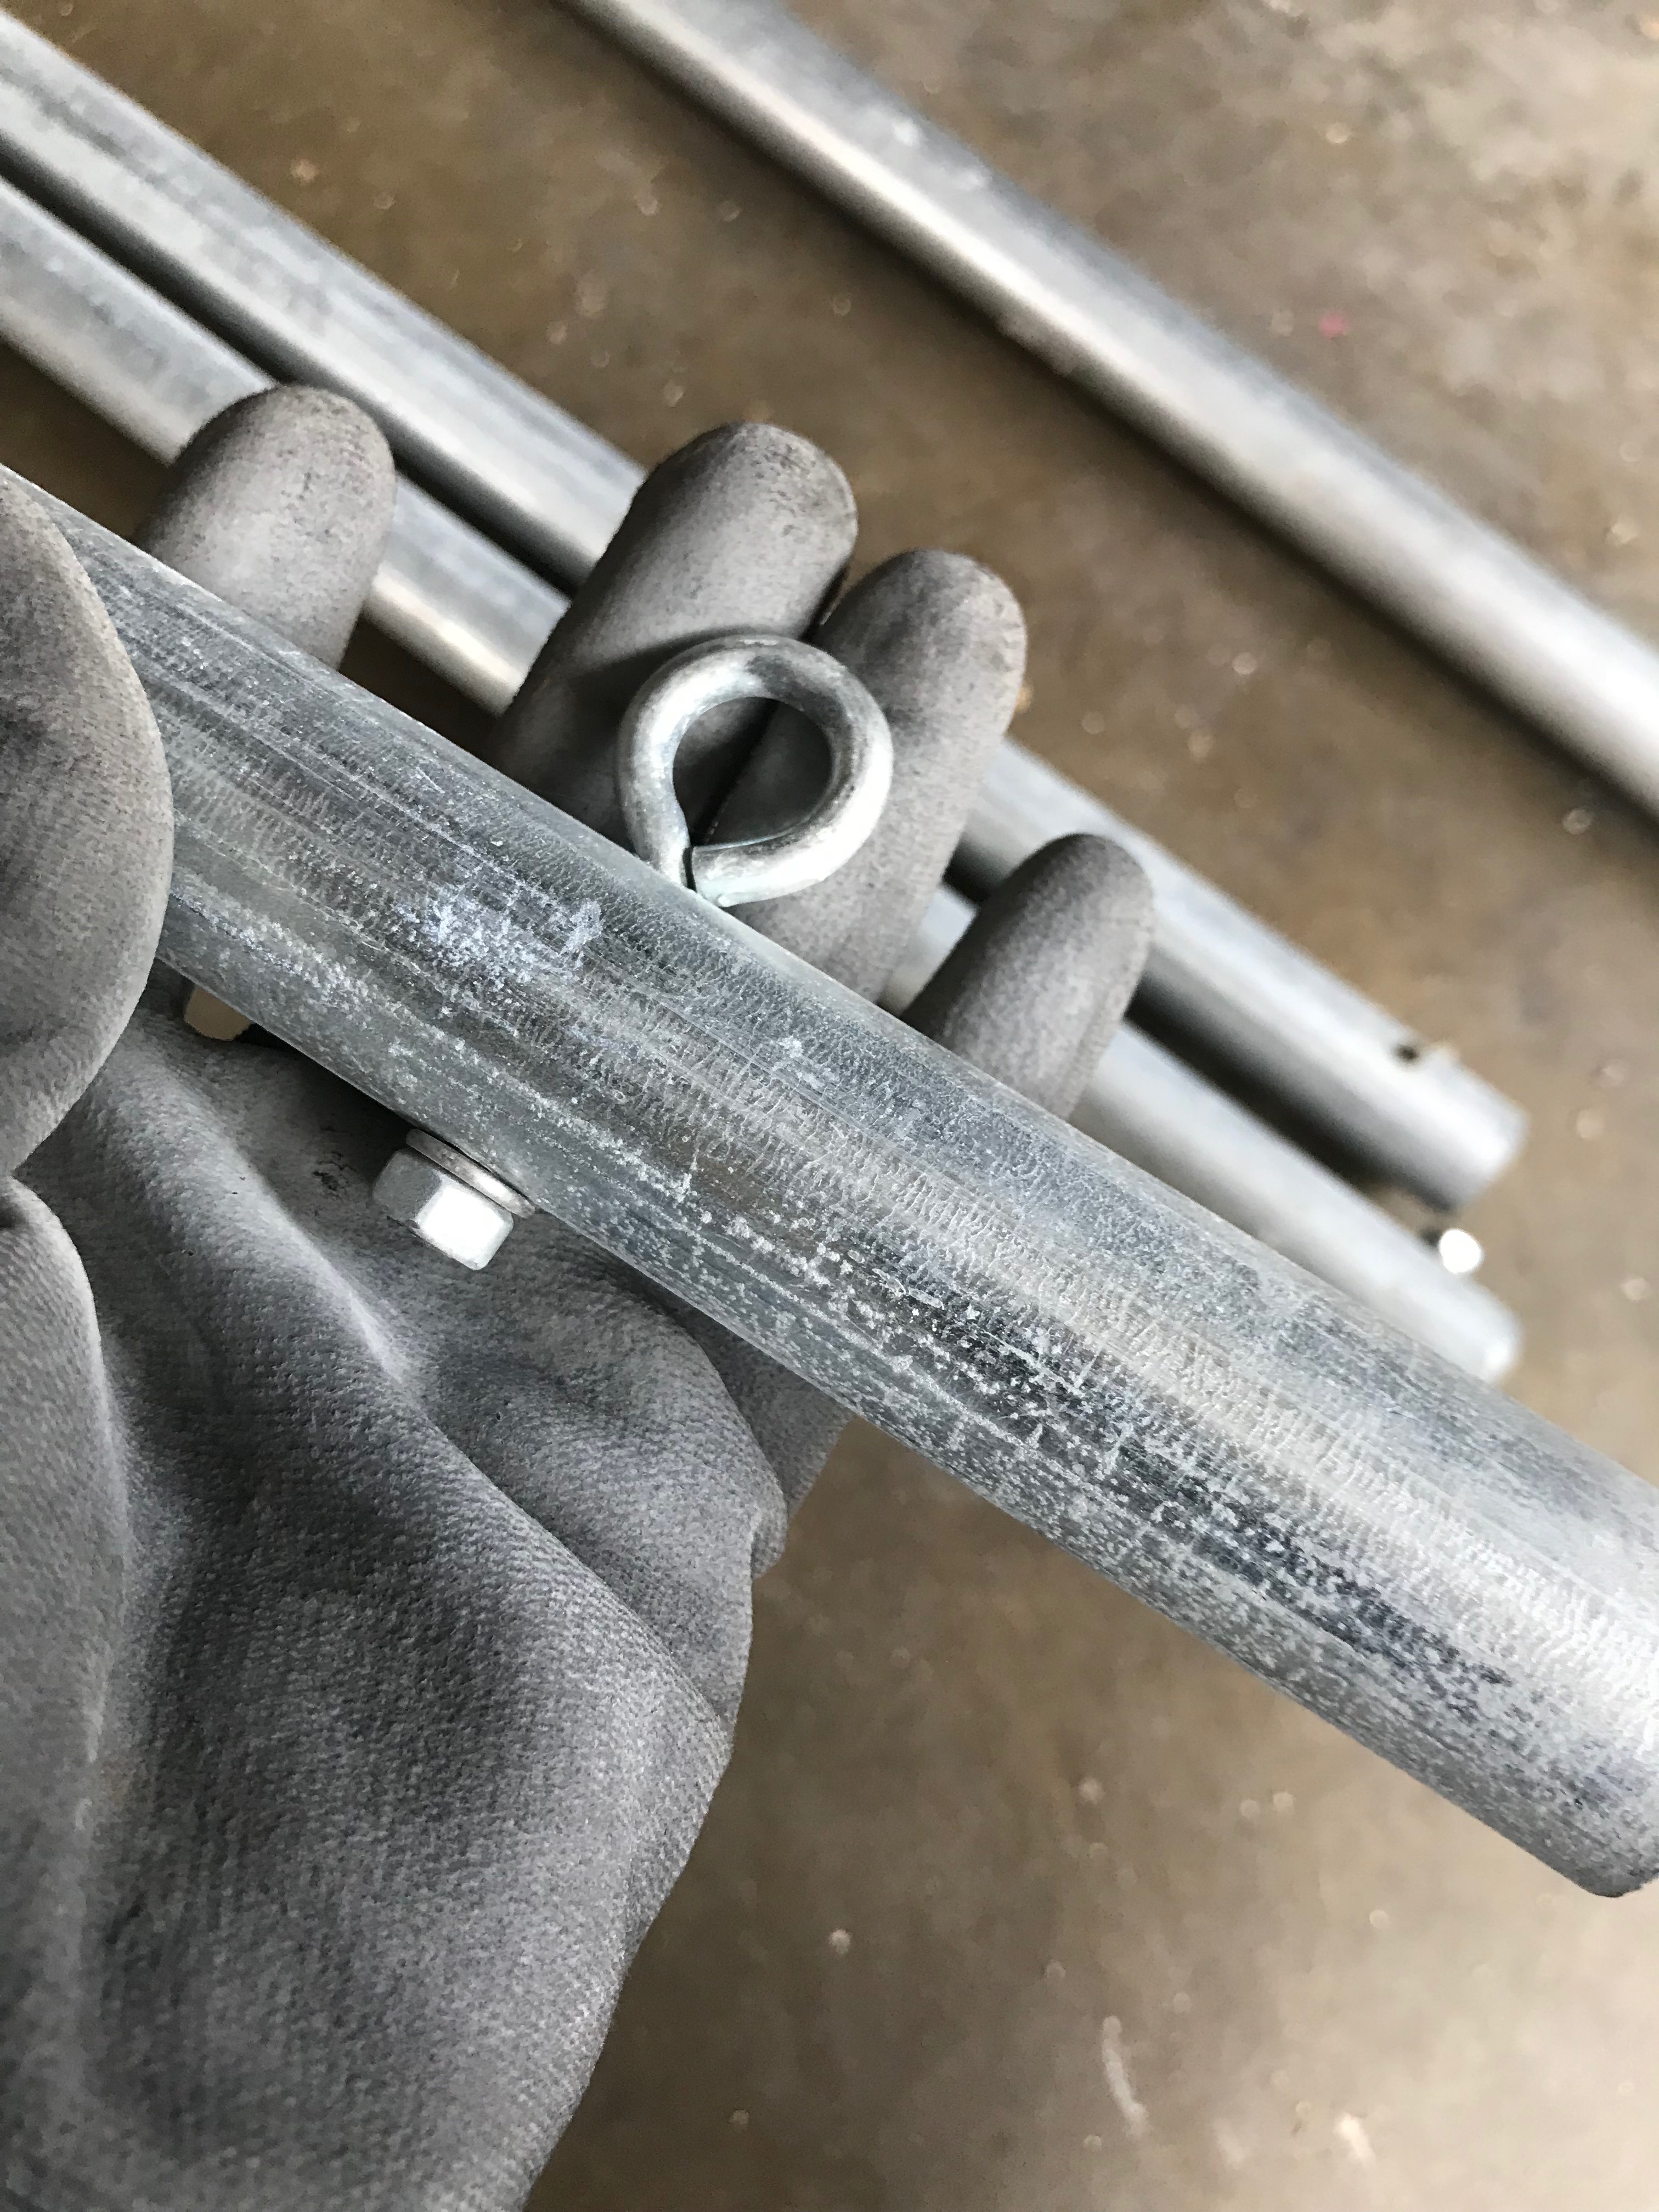
New eyebolts in strut ends from which to hang the chandeliers. Also, set up the speakers for easy slip-on-and pin-it mount/dismount.
5 coats of clearcoat enamel and later a bungee wrap for the new tank drums.
Checked all the chandeliers and rewired some of the non-working ones.
Drilled and dipped in liquid vinyl a couple-dozen new mallets and sticks.
An experiment with a helium tank.
Took time out to enjoy the L.A. River.
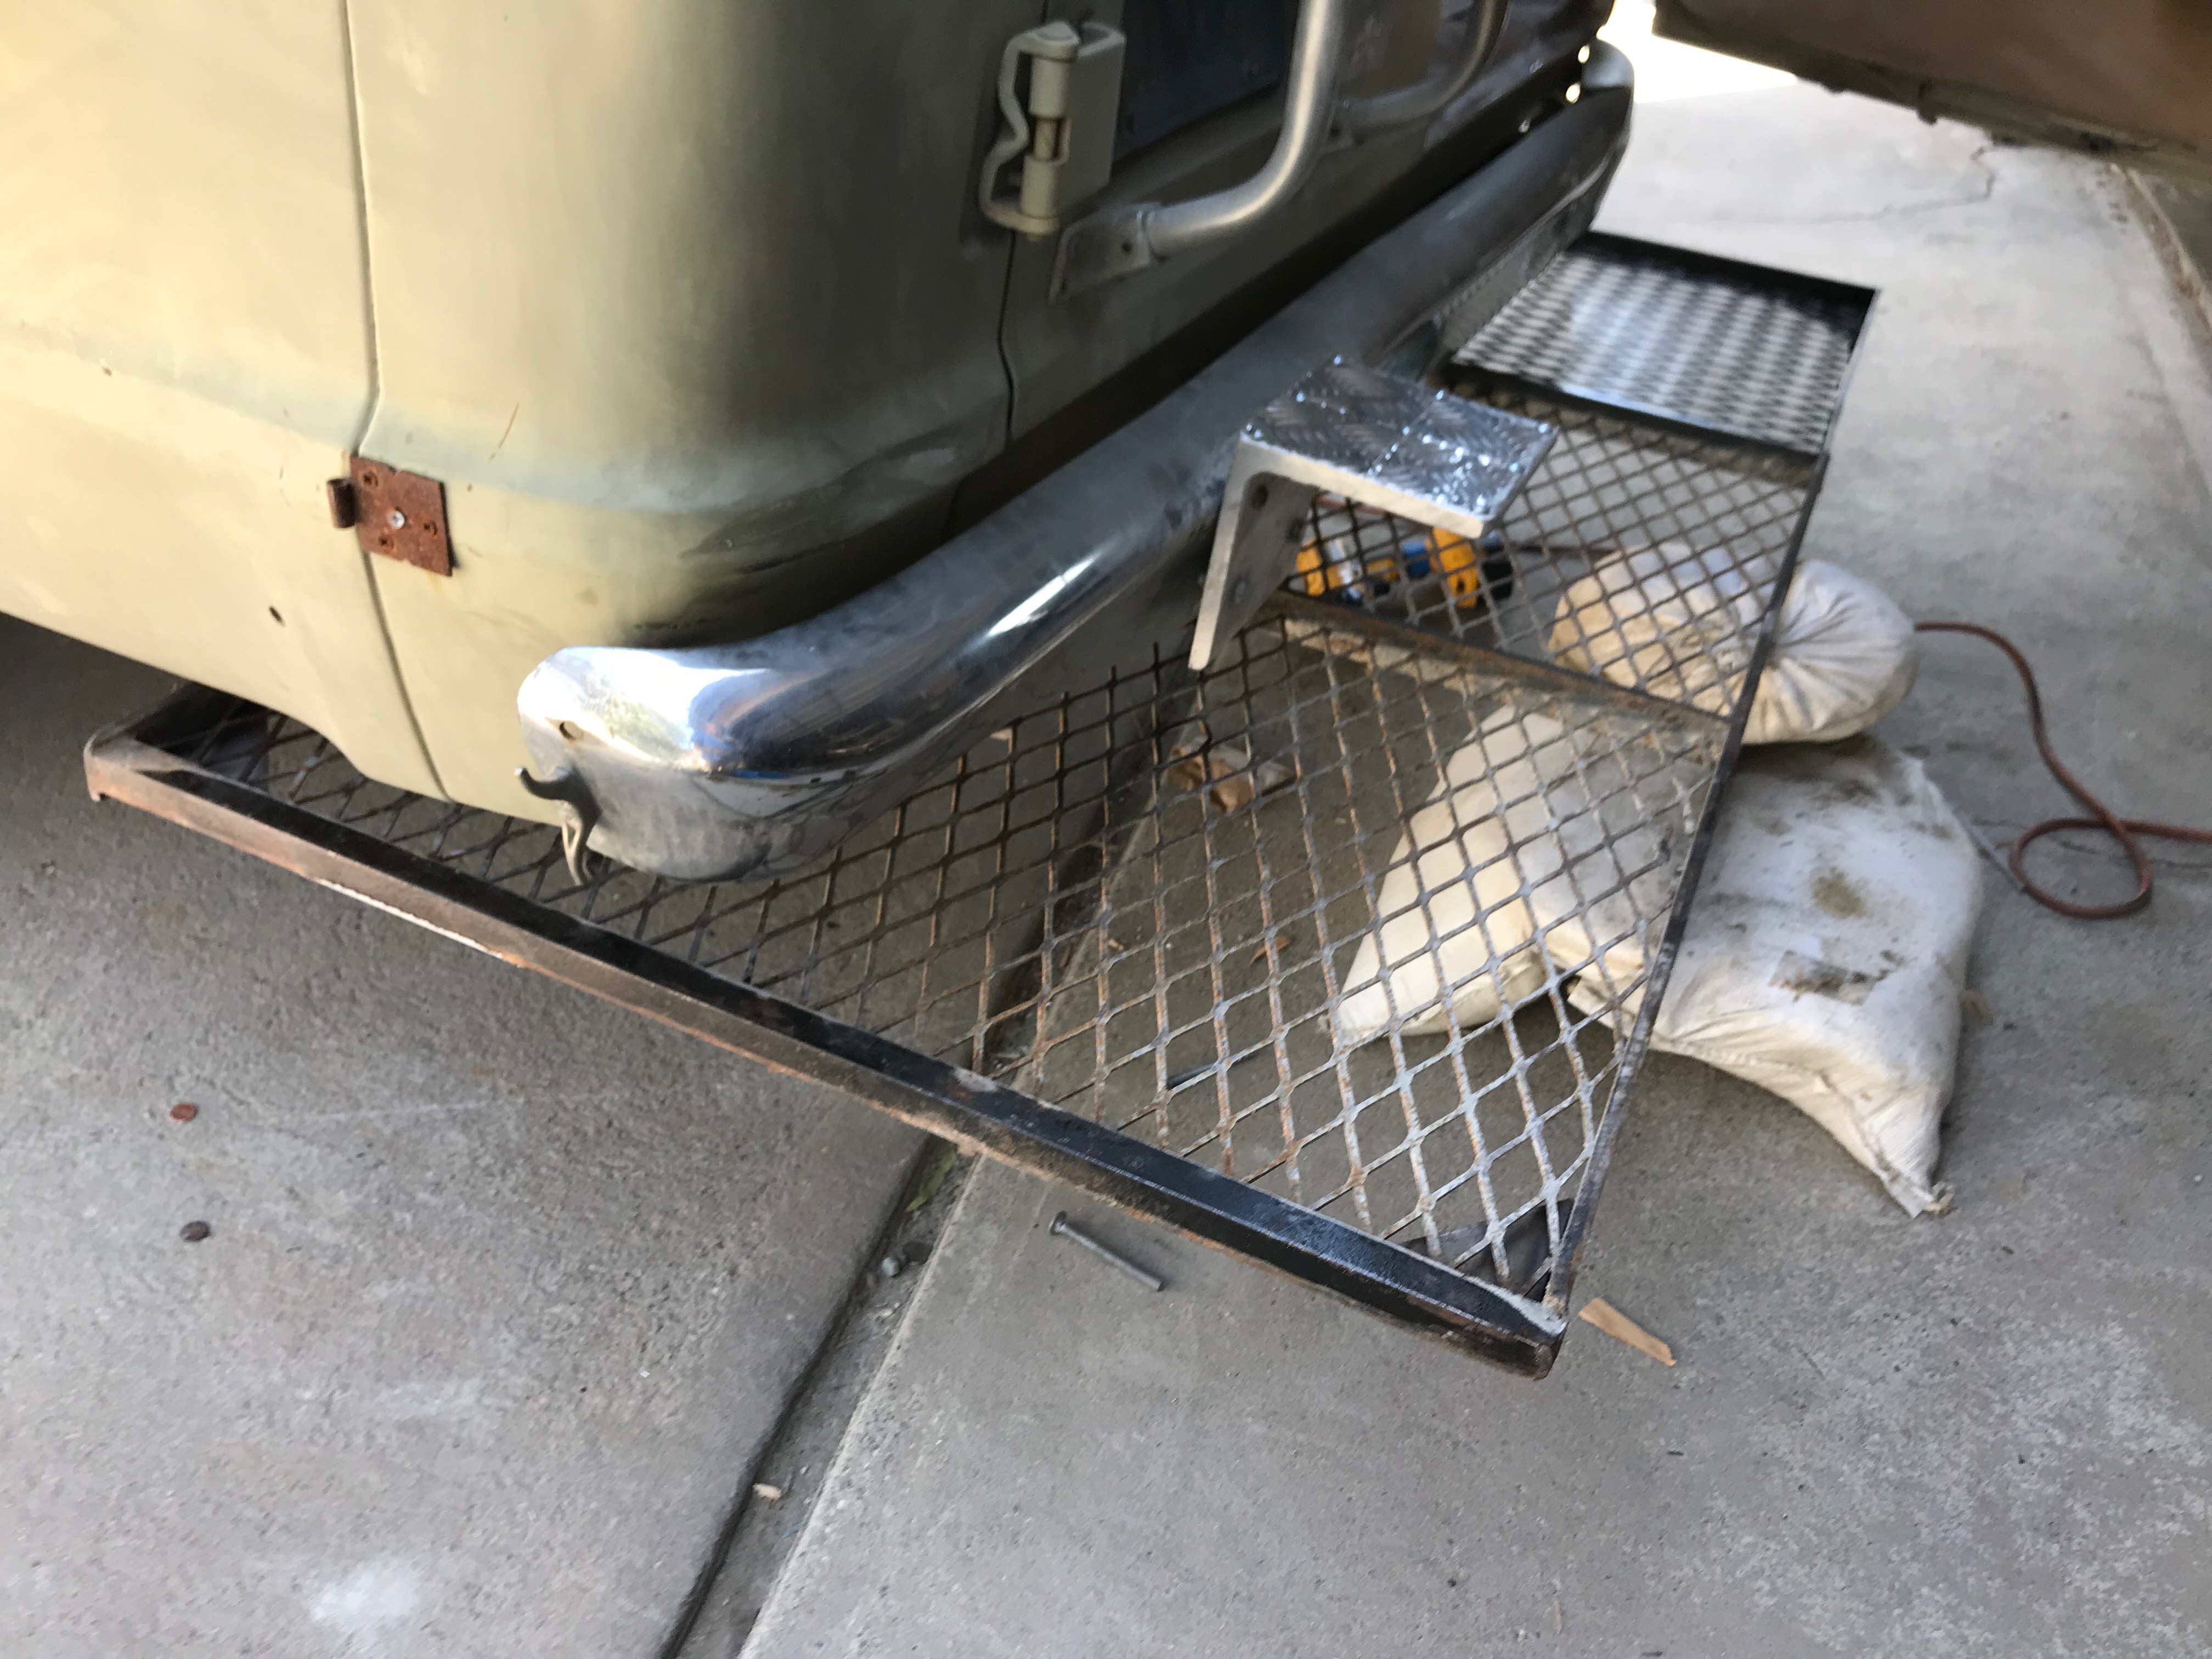
Got smashed into by an inattentive driver, who stove in the iron framework of our tailgate – a critical piece of equipment for letting people mount to the roof deck during the burn.
Unbolted the damaged tailgate frame from the underside of the van.
Cobbled together the Helium Bongoes
Took a trip to Alaska.
ALASKA.
Alaska is ravishing.
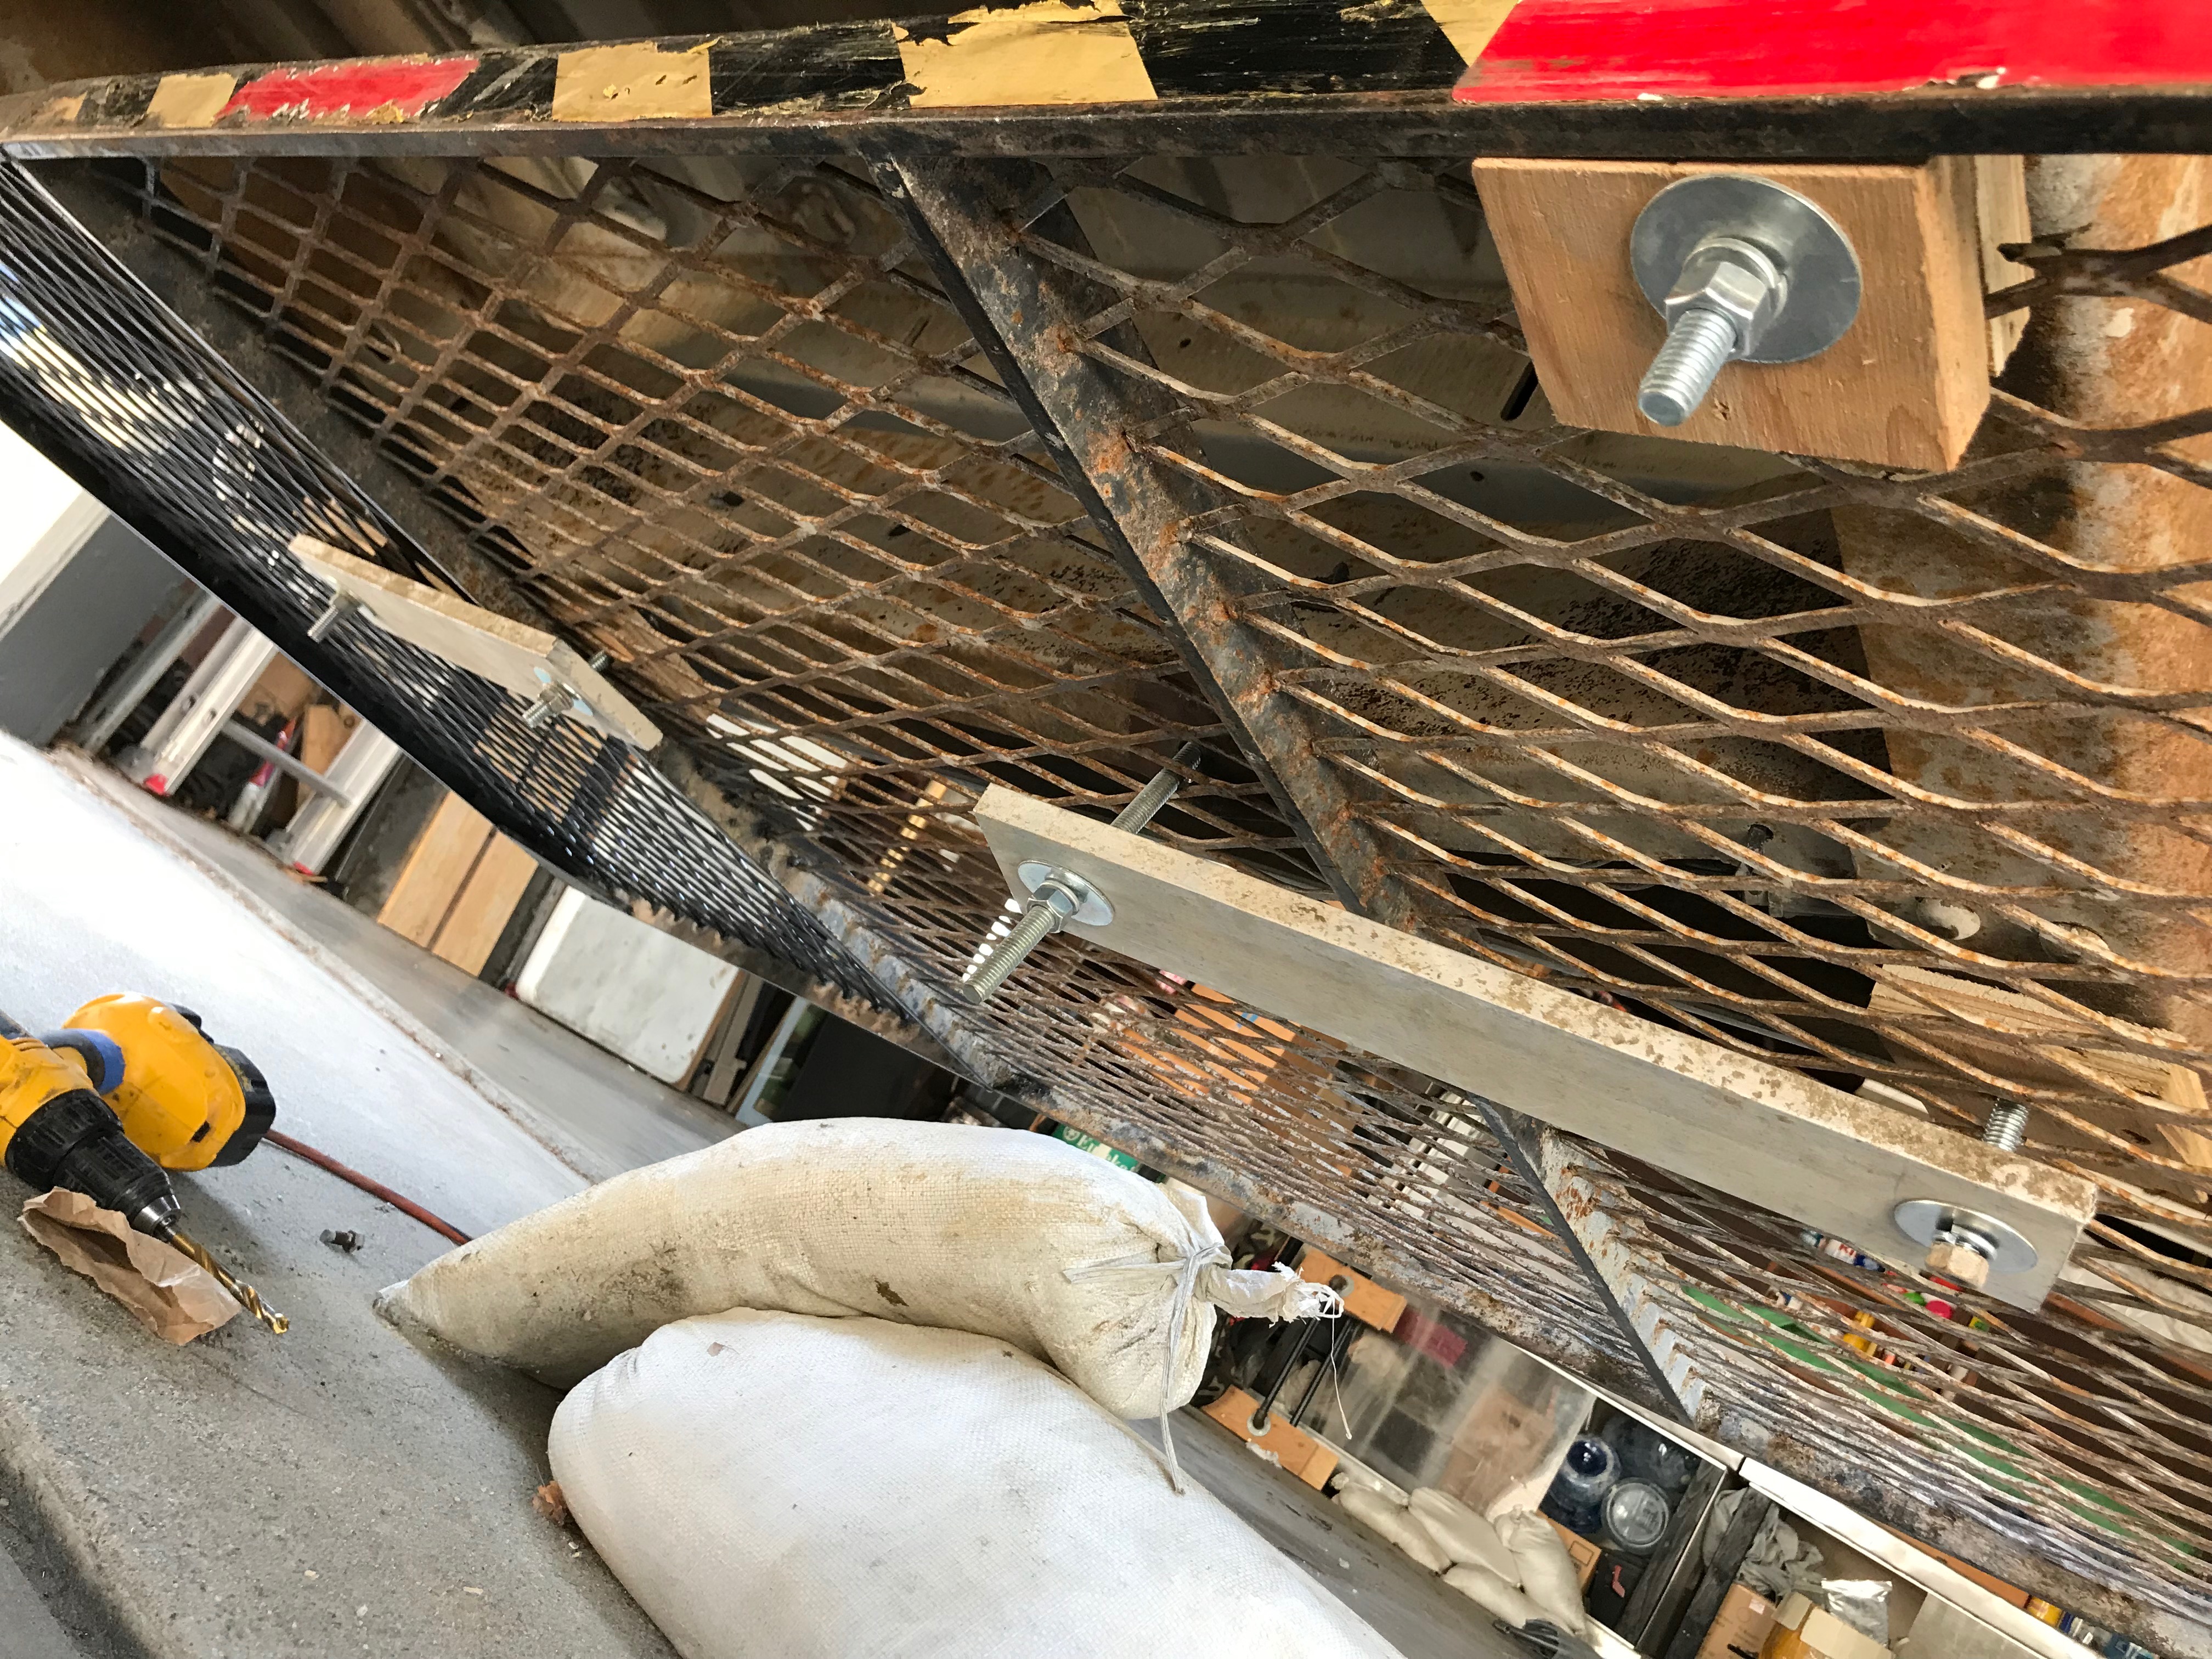
Returned home to find the maximally awesome Matt Rogers had repaired the tailgate frame by cutting off the crushed third, and re-welding it from scratch (and the materials I picked up at IMS)
Bolted that mofo back onto the underside of the van. BUT GOOD.
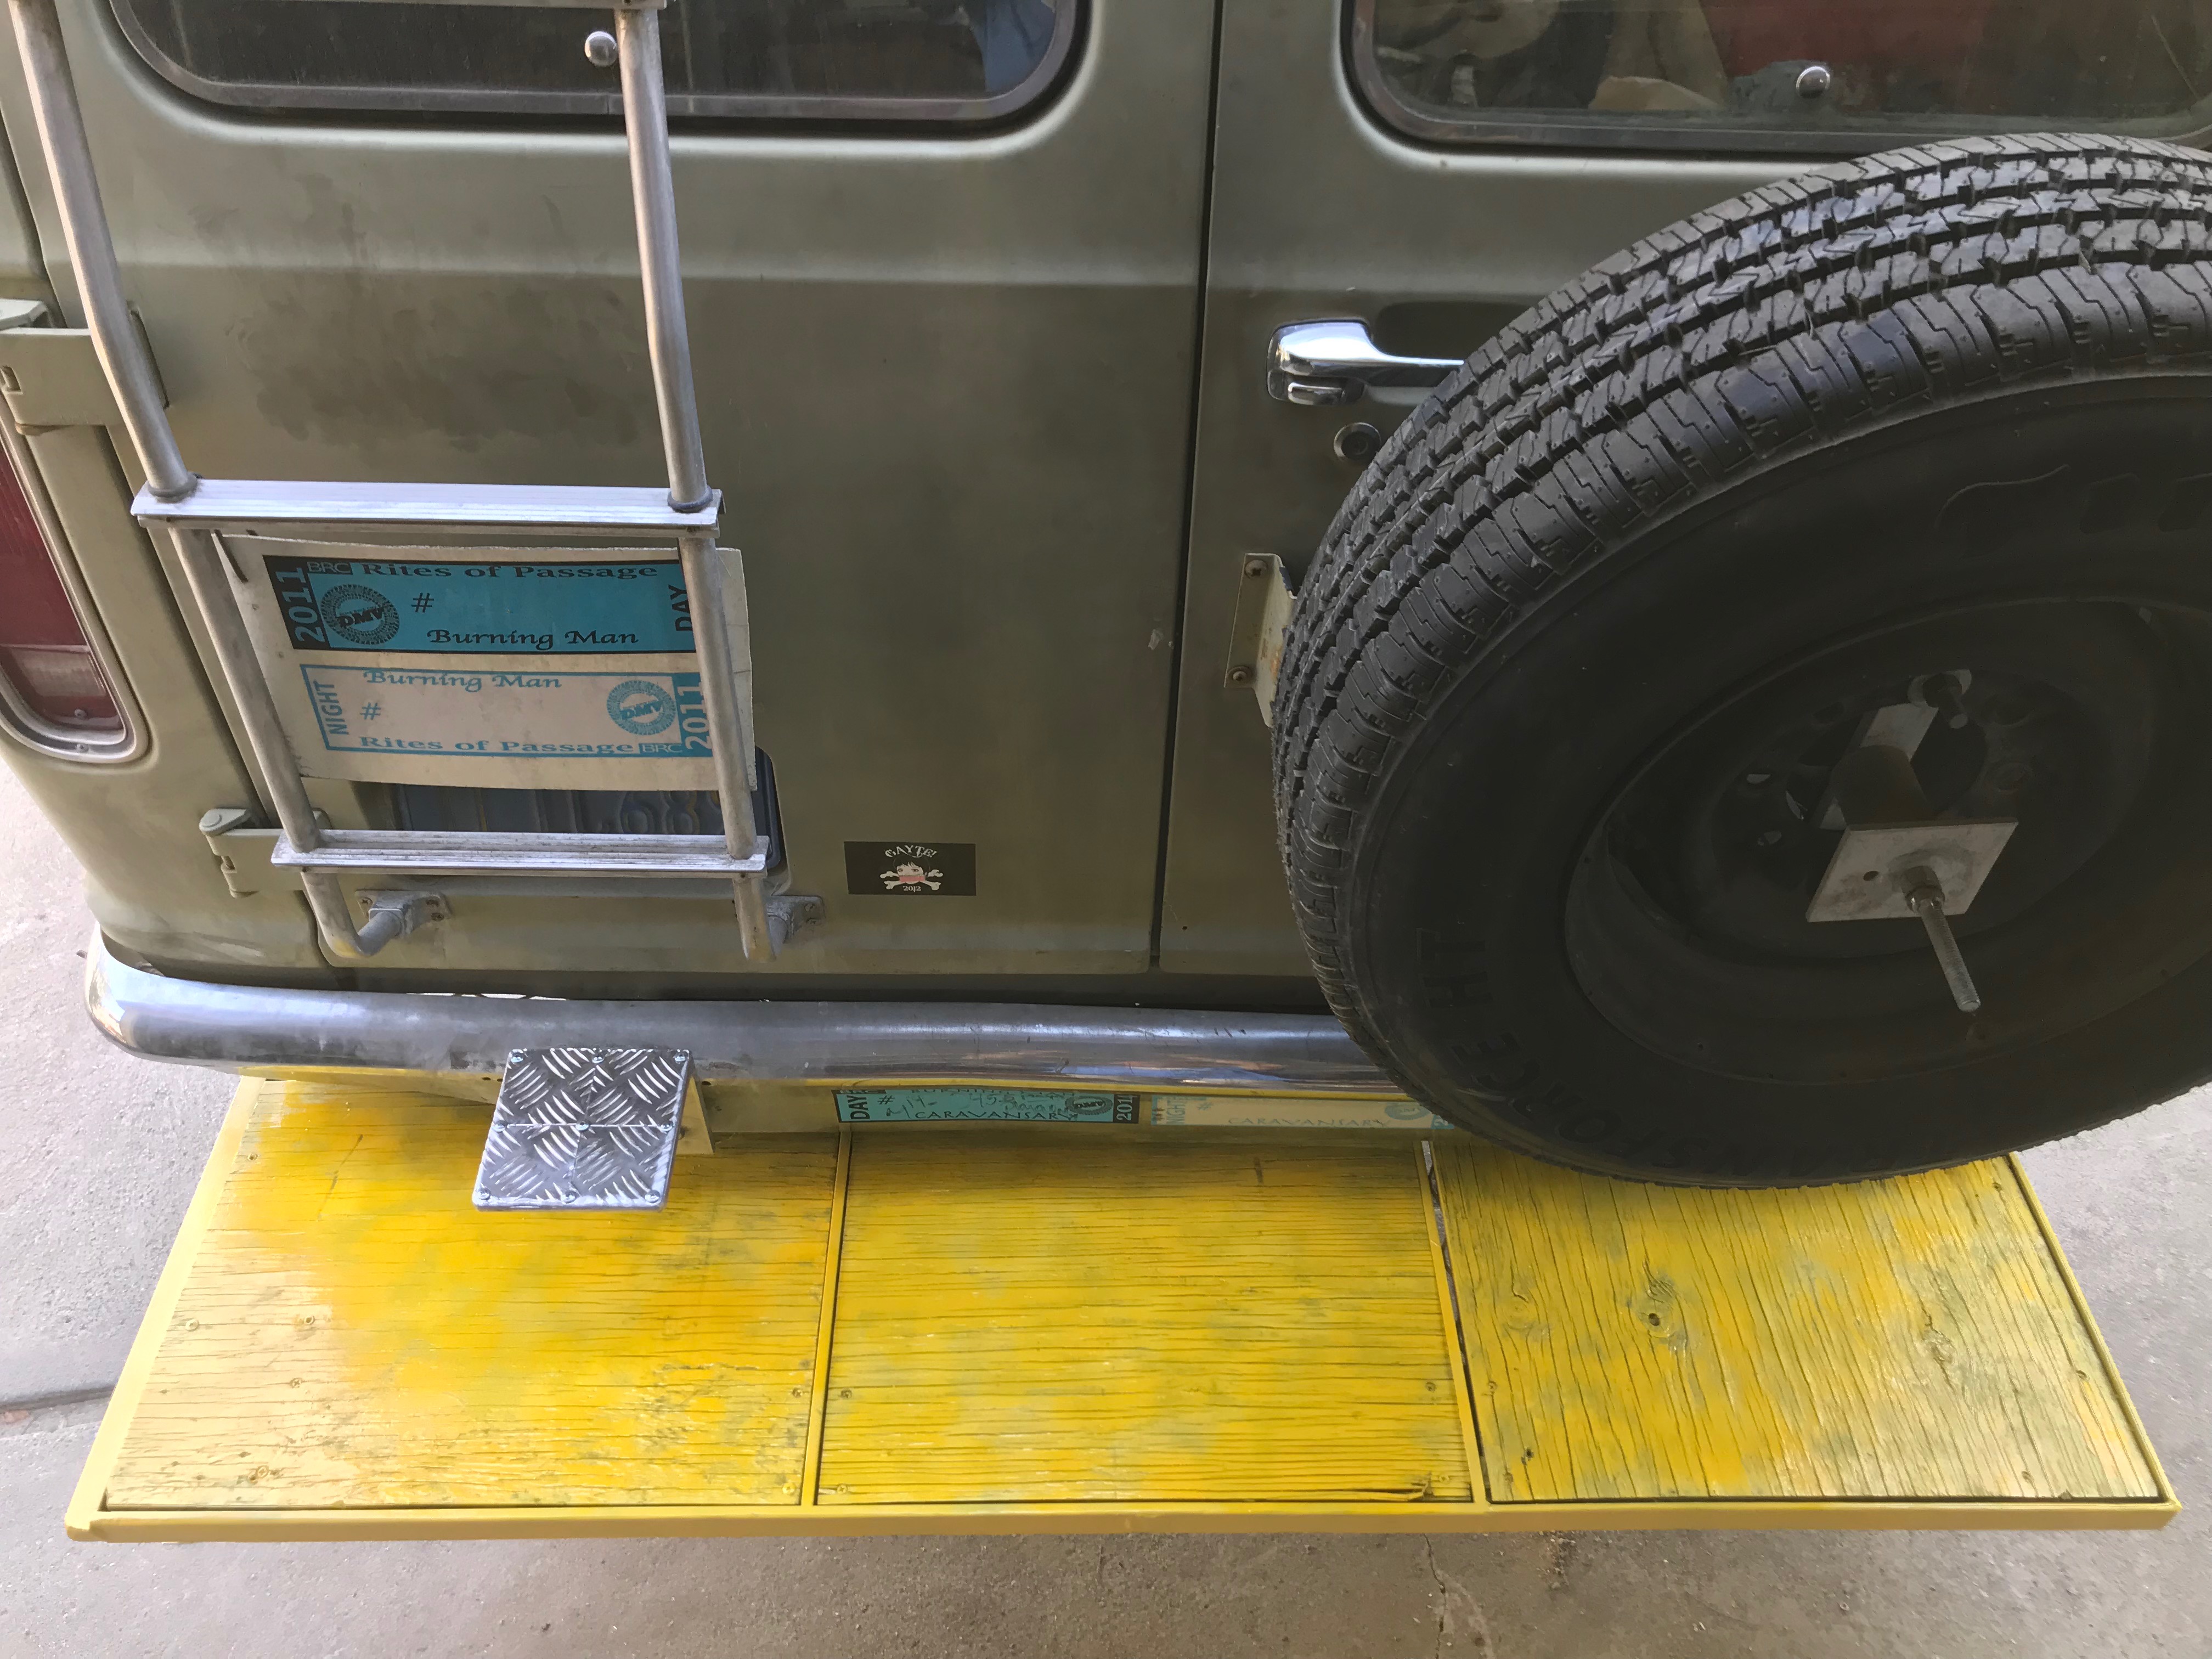
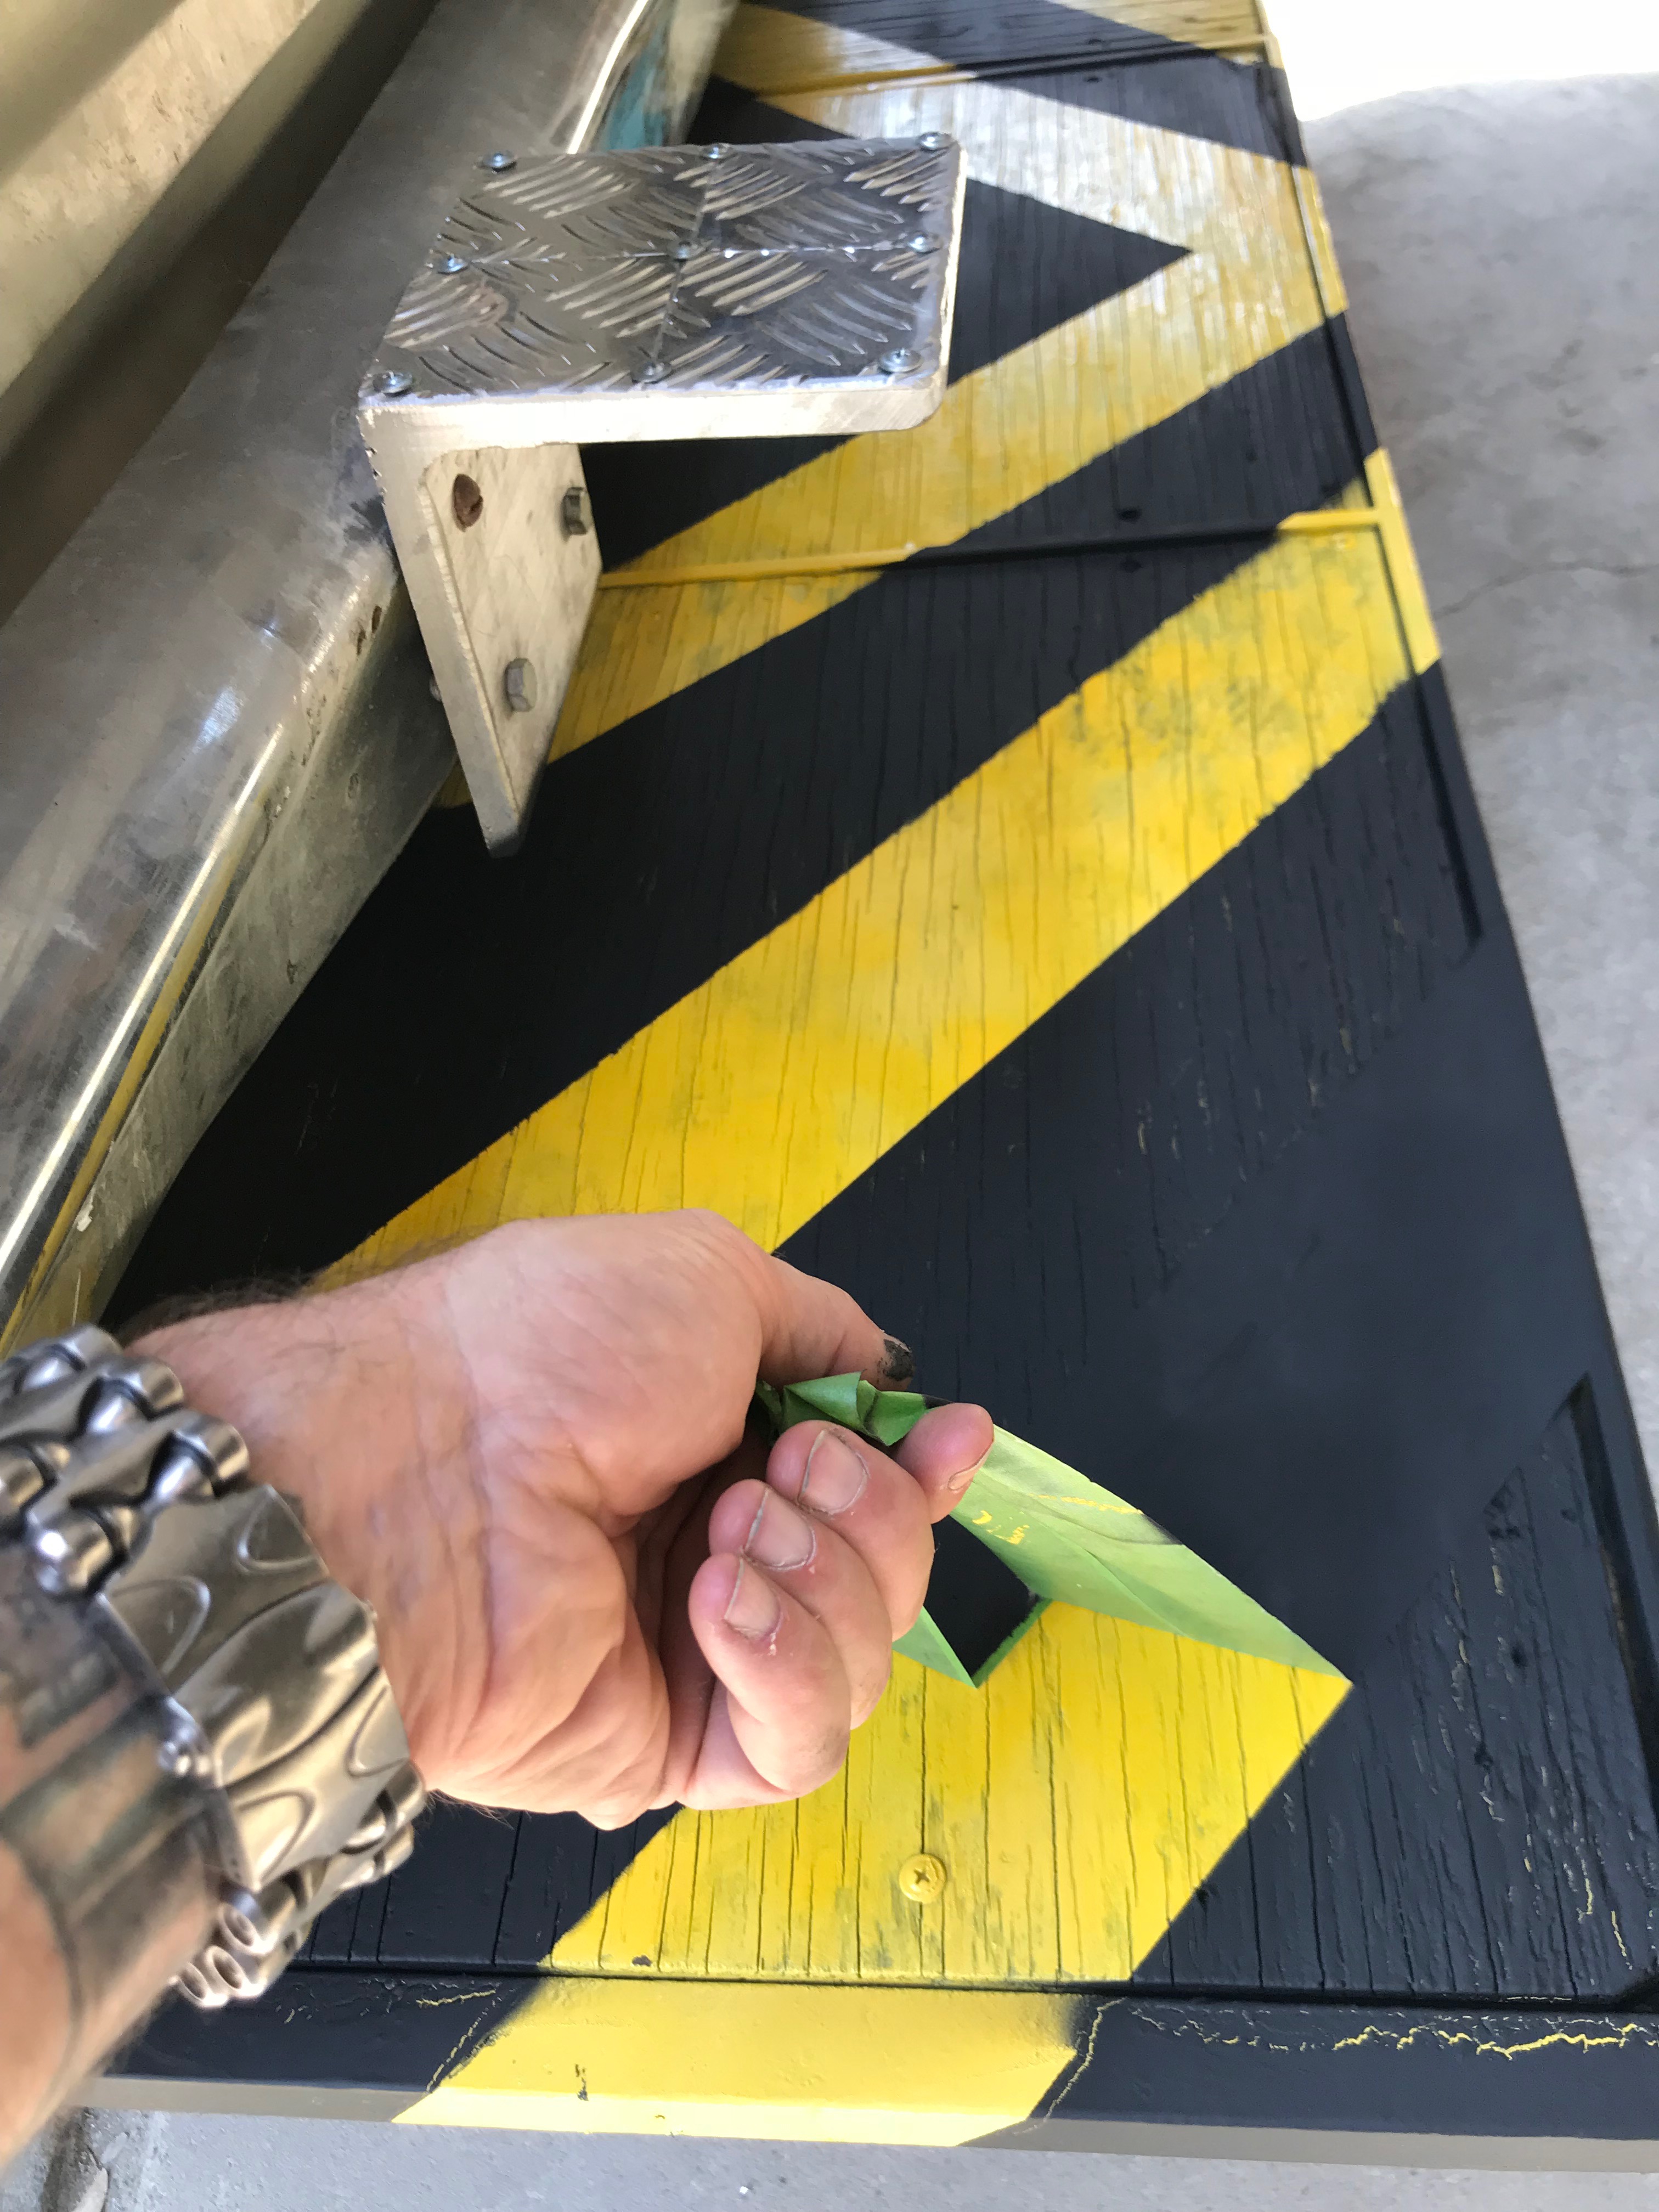
Replaced and painted the plywood decking
Masked it off
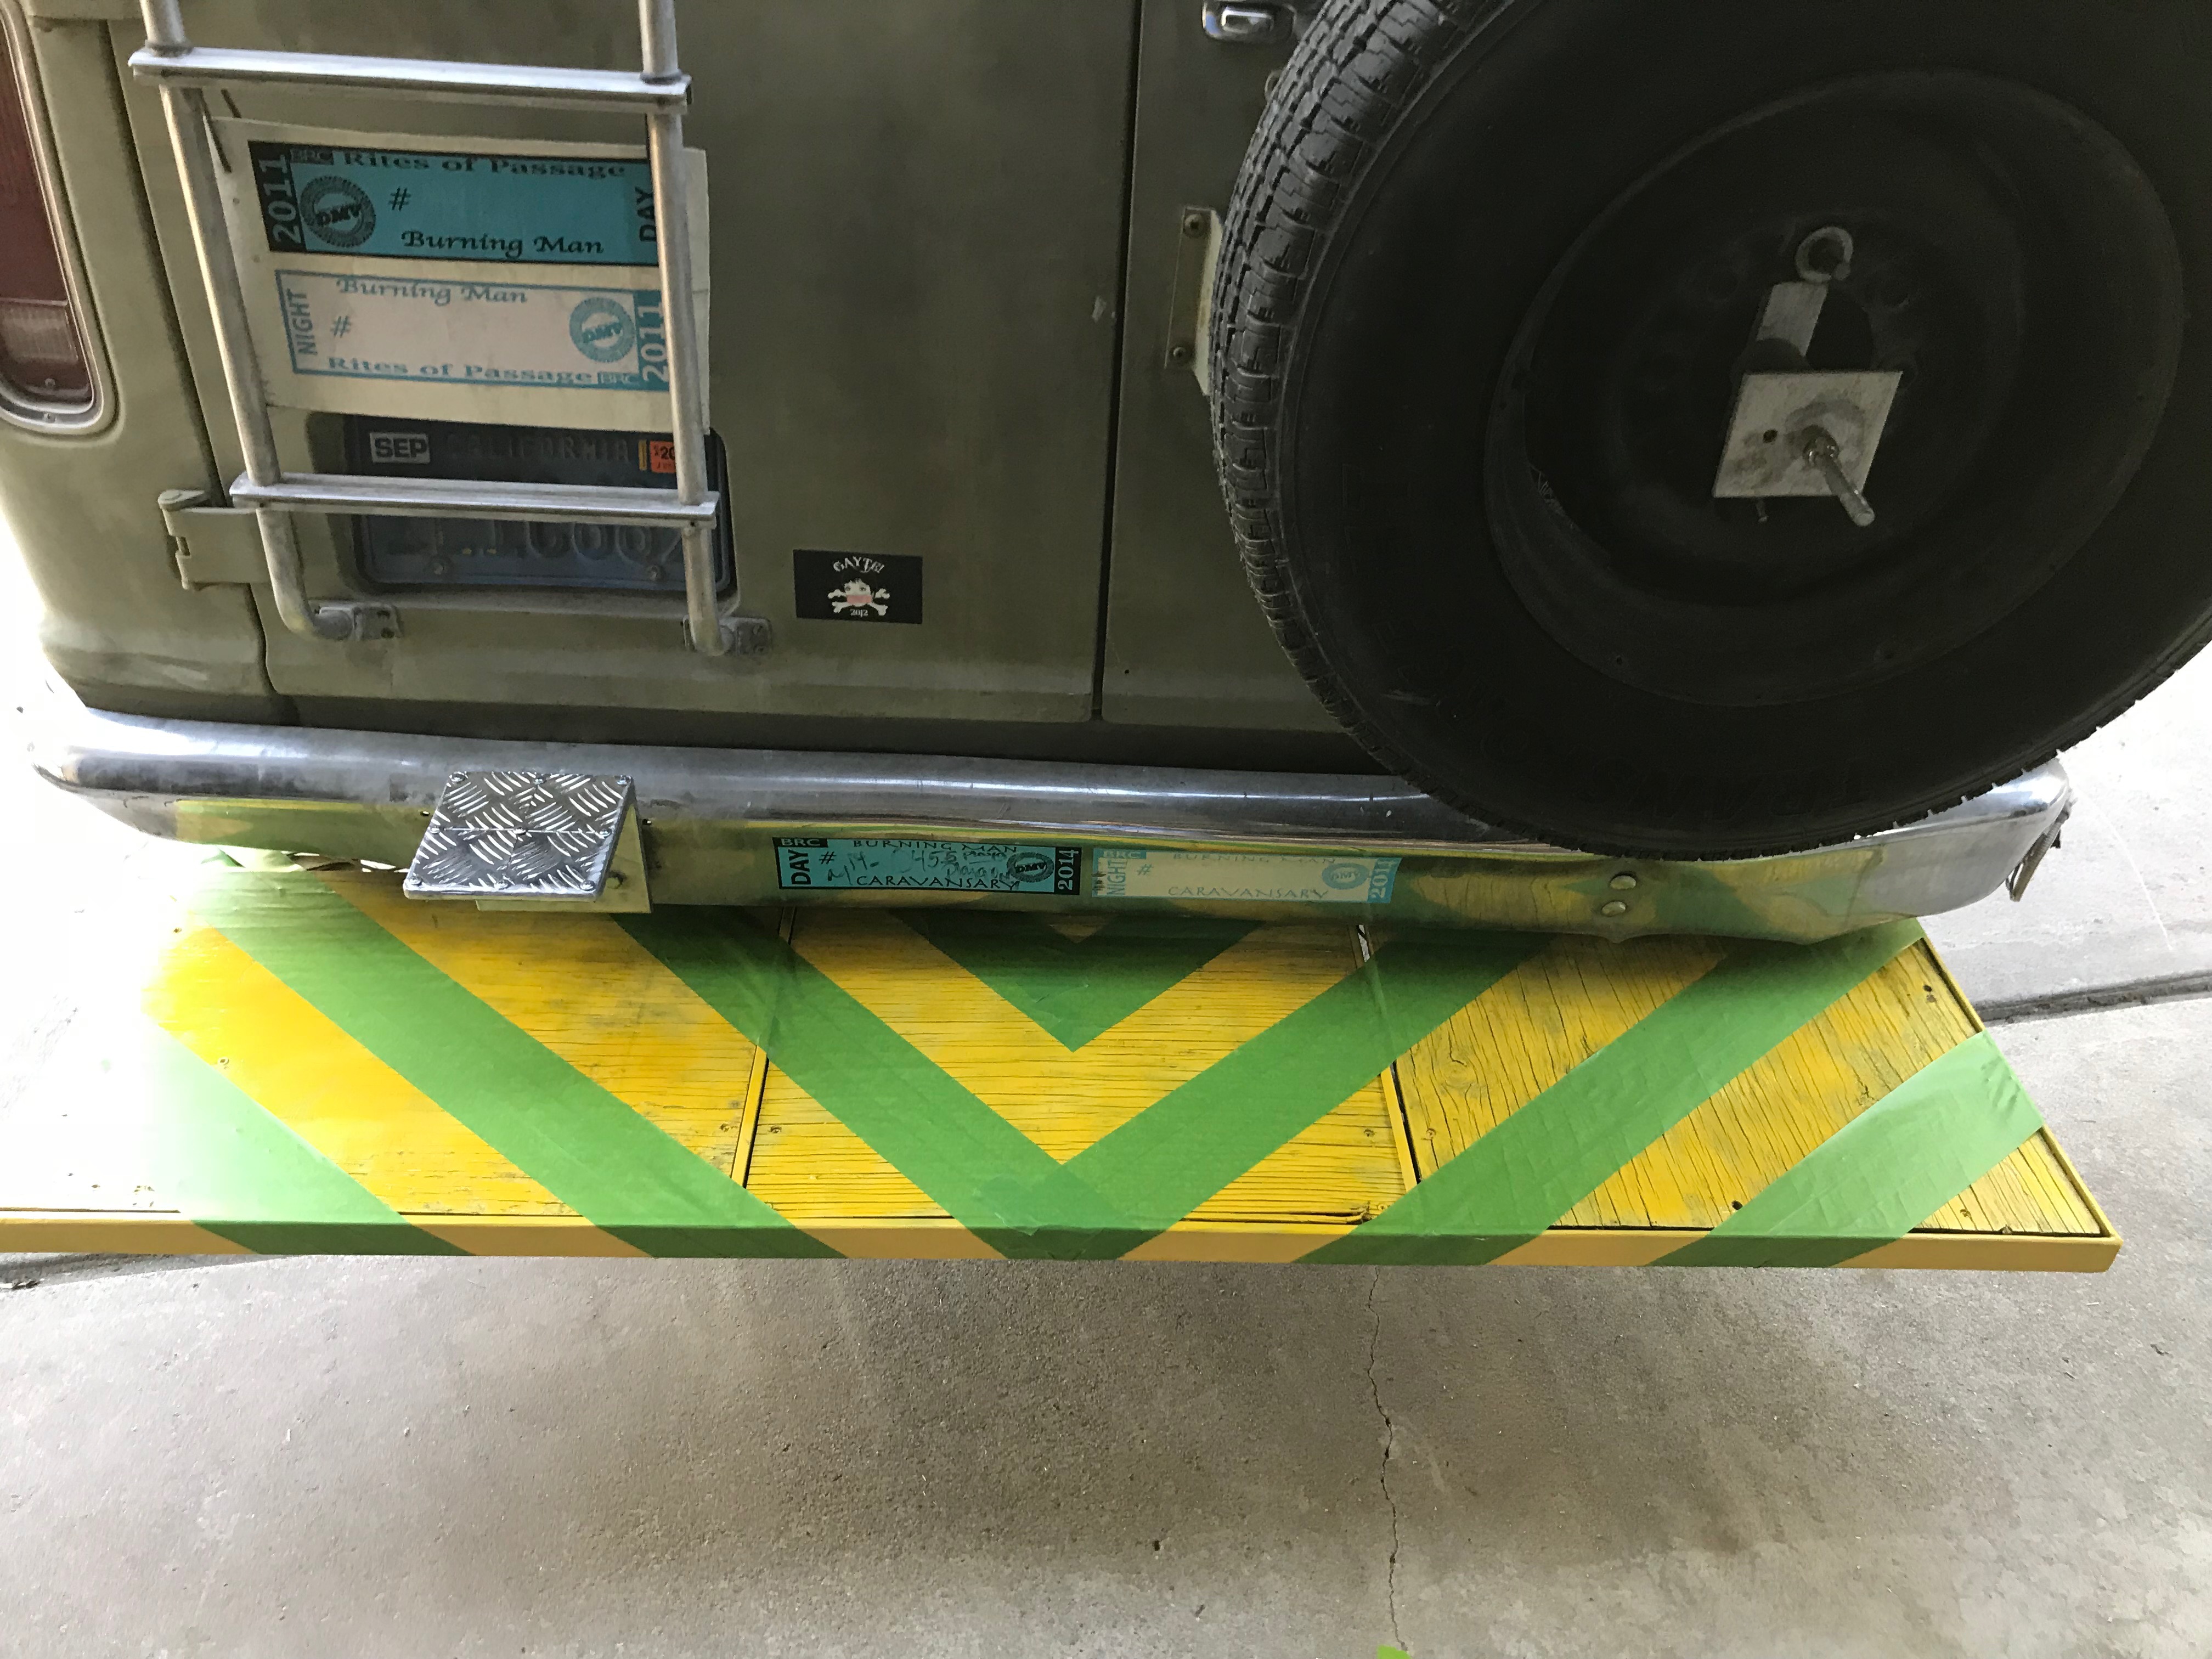
Peel off the masking ,and voila – an exceptionally noticeable tailgate so that people can mount the ladder safely – and so inattentive drivers will be less likely to smash into it again/
Oh, and tonight, thanks to the unstoppable Shea Sullivan, who brought our Arduino lighting system back online. MUCH GRATITUDE AND RESPECT, SIR.
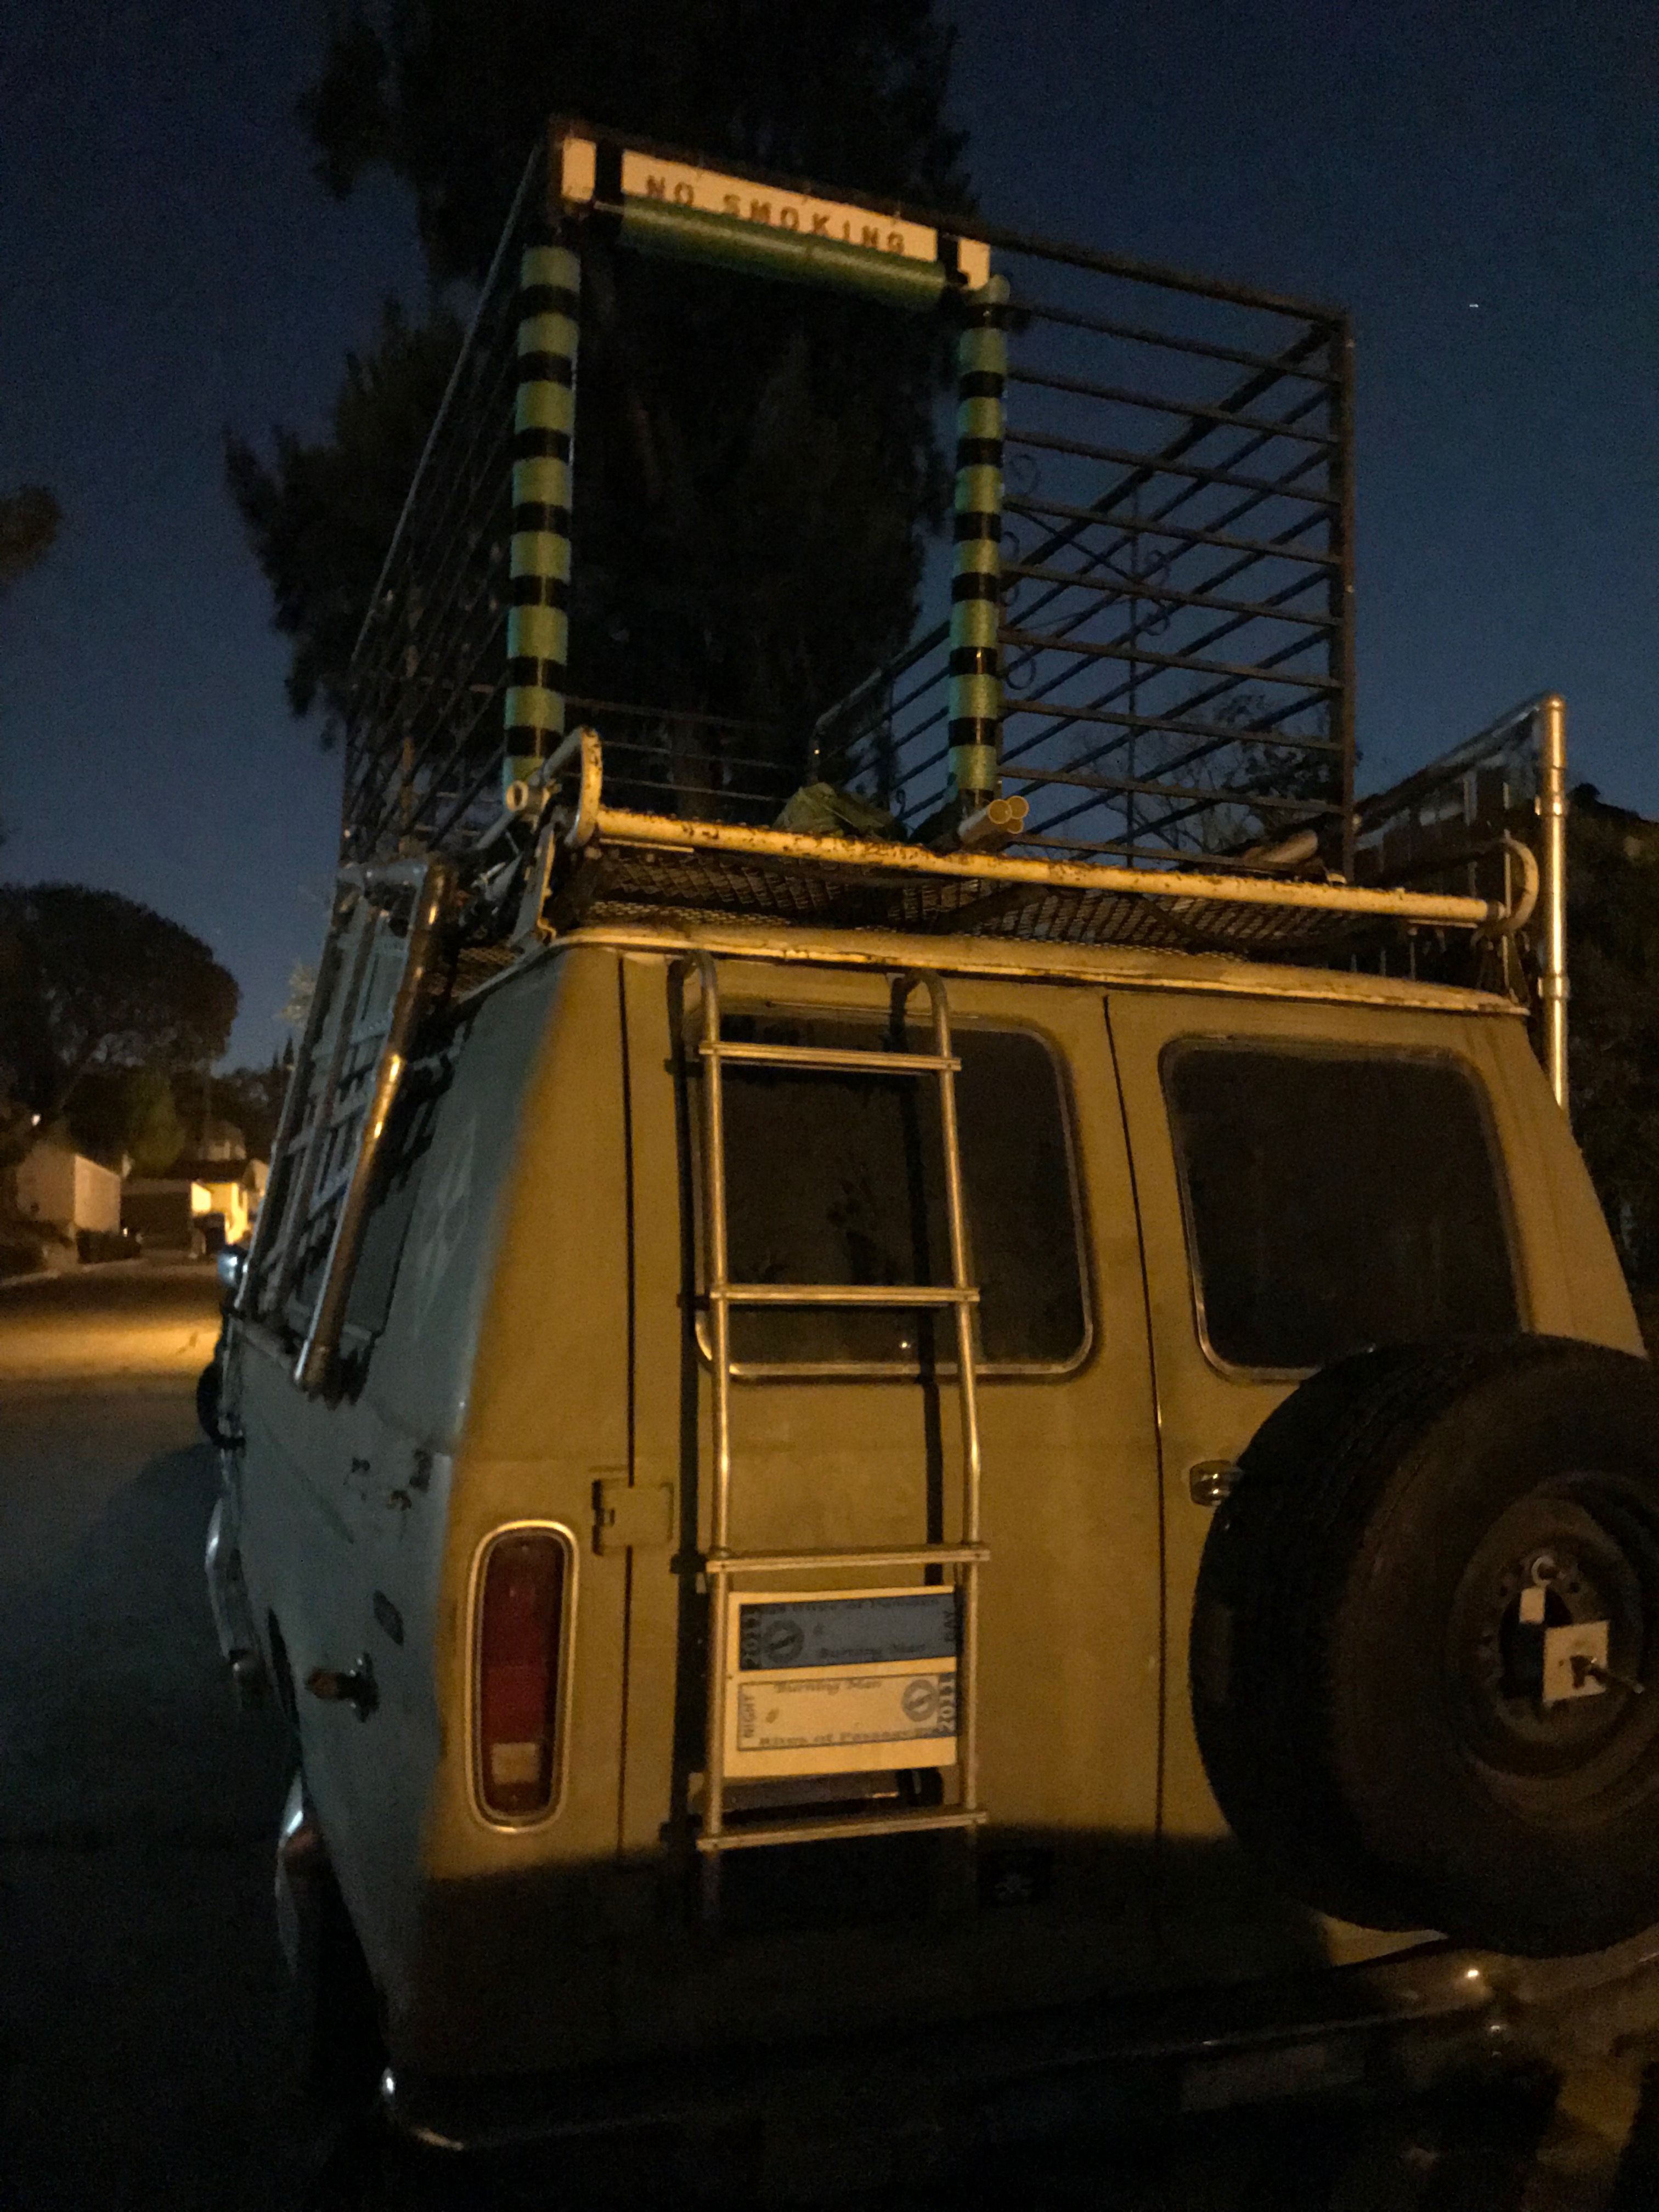
And I finished mounting the upper deck cage and hippie-proofing it with pool noodles and safety signs.
I might not be blogging again till after the Burn. Should be a doozy (see schedule below) Thanks for following!
2018 Scheduled Cruises:
Flag me down if you see me and I’ll give you a ride if there’s room!
If I’m not cruising the playa, abandoning XyloVan briefly to volunteer on GATE, enjoying the insanely inventive events at home at OKNOTOK at 3:00/A, I’ll be doing one of these things.
Tuesday 8/28
12 noon: BAIT route from 3:00/L to the Temple and back
2:30 pm: XyloVan Robøtik Perkussion Jam Cruise departs from OKNOTOK (3:00/A)
3 pm: BAIT route from 3:00/L to the Temple and back
Thursday
12 noon: BAIT route from 3:00/L to the Temple and back
2:30 pm: XyloVan Robøtik Perkussion Jam Cruise departs from OKNOTOK (3:00/A)
3 pm: BAIT route from 3:00/L to the Temple and back
10 pm: XyloVan plays the Sonic Runway in deep playa – Come bang on the van with us and make the Sonic Runway go wild!
The chief lesson was – assemble the chandeliers with lock washers instead of flat washers so they don’t keep unscrewing and sending the delicate handmade fixtures crashing to the playa while driving (thus requiring me over and over and over and over again to haul the 10-foot A-frame ladder down from the Cloud Deck, set it up, clamber to the top, screw everything back together, re-crimp all the destroyed electrical connections, clamber down, and put the ladder and tools away).
Oh, and Velcro wraps are no substitute for zip-ties.
A more valuable lesson was this: an on-playa build crew is worth more than water, gold or any precious commodity you can think of, and deserves a spot on XyloVan’s roof on burn night, along with all the just-thawed Gatorade I can give them.
I’m looking really looking forward to working with the good folks at OKNOTOK, the brilliant camp that has graciously agreed to host XyloVan this year.
(edit: I quit Facebook in 3/2018, which accounts for the missing videos.)
So, I make these musical drums out of up-cycled propane tanks. Click through for a demo video (and the build log) for Tonepod 2, the new model. Making this one, as with the others – gave me tremendous joy – which is good because the process takes about 40-60 hours and fills our basement shop with dust and noise. And yes, I might be able make one for you. Inquire here.
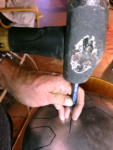
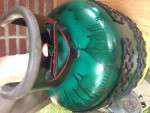
At this point, I have already safely emptied the tank of propane and washed out the residue of methyl mercaptan (the nasty stink agent that lets you know when odorless propane is leaking). (Seriously, don’t use any tool on metal until the propane is safely gone). I’ve cut off the handle from the top and the base ring from the bottom, and ground off the welds, and now I’m grinding off the rest of the paint before cutting … More
I’m not much of a player, but here’s a demo of a drum in C-minor – This is the seventh drum I’ve made out of a 20-pound propane tank.
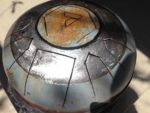
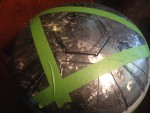
The discarded tank came into the shop in a thrashed, rusted-out pale blue, which looked amazing.
So I kept much of the original paint, cleaning off only a ring of the steel at the tips of the tongues. I then added a pinstripe ring around the hexagonal key (low-C) in the center, painted on a stylized “7”, which I limned in Sharpie – and sprayed 3 or 4 coats of clear enamel over the whole thing.
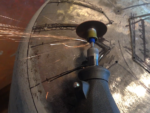
I made two major design improvements for sound – I cut out a resonator hole in the tank’s bottom (around the valve, just inside the handle).
And I’m experimenting with a new deadening material – recycled bicycle tubes wrapped around all the way around the tank to keep the body from ringing and drowning out the keys.
Here’s a quick demo of Fireball XL-5, which I made on commission for Burns. I’m not much of a musician and iPhone isn’t much of a sound-capture device, so the clip doesn’t quite do justice to how resonant it sounds in person. It’s glorious.
If you would like me to make a drum for you on commission, the price is $300 – $250 if you bring your own empty propane tank. Contact me for details.
I made Fireball XL-5 for Mykal Burns, a video producer, roller derby enforcer and erstwhile percussionist. The build went something like this:
I safely emptied the propane (see the build log for Green Destiny on how to do that), rinsed and dried the tank, and then prepared the surface. This means scraping off all the paint with an angle-grinder and then in this case, sanding the hell out of the metal with 80-grit on an orbital sander.
Ooo. Satiny-smooth.
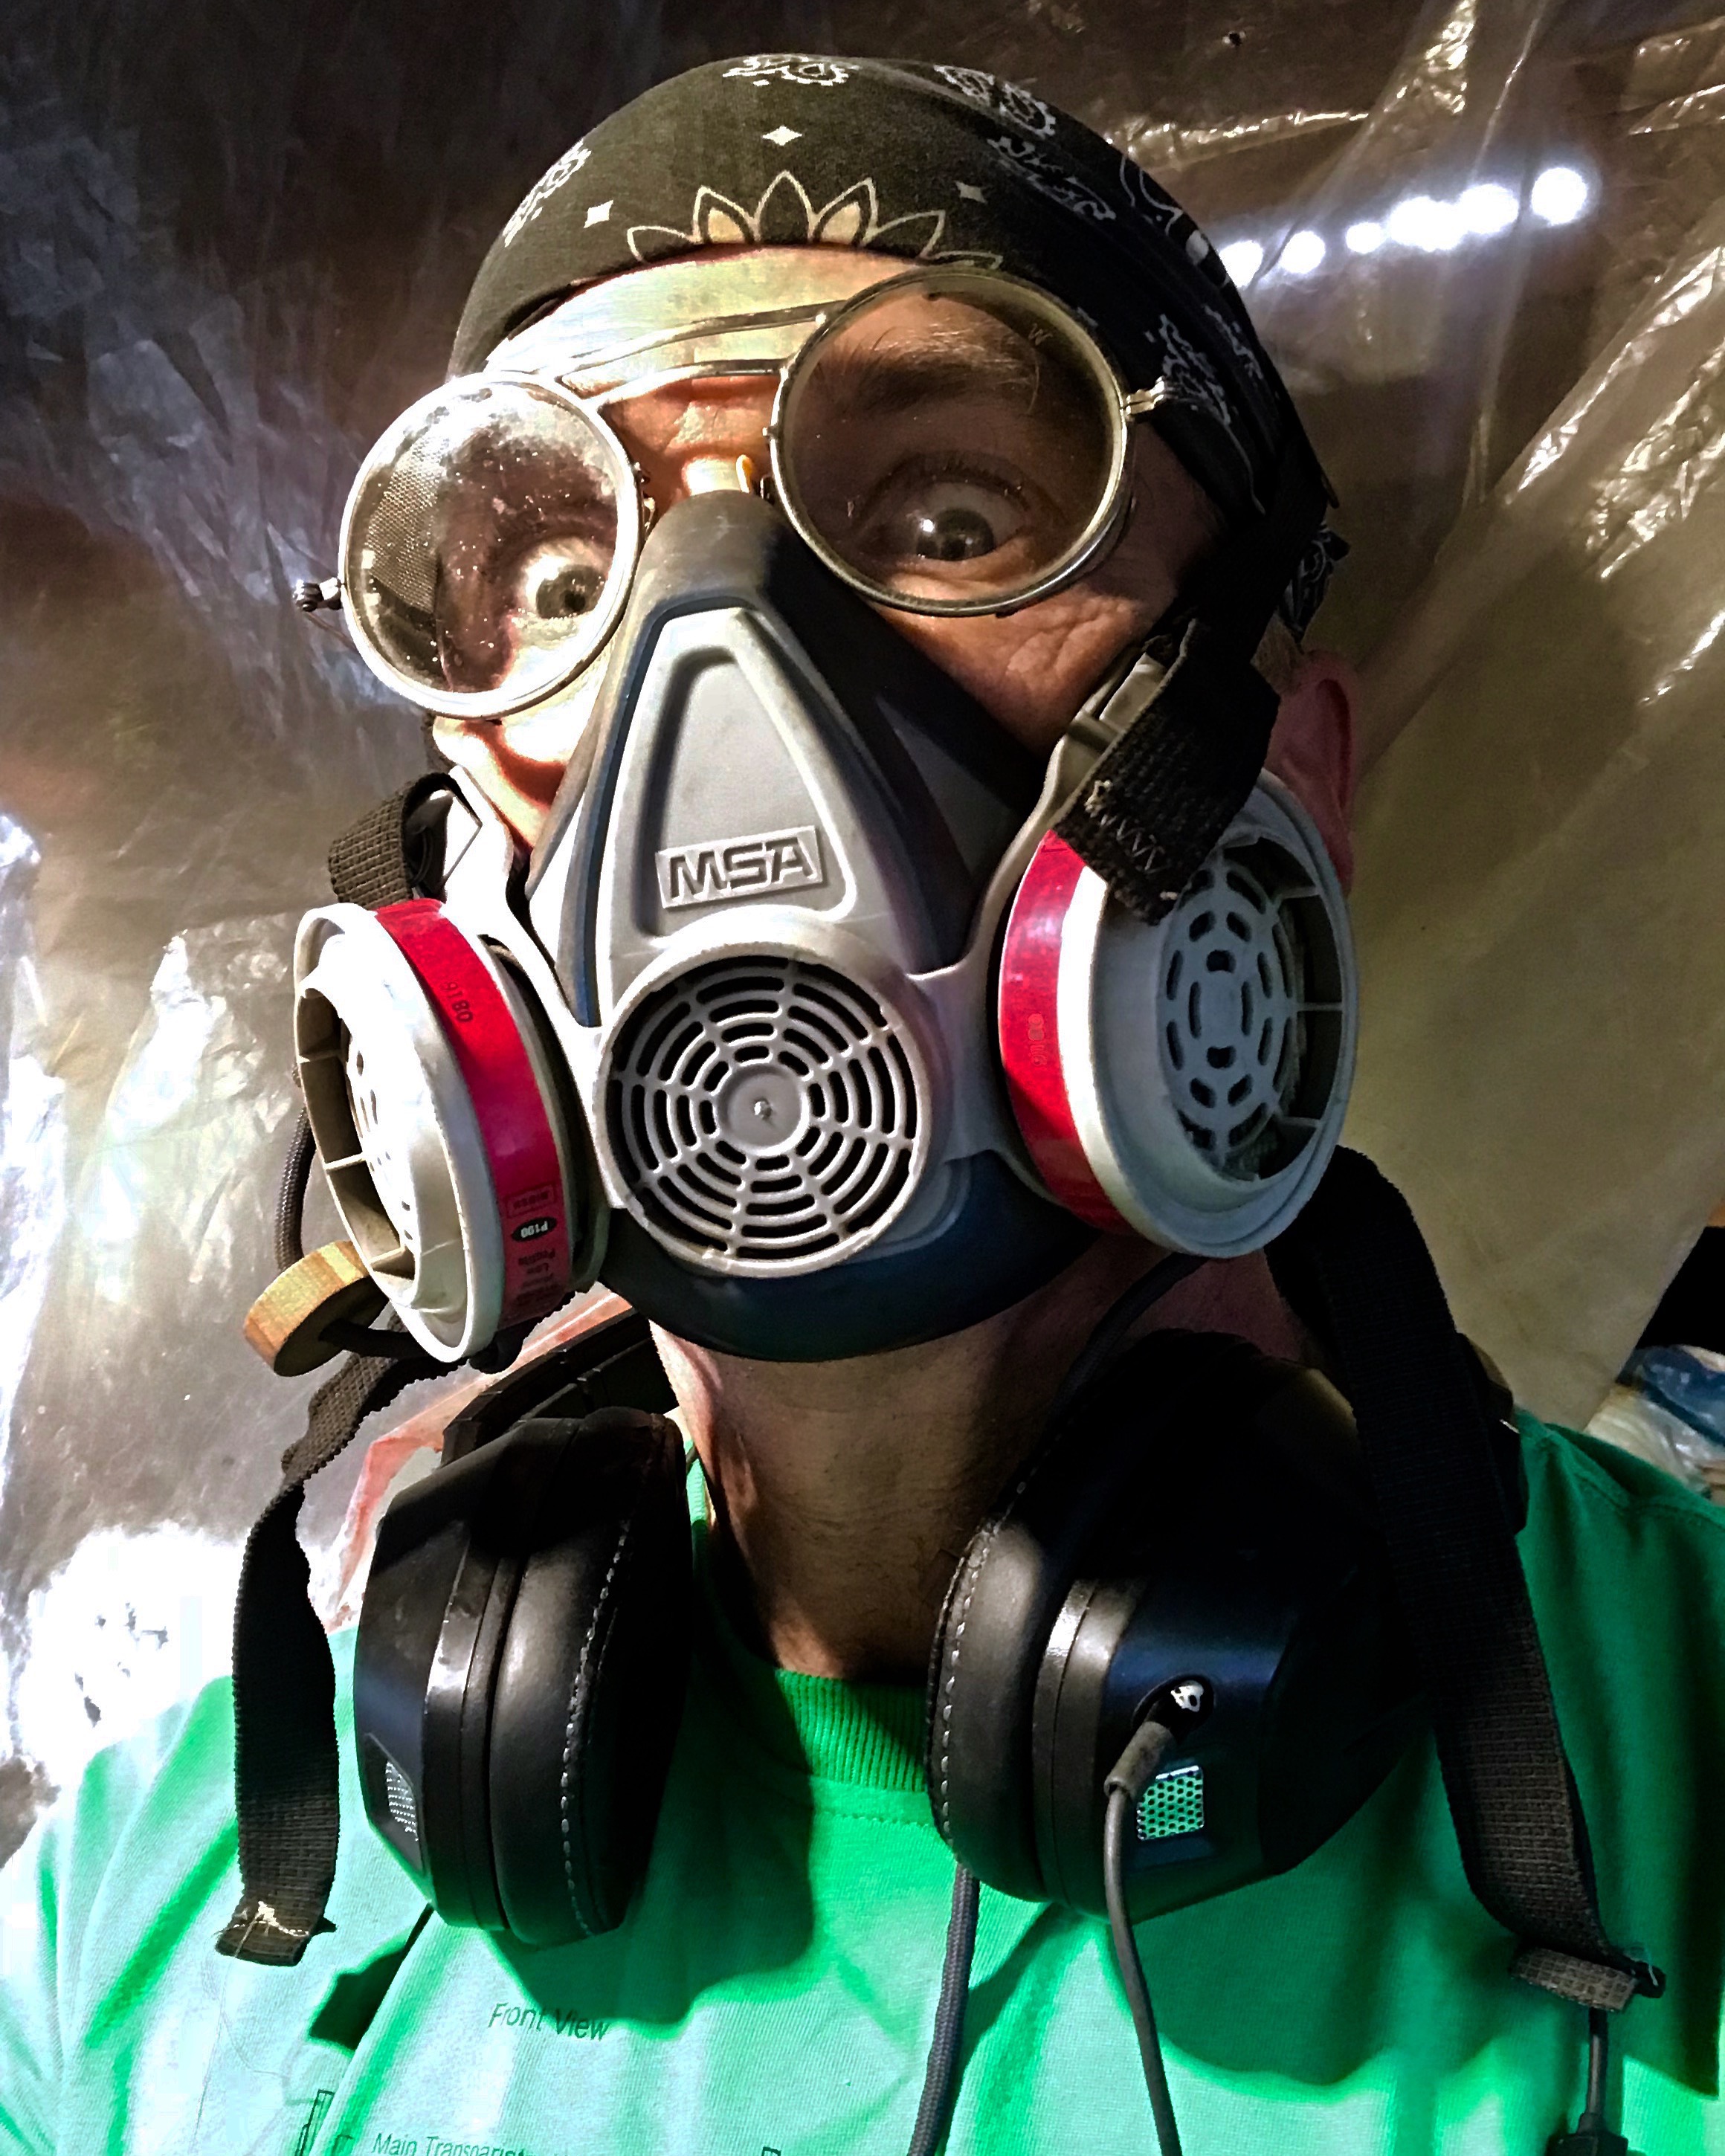
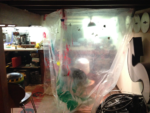
The workspace – Plastic sheeting contains the mess of metal filings, ground-off paint chip and Krylon overspray that fly around during fabrication, to keep it from polluting the area reserved for sewing, beading and, well, breathing.
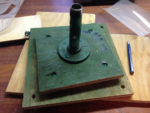
I built a stand out of a 3/4-inch flange and 5-inch nipple, which screws neatly into the tank socket where the valve fitting was removed.
Once on the stand, I can spin the tank to any angle for drawing, cutting, painting, etc.
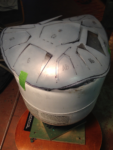
Using Green Destiny, I traced and cut a template in thick sheet plastic.
This is what happens when you put a flat template on a domed surface. You spend some time fudging and finagling to get it aligned with the center of the tank, then tweak some more to …
… trace the individual key shapes.
Use a center punch to mark all the corners – this will make drilling easier.
Drill holes through all the corner points – this makes it easier (and hella less finicky) to connect the linear cuts.
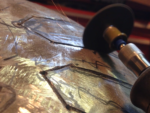
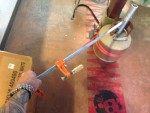
And … start cutting, with reiforced cutting wheels.
Cutting takes 4-5 hours – the Dremel gets pretty hot from being overworked. I might just upgrade to a beefier model.
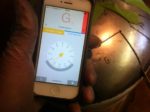
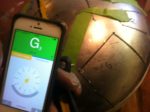
Now for tuning. You tap the key and check the tone on a guitar-tuning app. This one came out G#, supposed to be G natural.
Cut the key a tad longer with a hacksaw blade …
Sweet. Tuning all the keys takes another couple of hours.
Burns wanted the note markings left on the drum, so before clearcoating the keys, I engraved them into the steel.
After spraying three coats of clear enamel onto the whole drumhead, I masked off the keys from the paint.
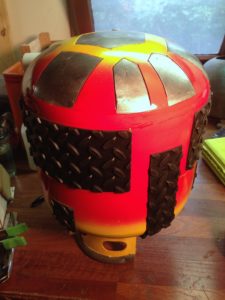
Two coats of red later, it looks a little like this.
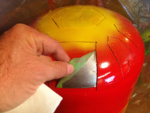
Now for the sunburst.
First peek!
Peeling is appealing …
Burns requested this paint scheme – it came out pretty sweet.
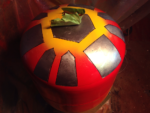
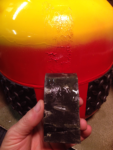
Now I apply material to damp the ringing of the drum body – The sound tends to overwhelm the sound of the keys if you don’t deaden it. I used the same type of self-adhesive rubber step-tread strips here that I applied to Green Destiny. Unfortunately, the Chinese manufacturer used shitty adhesive and they immediately started peeling off.
First I tried riveting the corners – but the riveting crushed and distorted the edges and looked awful. So I removed the rivets, and re-applied them with industrial-strength rubber cement – the solvent in which had the immediate effect of … blistering the paint. Ain’t chemistry a hoot. But precisely applied, the strips covered their own adhesion problems – and stuck fast.
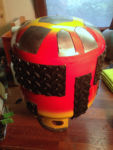
Here’s the finished product – Paint scheme picked out by Mykal Burns, other aesthetic and functional nonsense was mine.
I can’t wait to make the next one. And yes, I am taking more commissions like this one. If you want me to create a drum for you, hit me up. If you want to know about the experience, ask Burns.
Man spotted with bizarre handmade musical instrument. Enjoy, Mykal!
If you would like me to make a drum for you on commission, the price is $300 – $250 if you bring your own empty propane tank. Contact me for details.
Perfect for Burning Man, lazy Sunday afternoons or hand-to-hand combat.
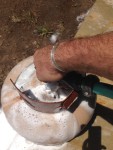
I then ratchet-strapped it to a post and put a bar on the wrench to get the needed leverage. It takes a *lot* of leverage to break the seal.
Once you’ve unscrewed the valve, take the tank – which still contains propane and methyl mercaptan residue – immediately out back and fill it with water and dish soap. Leave it overnight, then dump it and rinse and drain it dry.
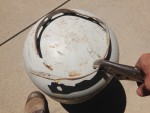
I’ve written about this before, but do *not* attempt to build one of these unless you know how to safely empty a propane tank and get the valve off ot it. Just don’t. Anyway, beginning with an empty, de-valved tank, you start by using ViseGrips to break the welds holding the base in place. You have to wrench pretty hard back and forth to weaken the welds till they snap, but there are only 3 or 4 of them.
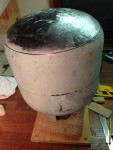
I then used an angle grinder to strip off all the paint and grind off the welds from the bottom of the tank.
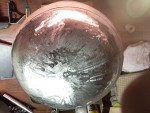
This leaves a nice, textured finish.
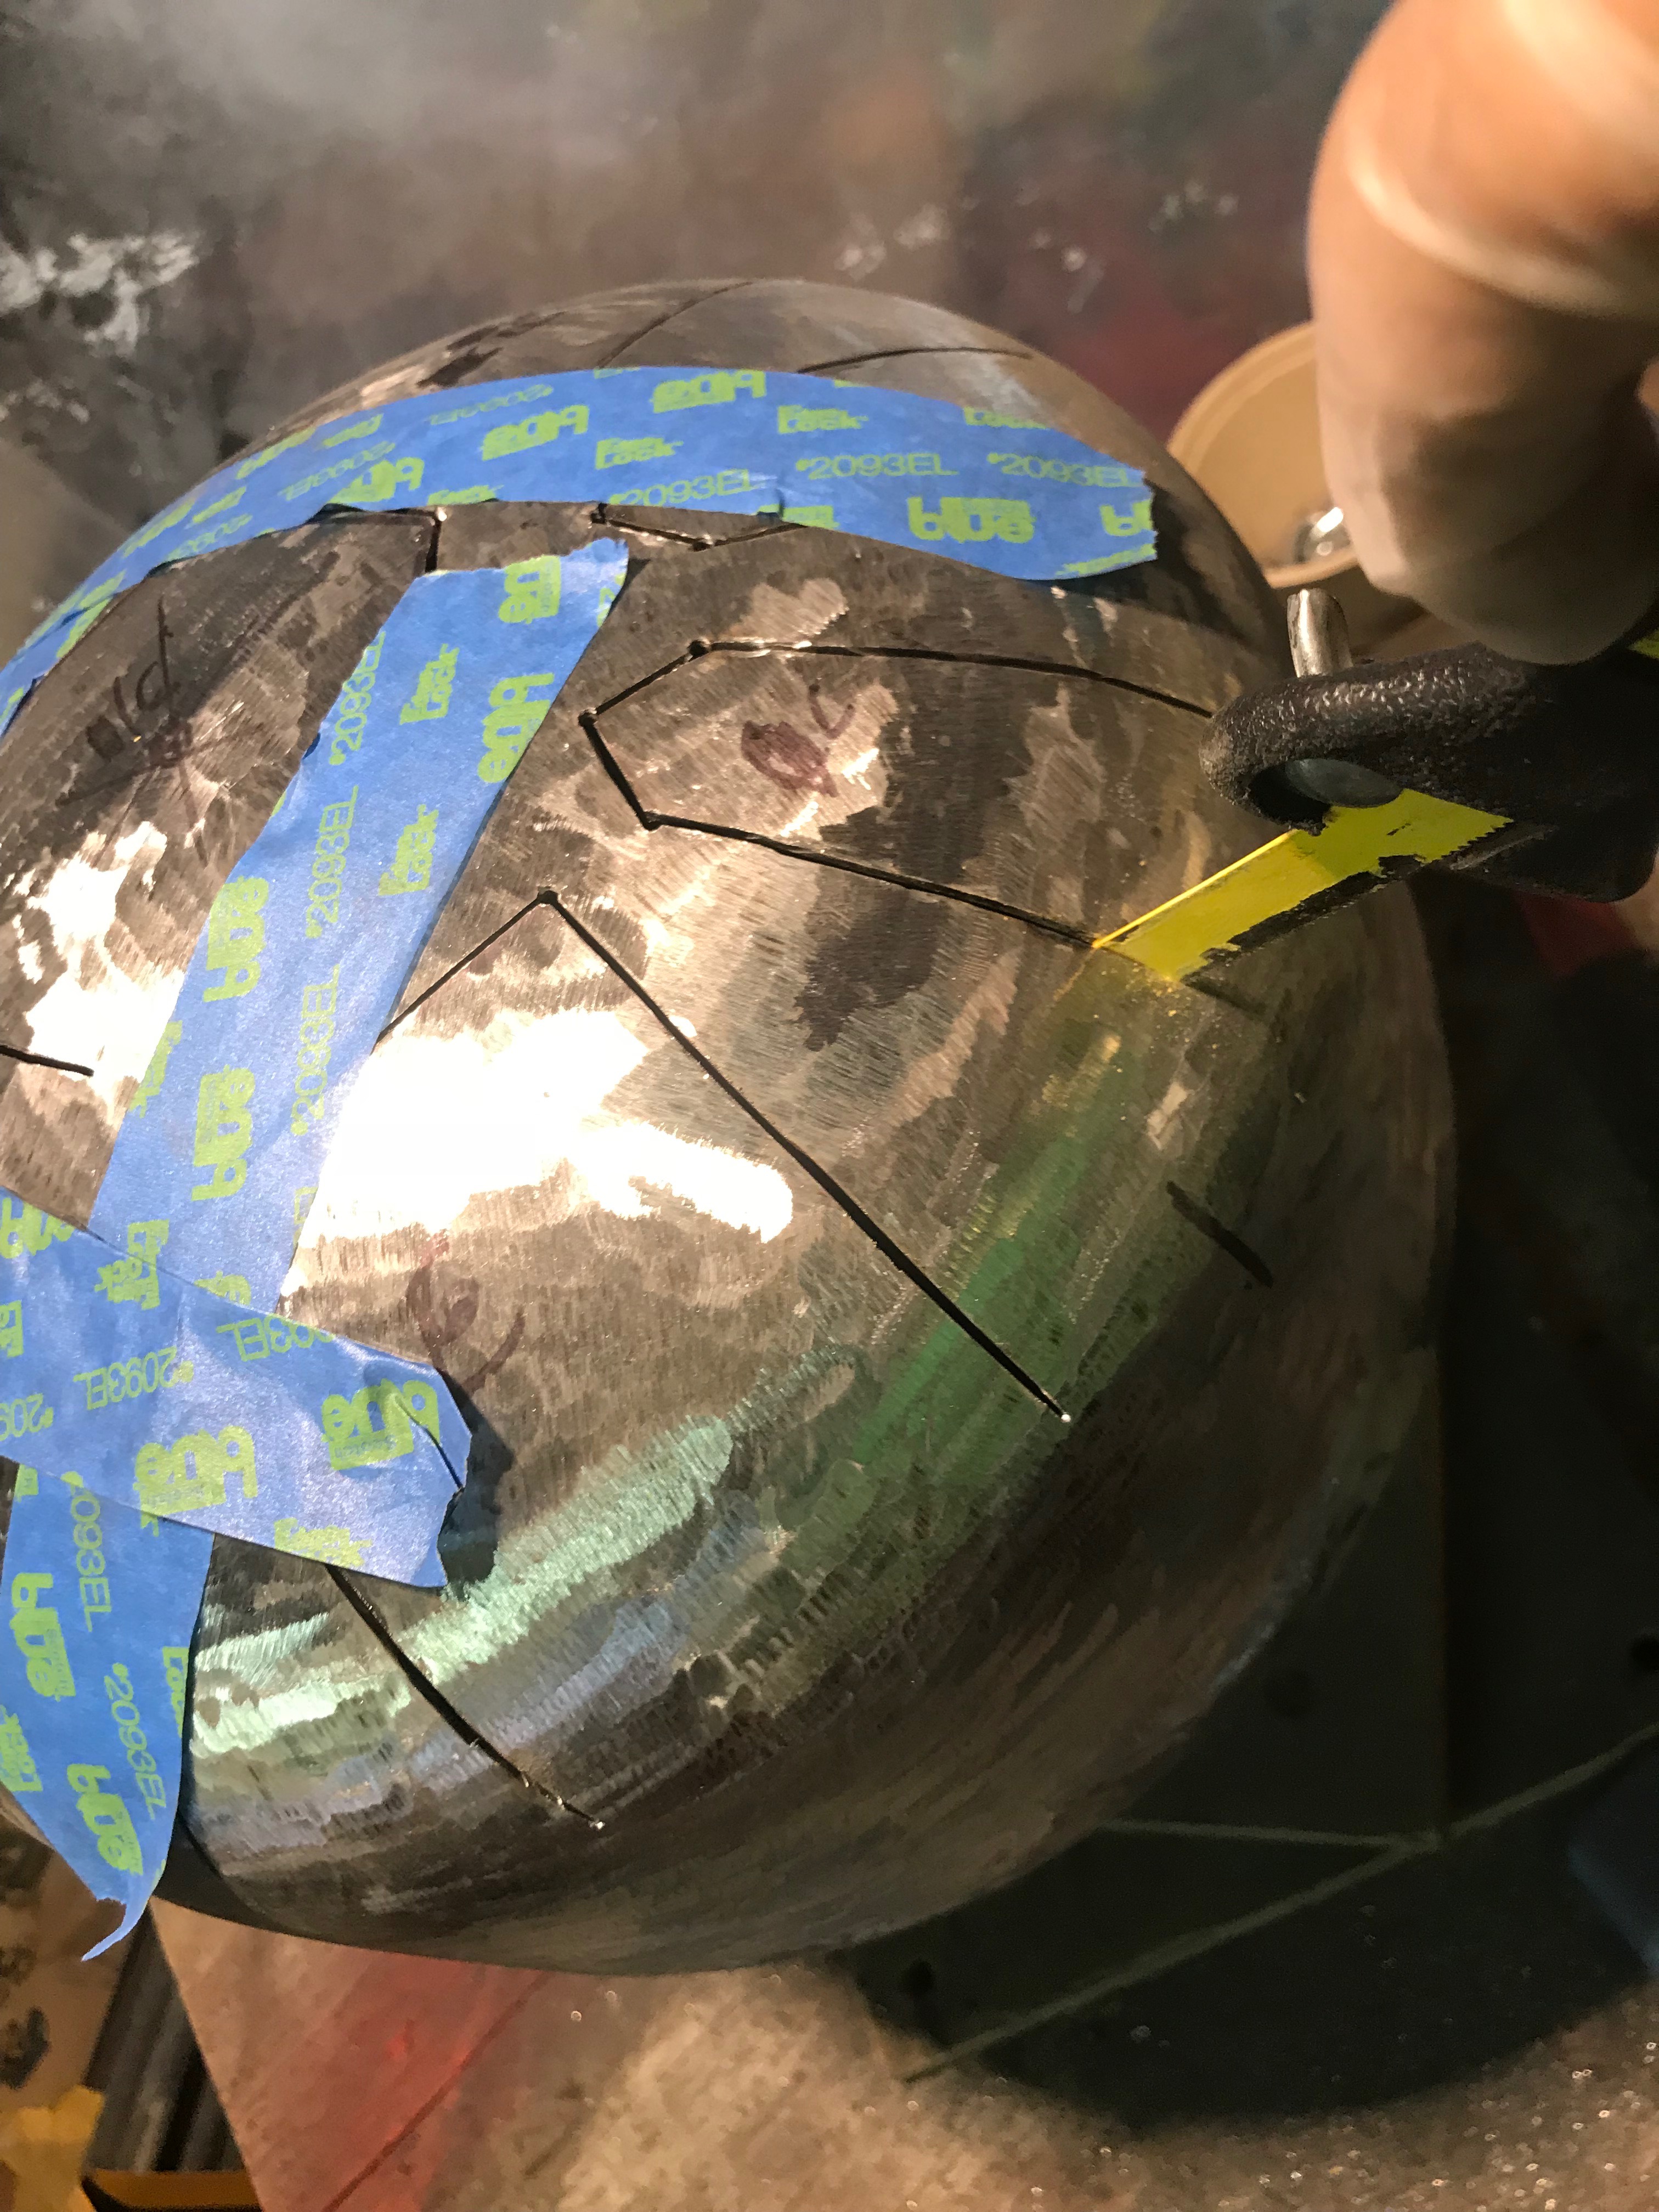
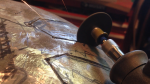
Laying out the pattern with a compass and Sharpie. The concept of building tank drums from propane tanks should be credited to Dennis Havlena, a Michigan instrument-hacker who made his first in 2008 – (plans are here) A lot of people took up Havlena’s open-source idea – some even took off into manufacturing them.
I found a video at one maker’s site that had a tuning I liked, and hand-sketched a 10-key drum based on that design.
Here’s the pattern sketched in with Sharpie.
. Now drill holes at the corners of all the key edges. This lets you bring two cuts together cleanly without making an X if you cut a little too hard.
Then you get to making the rough cuts with a Dremel, top speed, with thin-grade reinforced cutting discs. I go through 8-10 discs during the whole process.
You cut each key a little short of what the template suggests, tape off all but the key you’re tuning, and then use a smartphone tuning app to find what the pitch is on each one.
You can find a few good tuning apps on the App Store – I’m using insTuner.
If a key is sharp – say, an E is ringing at D#, you cut it longer. If the key is flat, you have to carve off the end of the key to shorten it and raise the pitch.
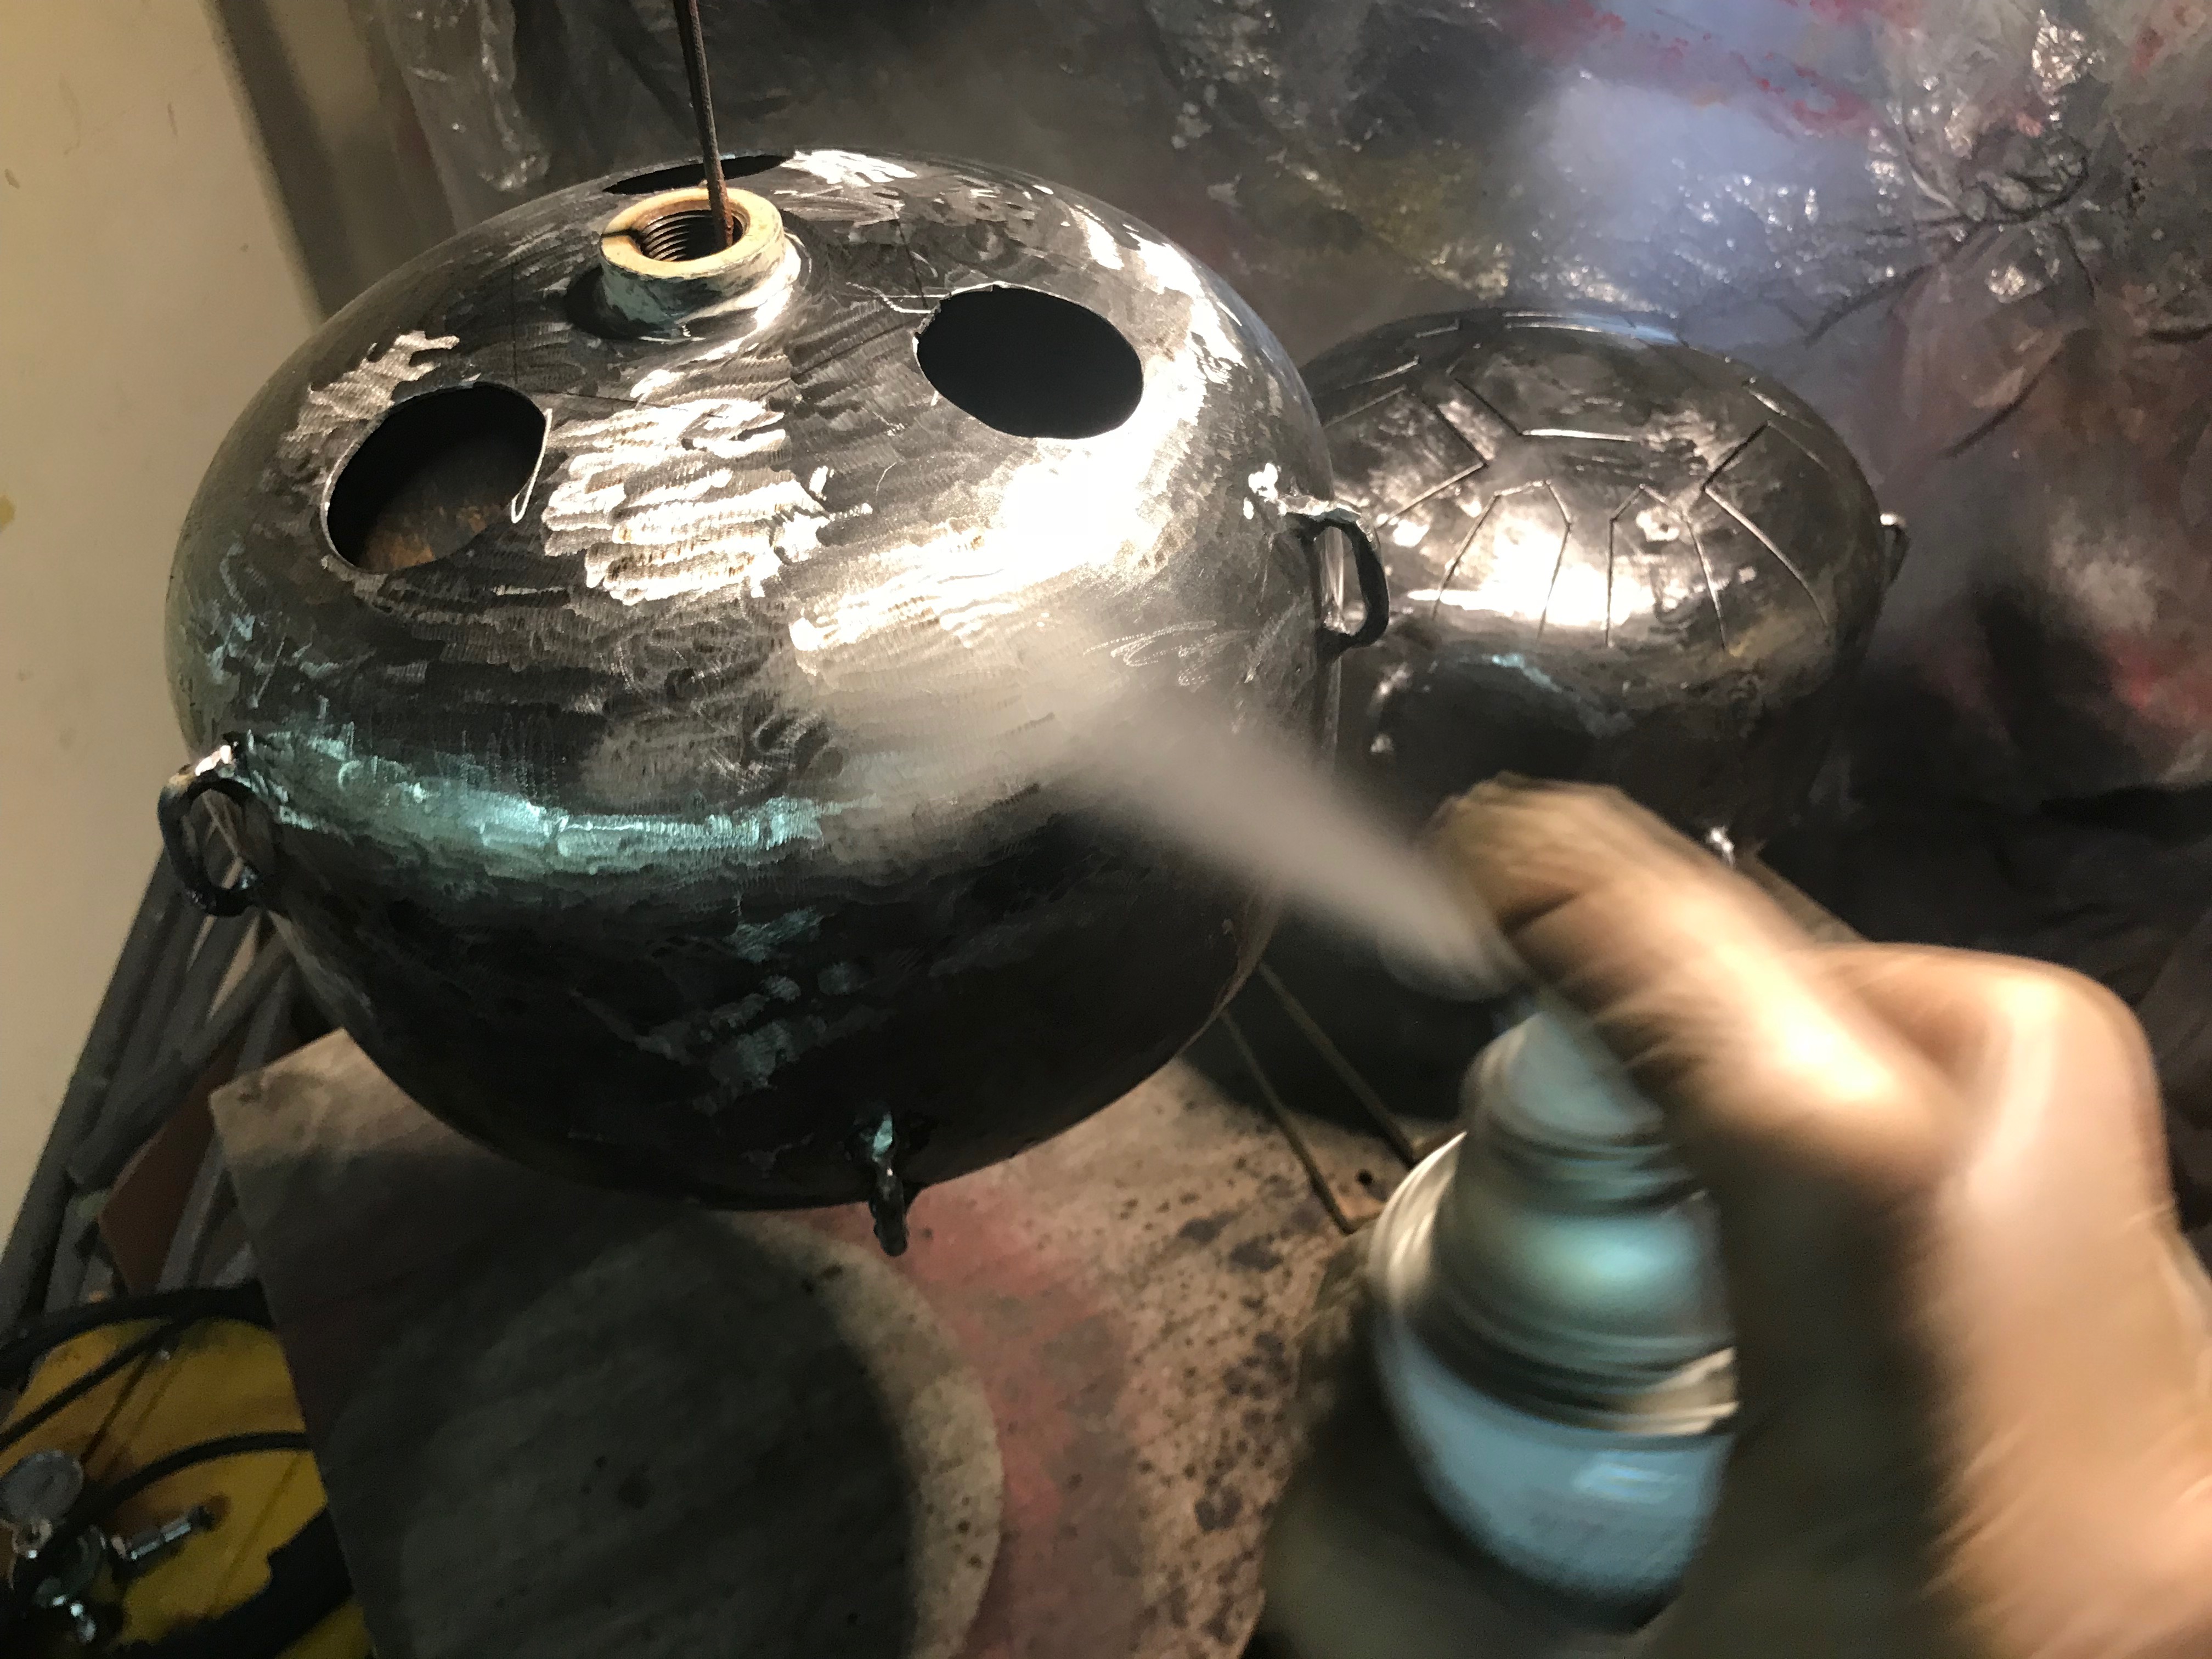
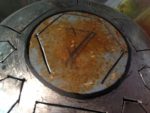
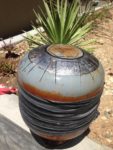
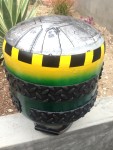
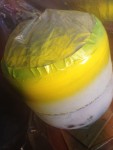
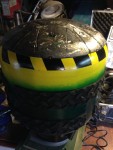
After a lot of tuning (cutting takes a couple hours, and tuning properly can take three or four more) it’s mask and paint time. I’ve already sprayed clearcoat all over the keys, since I liked the way my sketched-in keys looked and wanted to preserve the design process. I then masked it off and sprayed a thick coat of yellow. I purposefully laid on a bit too much so the paint would drip and run a bit.
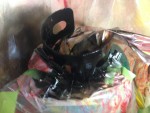
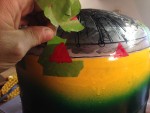
I sprayed the middle of the drum with this wild green mealflake model enamel I’ve had sitting around forever, and then sprayed the handle in black.
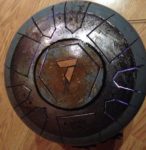
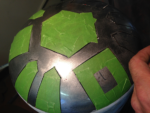
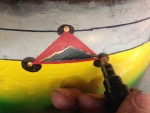
I wanted to add a little accent color, so I masked off triangles at the base of each key and used red Testor’s model paint.
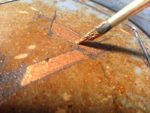
Then – I don’t know what the f$@k came over me – I proceeded to over-pimp the triangles with Sharpie and metallic markers, and the whole thing wound up looking absolutely garishly awful. So …
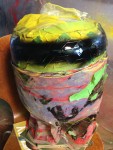
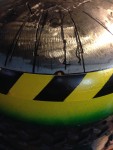
I masked off everything but the level containing the ugly, and put three thick coats of yellow over it so it would blend with the rest of the top- laid on stripes of masking tape at regular diagonal intervals, sprayed the exposed stuff with black …
… et voila. No less garish, but at least it doesn’t look like a hippie barfed all over it. I even managed to keep a little bit of the detail that I did like.
I epoxied a chunk of slit garden hose to the handle to act as floor protection for the base …
I also found a terrific substitute for the damping material. To help the keys ring well, you have to nullify the entire body of the drum from ringing and overpowering them when you play. On “Little Boy,” my previous 8-key A-minor drum, I used a chunk of garden hose wrapped 7 times around the center, anchoring the ends with metal screws. On this one, I found that self-adhesive rubber strips used as non-skid-plates for stairs worked perfectly – and fit in beautifully with the aesthetic.
If you would like me to make a drum for you on commission, the price is $300 – $250 if you bring your own empty propane tank. Contact me for details.
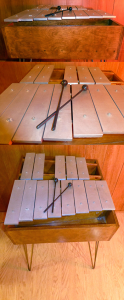
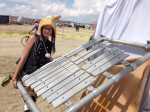
If you’ve ever dreamed of owning a handmade full-octave xylophone like this one – or an ornate custom-engraved ceremonial gong for announcing dinnertime, kickass achievements or the arrival of Friday, now’s your chance.
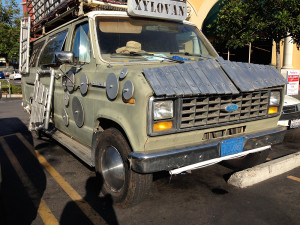
We need to have it repaired (it’s a big, costly 1985 Ford truck transmission!), smogged and re-registered so that our one unhappy neighbor (among hundreds more who love playing it every day when they walk past) won’t have call the Parking Authority to get it ticketed and towed.
That’s where you come in. We’re reviving the full perks package from last year’s successful Indiegogo campaign, and offering them to you.
Please donate towards the XyloVan repair fund via the Paypal button below, and we will hand-build some instruments (and deliver some other very cool schwag) just for you:
$5 gets you: a XyloVan sticker. $10: A XyloVan crew patch (plus sticker!) $35: A hand-machined aluminum slice amulet (plus patch and sticker!) $85: A hand-machined aluminum block amulet and dowel chime (plus slice amulet, patch and sticker!) $150: A hand-machined, disc gong (seen here in the video), custom-engraved with your choice of slogan, quote or mighty call to arms! (plus dowel chime, block amulet, slice amulet, patch and sticker!)
$300: A hand-engraved, mounted XyloVan xylophone key (plus disc gong, dowel chime, block amulet, slice amulet, patch and sticker) $750: A hand-built, 5-key xylophone and personal 4-hour appearance by XyloVan anywhere within 40 miles of Los Angeles (plus engraved disc gong, dowel chime, block amulet, slice amulet, patch and sticker) $1,700: This is pretty damn awesome, so we’ll let our Indiegogo description say it:
You are THE ULTIMATE XYLOVAN PATRON – you’re pushing us a long way towards our goal, and we’re massively grateful and fortunate to have you support us. So we’re building you a FLOOR-STANDING, FULL-OCTAVE 13-KEY CHROMATIC XYLOPHONE. Each key is hand-cut, carefully tuned to A-440 (Western) scale and mounted in a handsomely-finished, laminated-wood sound-box / case with handles for carrying. The instrument is set atop detachable hairpin-steel legs, which make it elegant for a spot in your music room or parlor, yet completely portable for special events, trips abroad or visits to the home of your exotically musical friends and collaborators. The instrument is fitted with a pressure-zone microphone, allowing it to be plugged in and AMPLIFIED, which will surely lead to all sorts of amazing adventures in music.
Excellent Patron Bonus: A 1-DAY XYLOVAN COMMAND APPEARANCE Because you believe in us, we’ll bring XyloVan to you – anywhere within 150 miles of Los Angeles. We’ll set up the instruments, sound and lights for a morning, an afternoon or an evening, and you and your guest/students/family/co-conspirators can make any kind of music storm you like. You’ll also have full access to our mixing panel, in case you want to bring other instruments into the mix, or pipe XyloVan’s four channels out to your own mixer for recording purposes.
Make it $2,000 and we’ll give you our Beloved Patron Bonus: A 2-DAY XYLOVAN COMMAND APPEARANCE – Because you’ve given so much, we want to give back to you. We will drive XyloVan to you – anywhere within 400 miles of Los Angeles – for a two-day gig. Do with us what you will. We’re there for you, body, soul and amplified, illuminated, motorized instruments.
That’s it!
Donate what you can here – include your mailing address – and we’ll start building your instruments right away:
In line for inspection at the Department of Mutant VehiclesI’ve often said, because I believe it to be true: A mutant vehicle is a hole in the playa into which you pour money, blood and tears. But it’s still a goddamn mutant vehicle.
There’s nothing so thrilling and rewarding as crawling through the inspection line at the Department of Mutant Vehicles at Burning Man, and realizing you’re surrounded by hundreds of other deluded crackpot engineers hard-working creative mutant-vehicle builders who are also transitioning from the hardest part of the journey to the most wonderful reward: Driving an art car on open playa, bringing your madness into the world.
Inspection went swiftly and painlessly – and sent us off into the wild night with full permission to drive no faster than 5mph completely sober with lasers, high-watt floodlights, strobes and propane bombs flashing in ones eyes – while simultaneously avoiding running down all the drunks, darkwads and overly-enthusiastic hippies who seem to delight in suddenly flinging themselves in front of our four-ton vehicle.
Whee! DMV hottie attaches the coveted and hard-to-earn night-driving permit next to the daytime permit we earned in an earlier inspection.
The Light Fandango parked at Swing CityThe trick with a mutant vehicle like XyloVan is that you have to disassemble everything you spent many weeks building, and then rebuild it on-playa in Nevada’s unforgiving Black Rock Desert in a reasonable amount of time.
Last time (when we built Janus) the build crew was, um, me. I had a few hours help on setup, but I worked mostly solo for 2-1/2 18-hour days and by the end I was exhausted, cooked, a mess.
This time around, I had an excellent build crew – Thanks to Sam Hiatt, Julie Demsey, Lindsay VanVoorhis, Anna Metcalf and Jeremiah Peisert, as well as my kids, Biomass and Hitgirl – and the mutation from XyloVan to The Light Fandango took just 10-1/2 hours.
We bolted the pre-cut 1-inch EMT tubing frame together atop the already-assembled passenger cage with U-clamps. Then we installed the front wheel covers.
We sleeved the theatrical lighting-scrim panels onto the three sections of pre-bent conduit (thanks for the bend-expertise, Bender!), and used long poles with plywood hooks at the end to hoist the sections into the air and bolt them to the ends of the 14 struts sticking out from the framework.
At this point, a massive storm system came in – shutting down the playa to traffic, and shutting down our work party for a good 18 hours. We left the sleeved halo in place, but kept the fabric all furled up, which was a good move because the 50-60-mph winds would have thrashed it to pieces.
Once the storm passed and things dried out a bit, we unfurled and draped the fabric, installed the 10 carefully-tailored shrouds to hide the Ford ClubWagon XLT’s gorgeously brutish 1985 bodywork, and tied everything down with a Frankensteinian mess of cord and used Rob DeHart’s genius-magic trick of bunching the fabric around tennis balls tied to the frame.
We plugged in the 14 chandeliers and hung them from the strut tips with carabiners (thanks to Kristina, Christo and Lee for their tireless assembly work a few weeks earlier!)
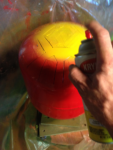
And then we plugged in the LED strips – which promptly showed some kind of electrical fault by glowing all red, and only red. Our genius Arduino expert Spencer Hochberg quickly isolated the fault, we rerouted some power, and gorgeousness ensued. (thanks, Spencer!)
And we had fun and managed to avoid heatstroke while doing it. The miracle of playa teamwork and good friends.
Framework built atop the passenger cage, Halo sleeved and hung
Sam bolting down the halo
Sam tapes on drunk-cushions to soften the hard-edged passenger cage
Sam handles the body drapery
Lindsay and Anna wielding the lifting-poles we used to hoist the canopy into place
Lindsay and Anna goosing Sam
Anna holds the drapery in place
Lindsay, the desert flower
Lindsay zip-tying LED strips to the inside of the wheel covers
Lindsay gathers the draped fabric
Anna assists with the drapery
Anna hiding and/or working
Sam the indomitable
Sam the enthused
Sleeving the halo
Sam and Anna sleeving fabric onto the halo segments
The dust has settled. XyloVan and crew have made a truly epic appearance at Burning Man in late August. And we have survived.
It’s only now – after taking time to unpack, clean up, de-stress, re-enter the default world and process all the wild stuff that we experienced – that I have the strength to share the nasty, hair-raising saga of our stagger-step journey from Los Angeles to the playa.
As I mentioned before the only way to build a really interesting mutant vehicle is to either be a genius or work with geniuses.
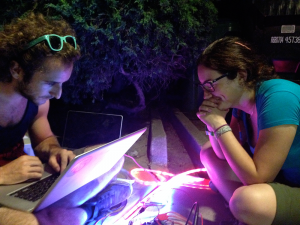
Lucky me, I’m in the latter camp: Spencer and Rina continued hooking up the elaborate Arduino-run LED array this week.
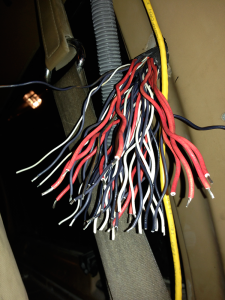
The trick was bringing the mass of wires coming down from the deck harness – four poles each (power, ground, data, clock) for each of the 12 lightbars – into the van to connect with the Arduino board and the controller.
The trick was bringing the mass of wires coming down from the deck harness – four poles each (power, ground, data, clock) for each of the 12 lightbars – into the van to connect with the Arduino board and the controller.
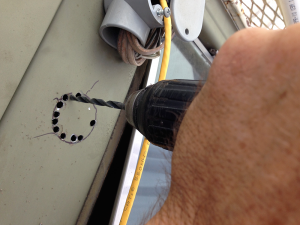
To do this, I drilled a one-inch hole (okay, a series of holes that I ground out to be just over an inch in diameter) into the driver’s-side door pillar and through the inside paneling to a spot just below the driver’s seatbelt.
Then I mounted a rear-access conduit body into the pillar, just below the existing one that carries sound cable and wiring for the original lighting system.
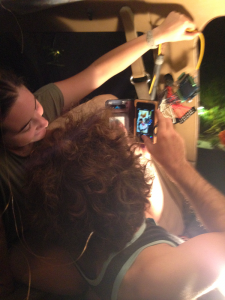
Once I pulled all 48 wires through the hole (after sleeving the inside with a protective chunk of bicycle inner-tube) Rina and Spencer went to work hooking up the Arduino.
This took many hours of patient work by flashlight, the two of them crunched up around the driver’s seat, screwing down terminals and soldering where necessary.
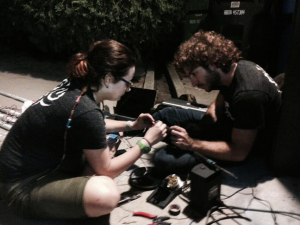
A job well done deserves to be photographed.
While they continued on with soldering connectors to wiring harnesses for the underbody lighting, I crawled under the van and suspended lightbars there on both sides between the wheels, under the front bumper, and under the boarding deck in the rear.
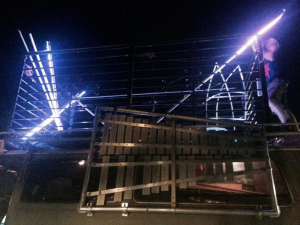
Then we plugged everything and ran some tests.
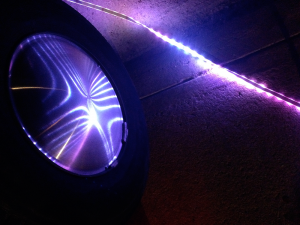
Here we have the sign and some of the underbody wiring – still to be connected on-playa to the front-wheel shrouds – running in multiple colors. The lighting looked glorious reflected in the racing-disc wheel covers I had installed earlier.
To cap everything off, Spencer fabricated a nifty control box with a toggle switch at top for selecting the lighting circuits for roof/canopy and underbody, a pair of next/back pushbuttons for selecting a particular animation, and a mysterious chromed knob labeled only “MAGIC.”
At this point, I’m giddy – half with exhaustion and half with delirious excitement at what the whole thing will look like at night after we assemble it on-playa.
As I write now after the burn, aware of what was to befall them in our tumultuous trip to the playa, it pains me to see these gorgeous wheel covers.
But at the time they were gorgeous, and once we get the wheels rebalanced and the covers reinstalled with plenty of insulating/gripping silicone caulk, they will be gorgeous once again.
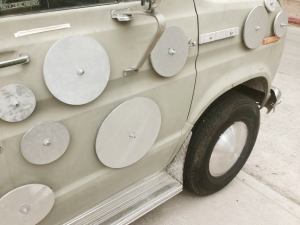
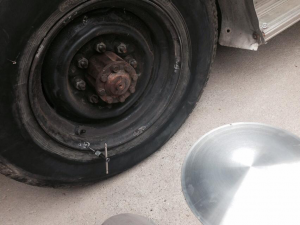
This involved a couple of days of futzing and fiddling – I bought the wrong sized wheel covers at first from Hubcap Mike, and wound up drilling a bunch of holes in the wrong places in a way that would ensure failure.
The best method for mounting these – since the wheels have to be drilled for mounting holes – is to get the wheels off the vehicle, the tires off the wheels, the wheels set up flat on a table top – and to do it all in a well-lit, well-equipped shop.
Since they’re bigass wheels with 8 lugnuts each on a multi-ton vehicle that no shop with a lift would take for any amount of love or money, I did it instead in the driveway – with the wheels and tires still on the van – using a power drill to grind three precisely-located holes through the steel lip of each wheel without puncturing the sidewall behind it, then tapping the holes for 10-32 screws.
Whee.
After many sweaty hours and not a small amount of foul language, I managed to get them mounted.
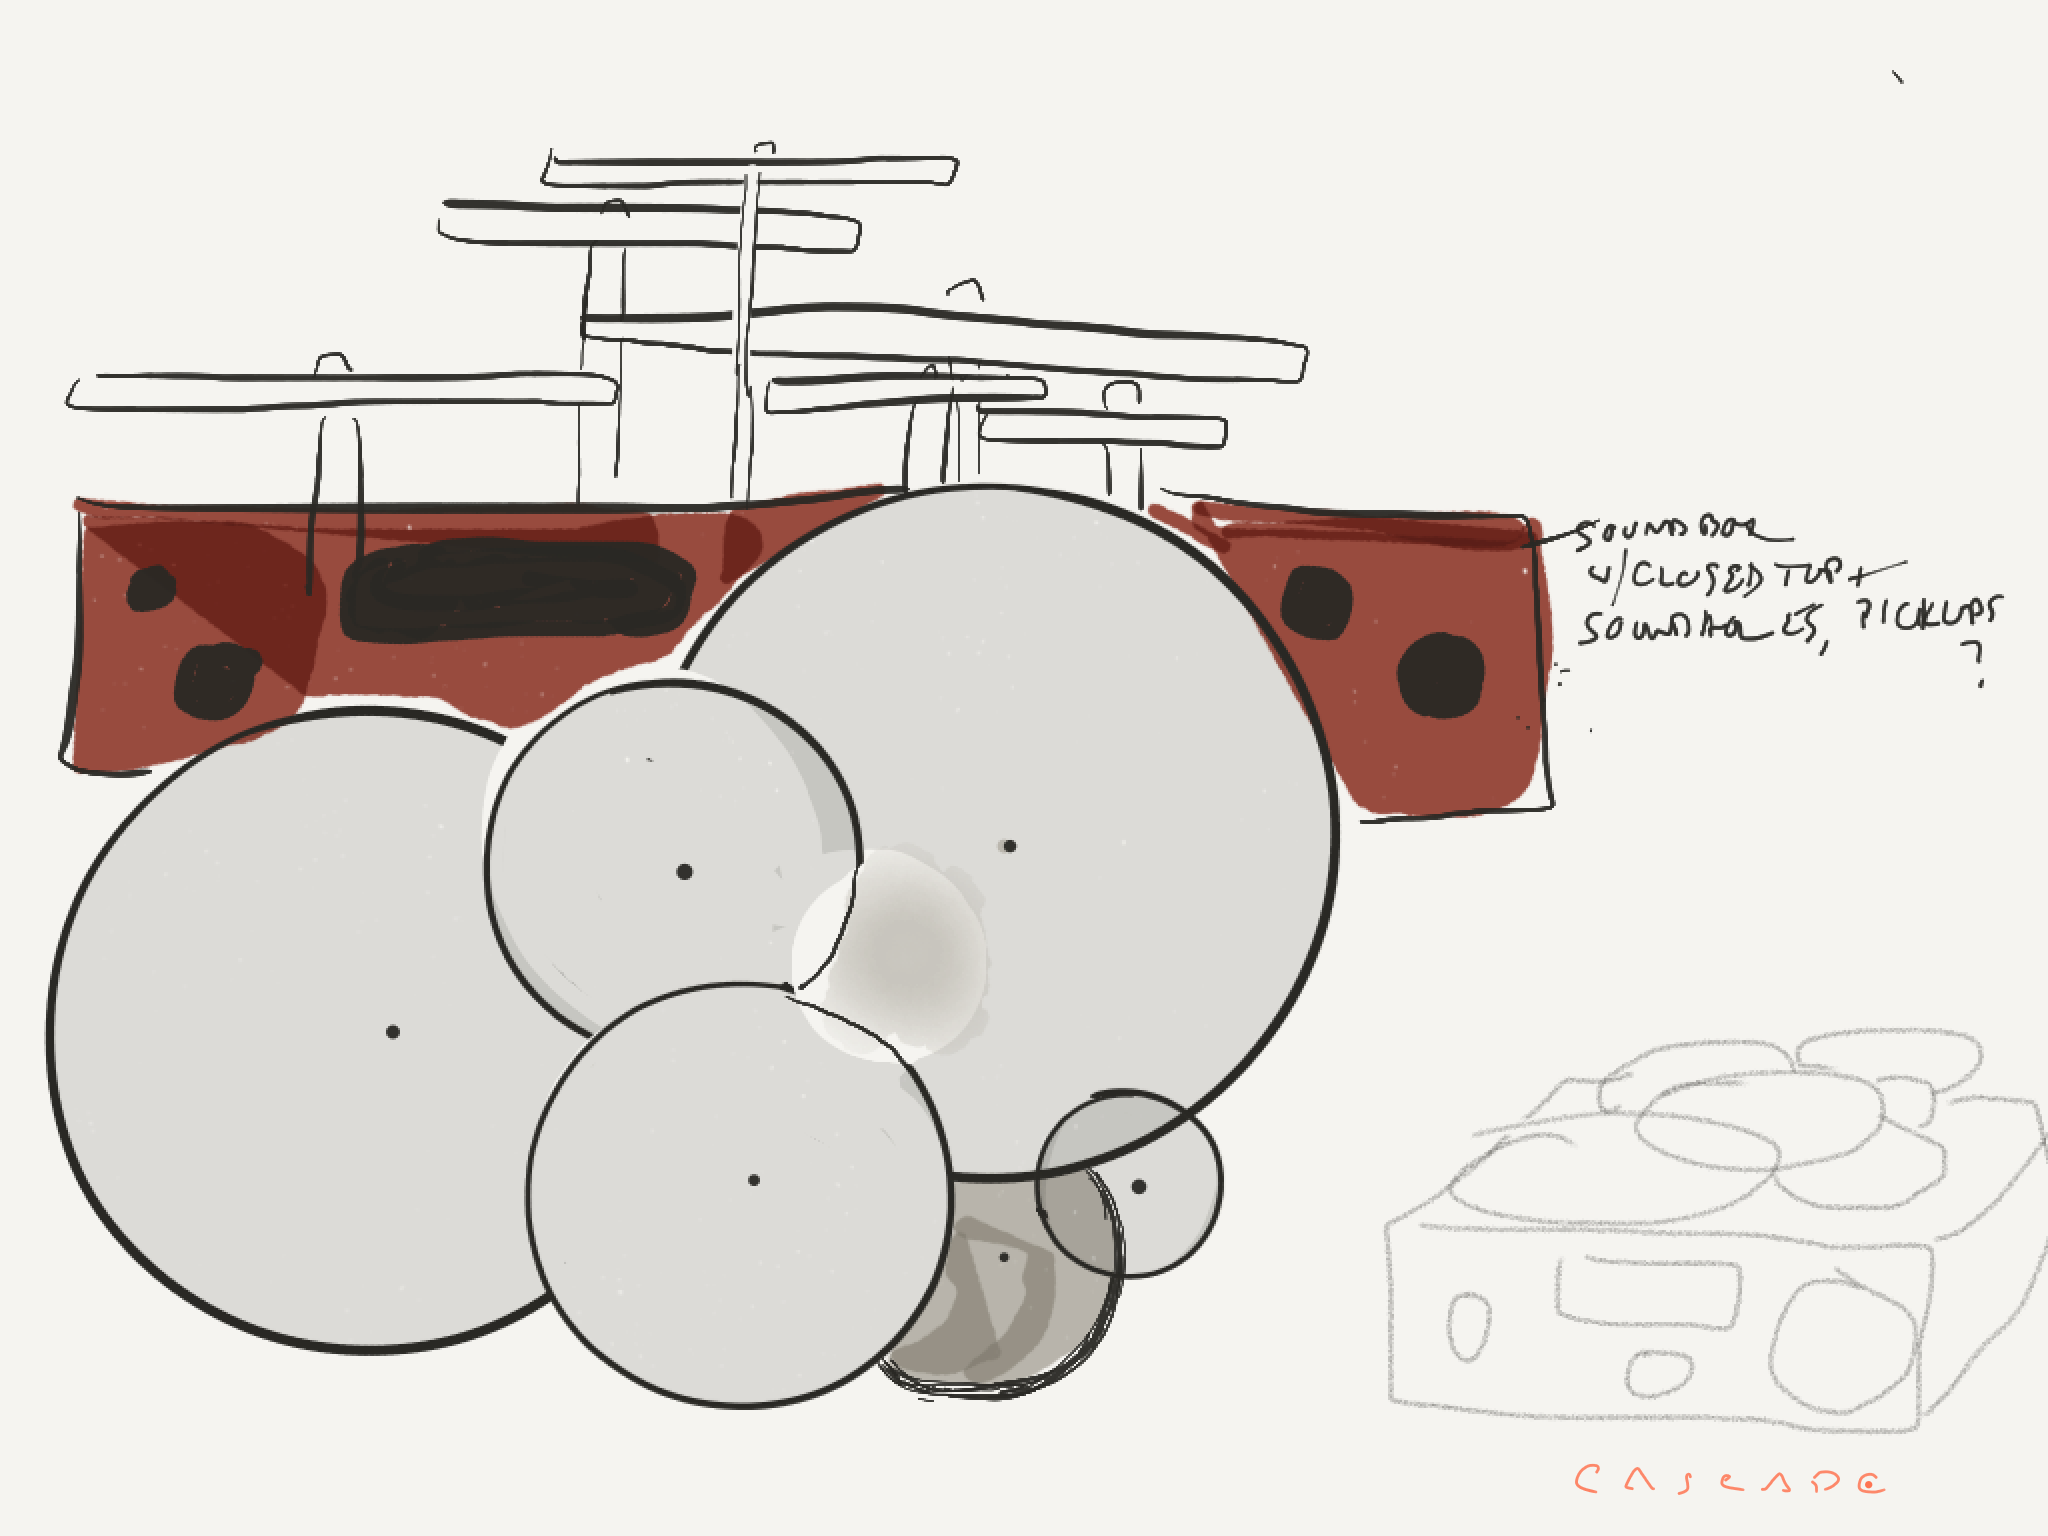 I wanted to explore: disc arrays, resonance, materials, instrument playability.Here’s a sketch: —->
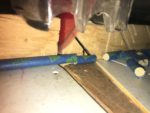


