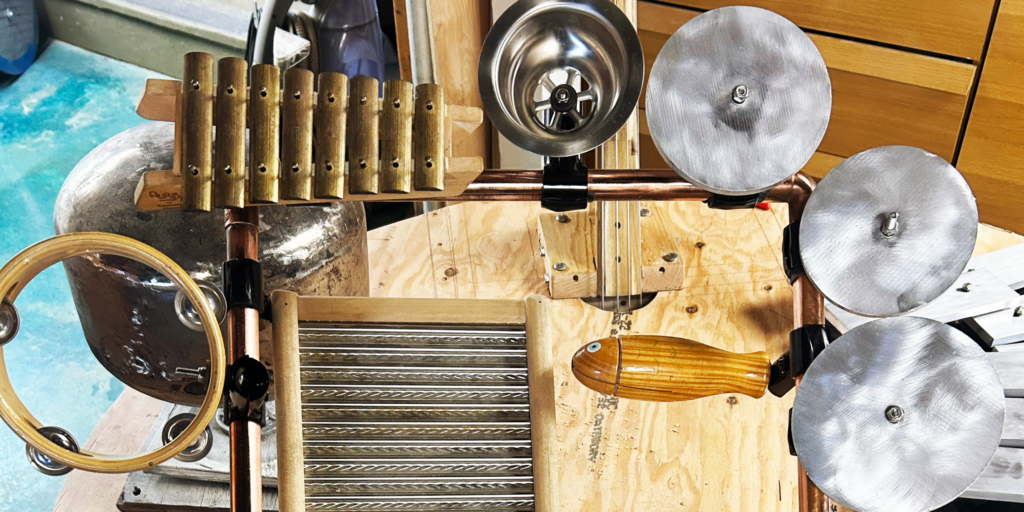
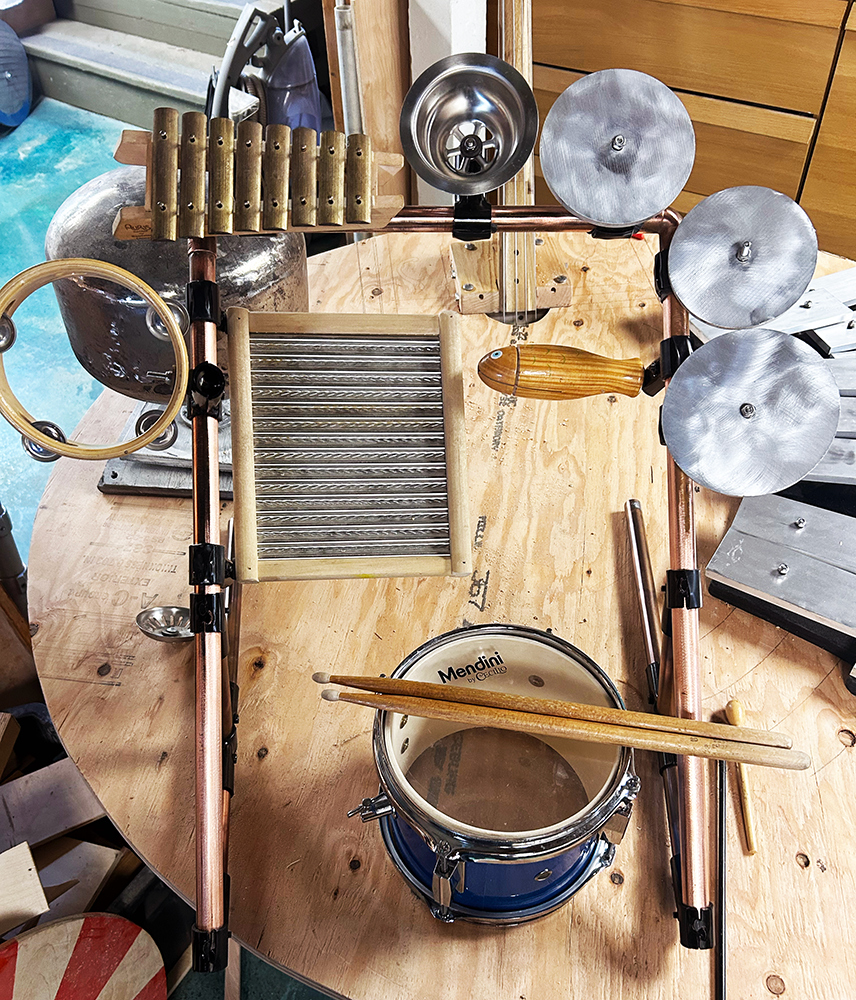
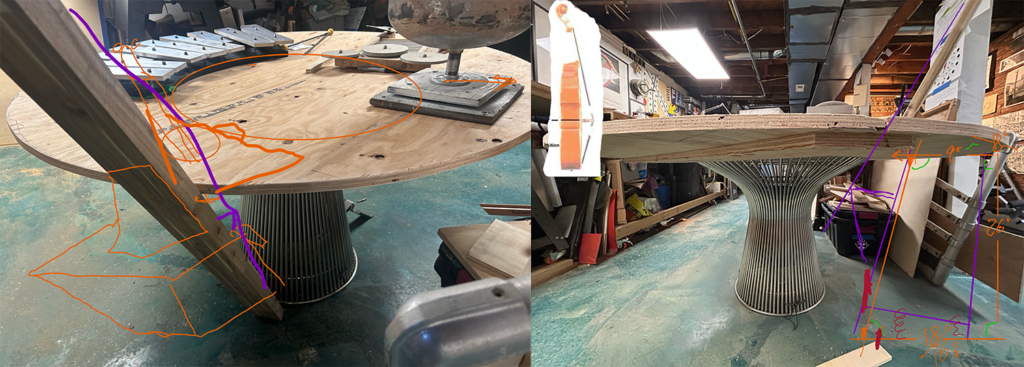
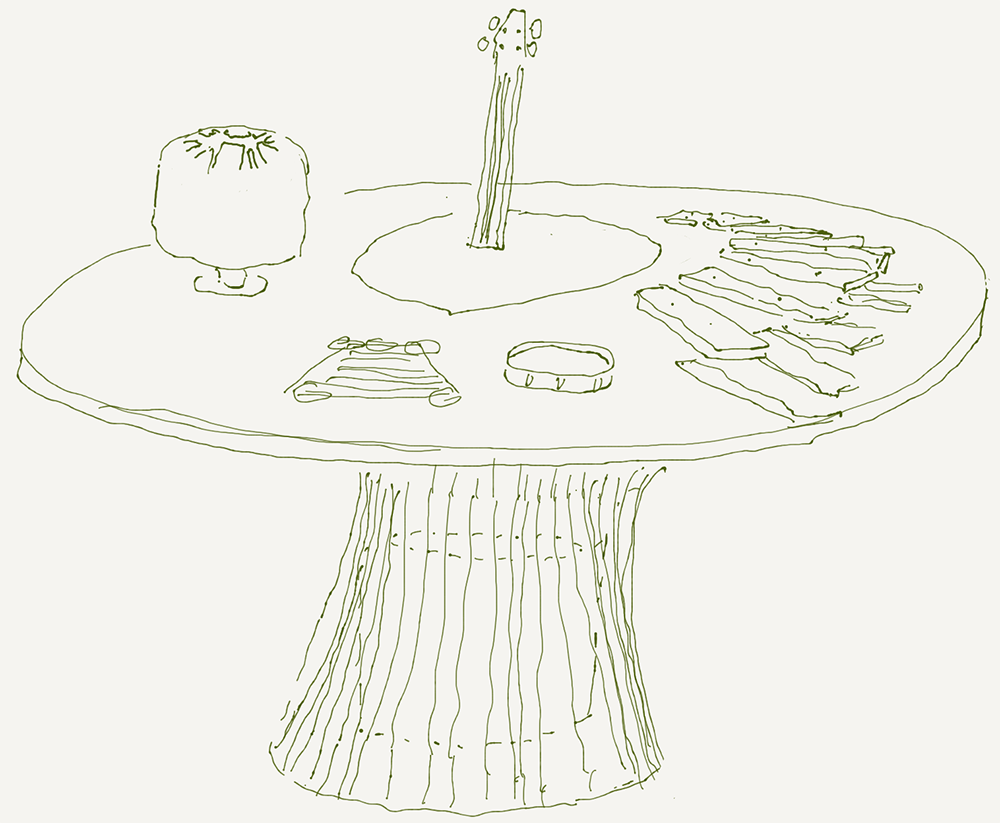
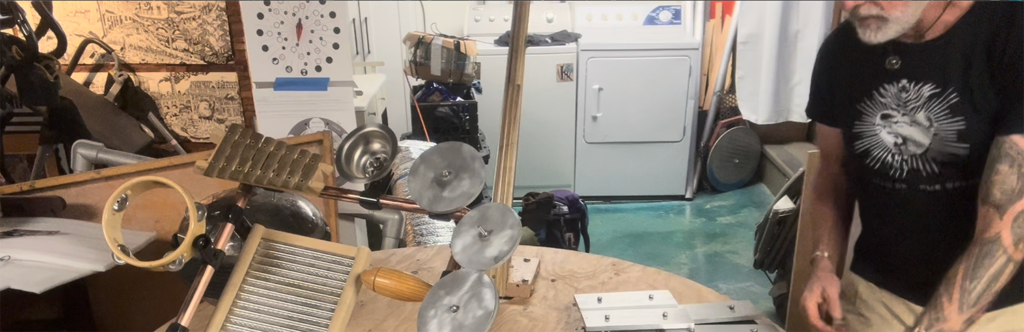
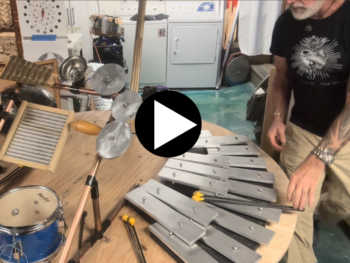
Everything is (finally!) built, and any four musicians can step up and jam.
And, of course, everything will change. With all the instruments in place, I want to start fine tuning the structural issues:
Cut a sound port in the table top to allow the bass and kick-drum tones to rise up through the high-end racket likely to be caused by the other three instruments once three musicians are wailing on them.
Seek out a better primary drum, or maybe add a pair of little wooden bongos to the rack. The high tom-tom is fun, but I don’t think it’s the right voice to carry the drum section.
Maybe set up the xylophone at a slight angle so the musician can stand to face the others more upright. I’d like to add resonators to give it the same rich voice as our big xylophone at home, but that might get needlessly complicated)
Add a weatherproof finish. I’m waffling between decoratively-hammered galvanized tin sheeting, and simply covering the tabletop with a mosaic of pennies embedded in resin.
And then I’d love to find a home for the Jam Table out in Seattle – even temporary or rotating among different locations – where musicians will gather to play. Inquiries welcome!
I love buskers. Anybody playing an instrument on the street or the subway platform always gets a buck or two from me straight into their hat.
We need more random, live, human-generated music – not more of the overproduced, auto-tuned, beat-synched megaproductions ruling the AOR airwaves (“quantized, pitch-corrected, overly-inspected,” as Henry Rollins once riffed). There’s more than enough of that.
Let’s have more of the wild, hairy, random stuff that happens when musicians experiment together. Gut-bucket, goofy, syncopated noise. Bring that beat back.
And that’s why the percussion array – including the kick drum – is built from a bunch of random things you can bang on.
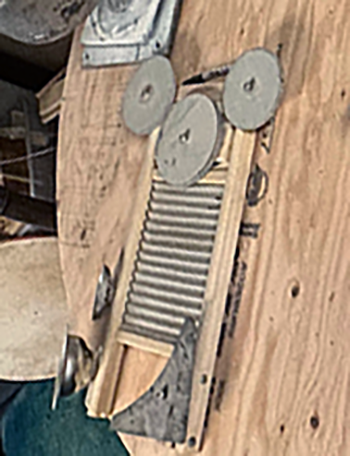
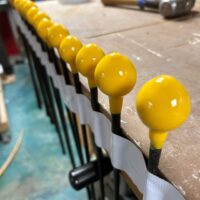
I built a little handheld percussion array last winter out of a washboard. I screwed some metal hardware to it – a couple of old sink traps, a piece of tin scrap, and three of the tinier gongs left over from XyloVan. But it looked junky, pretty poor and wasn’t going to fit well with the shape of the other instruments.
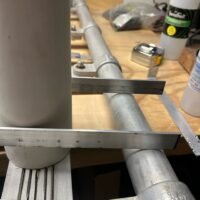
So I tore it down to the components. I can’t afford a whole set of drum stands and all the nifty adjustable mounting brackets to play with, so I built my own frame out of reclaimed 1-inch copper plumbing pipe and a set of Maker Pipe connectors.
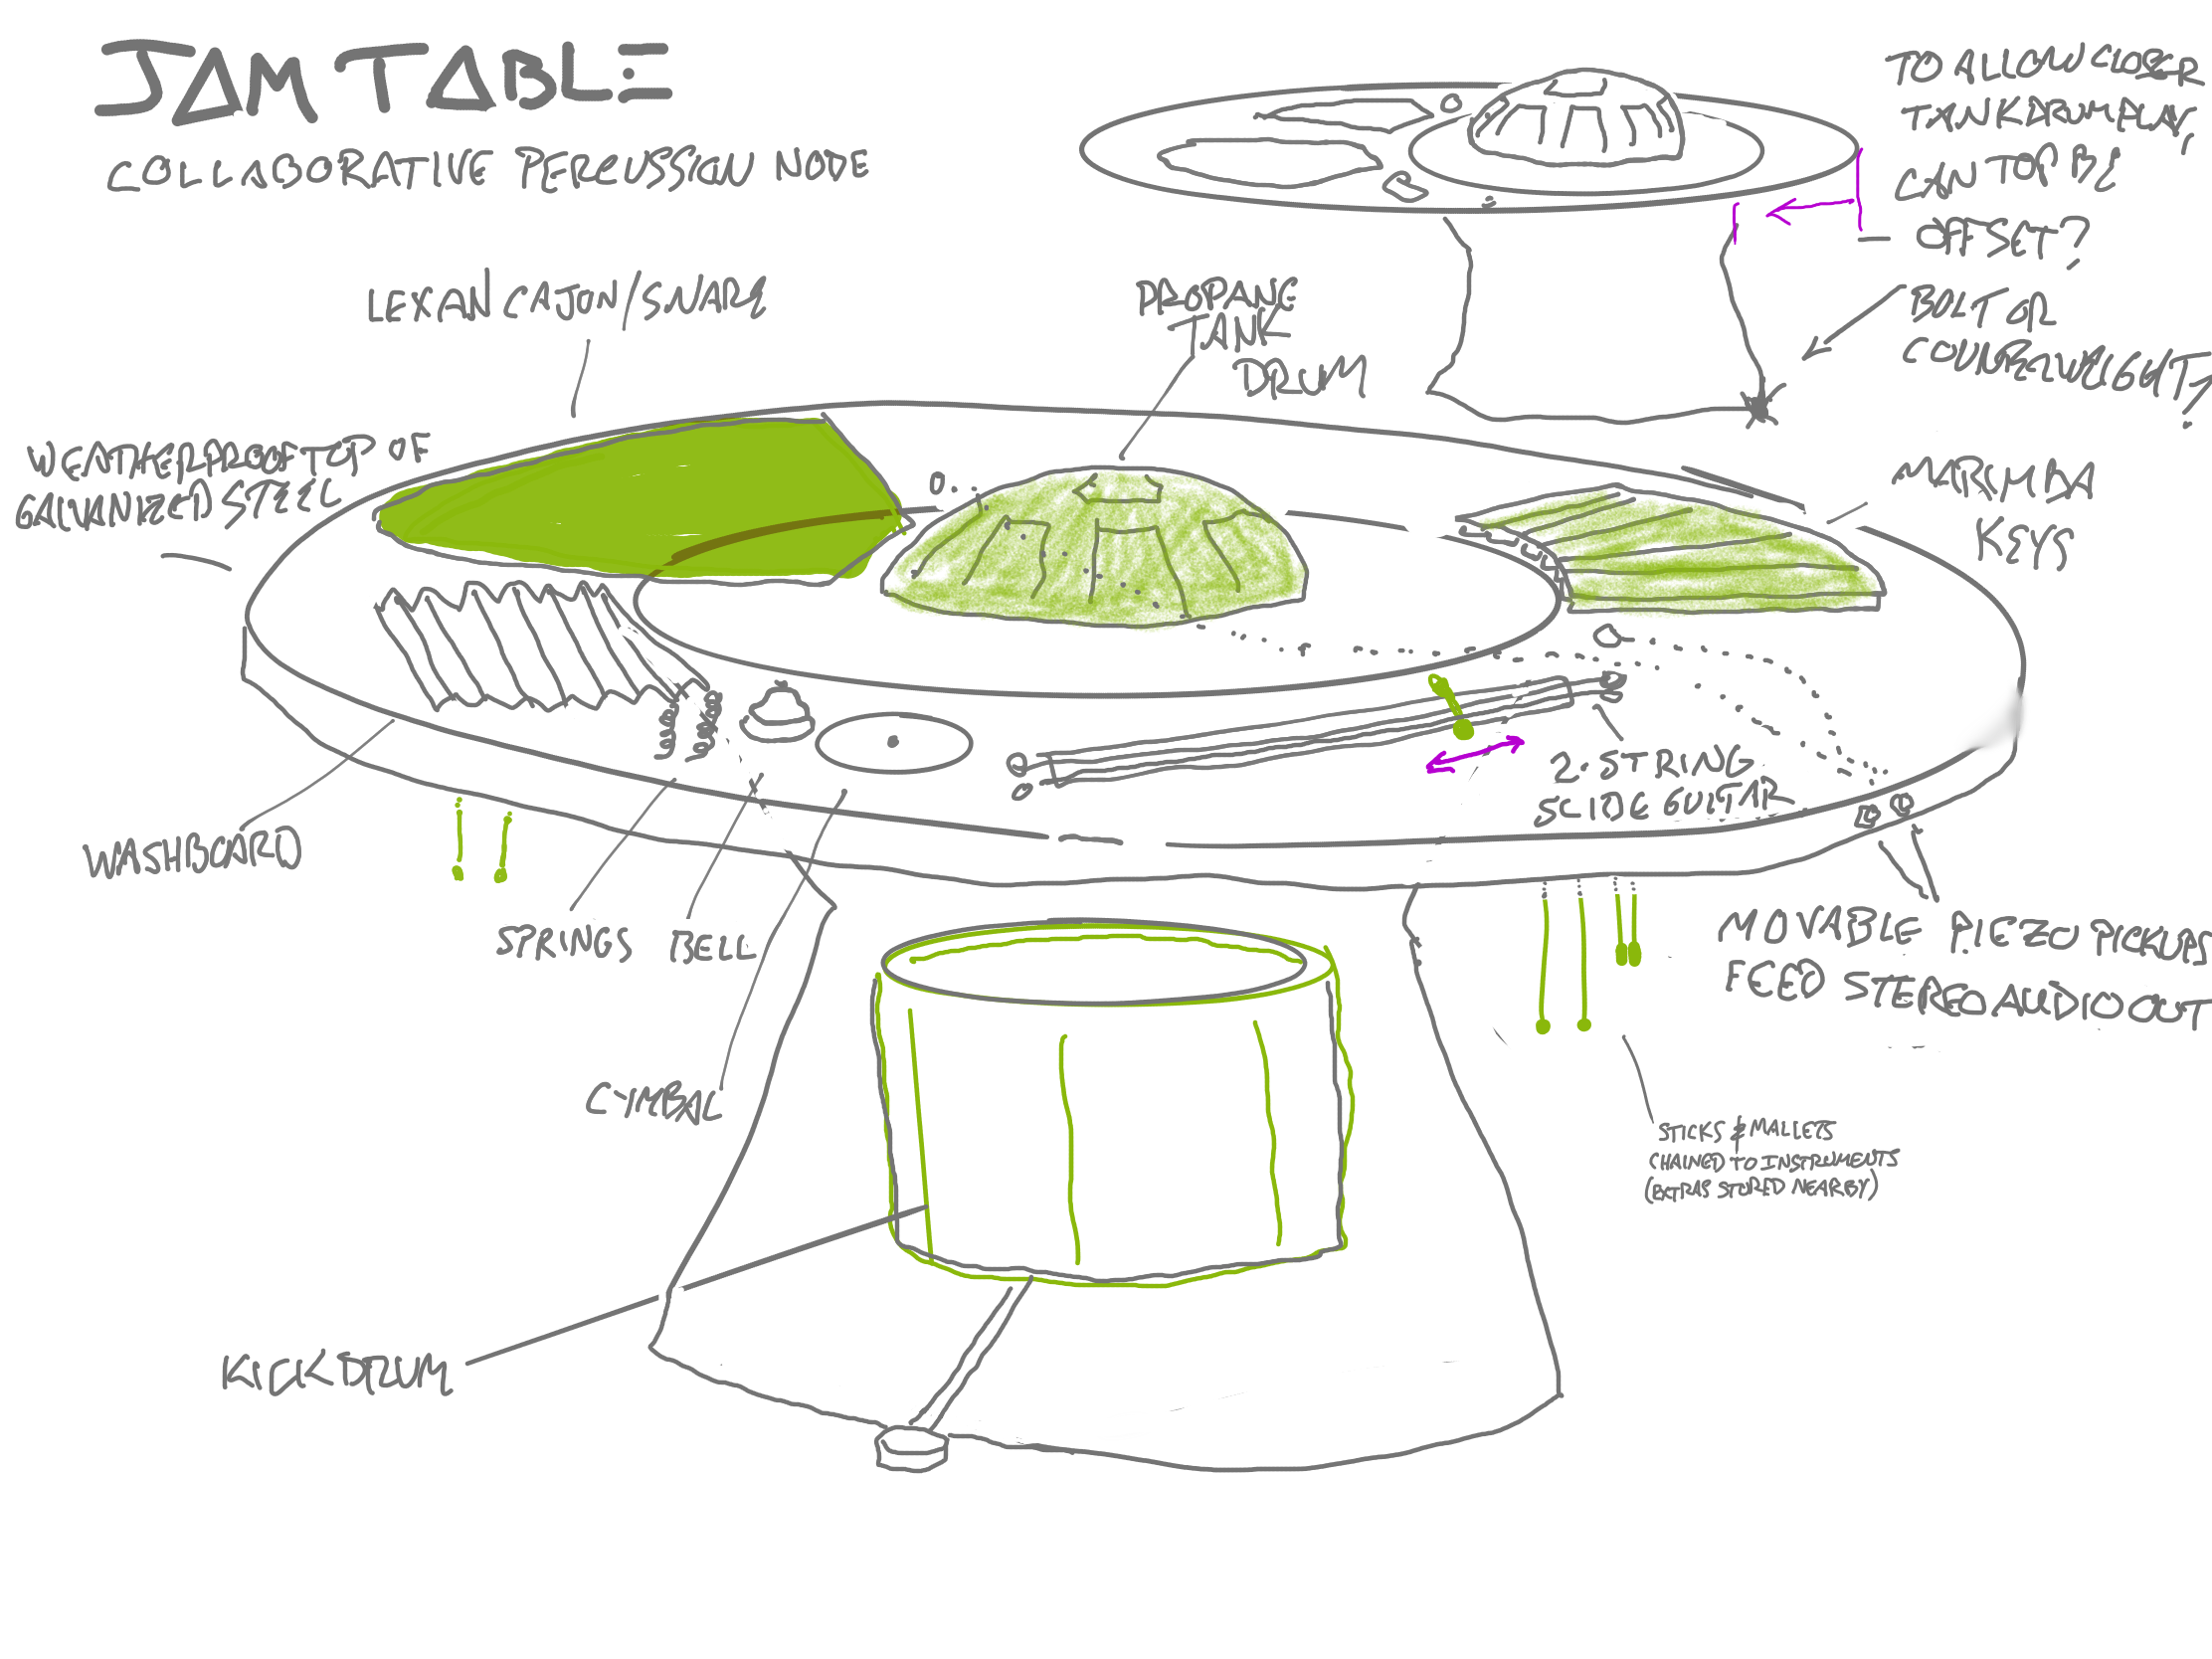
Once set up at a nice 45-degree angle, it can hold 6 or 8 instruments around a central gap where a drum can be mounted. I opted for a little high tomtom rather than a snare, because I don’t want the average drummer’s tendency to lean heavily on the snare to overpower the other acoustic instruments. As it is, there’ll be a heavy kick-drum under the table keeping time.
I can’t wait to have musicians try this all out, bang on all the things, and poke holes in the design and construction, as I do with anything I build for the playa.
All that feedback – anything from people breaking things to critiquing the angles or materials to utterly dumping on the whole idea will help me move this crazy prototype towards its next, more-robust and fulfilling incarnation..
Those sexy curves and f-shaped holes, rendered in fine varnished wood, are explicitly designed to sing sweetly when the strings are bowed or plucked.
But I’m just a brutish carpenter, so instead I made a box. The Jam Table’s architectural requirements for the bass are just plain weird:
Must sound good, and fully resonate bass frequencies made by the musician
Must fit between the floor and the underside of the table.
Must fit outside of the diameter of the table base, allowing room for the strings to move
Must be REMOVABLE so that the whole Jam Table can be broken down into components to be moved from my shop to its destination
Must not look like complete crap
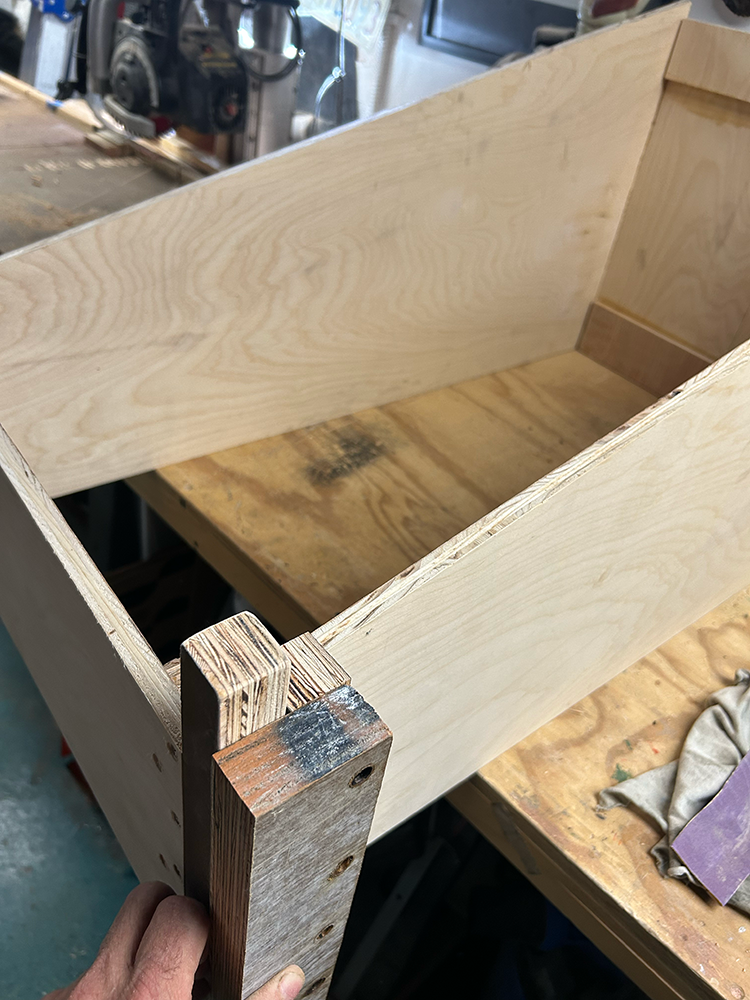
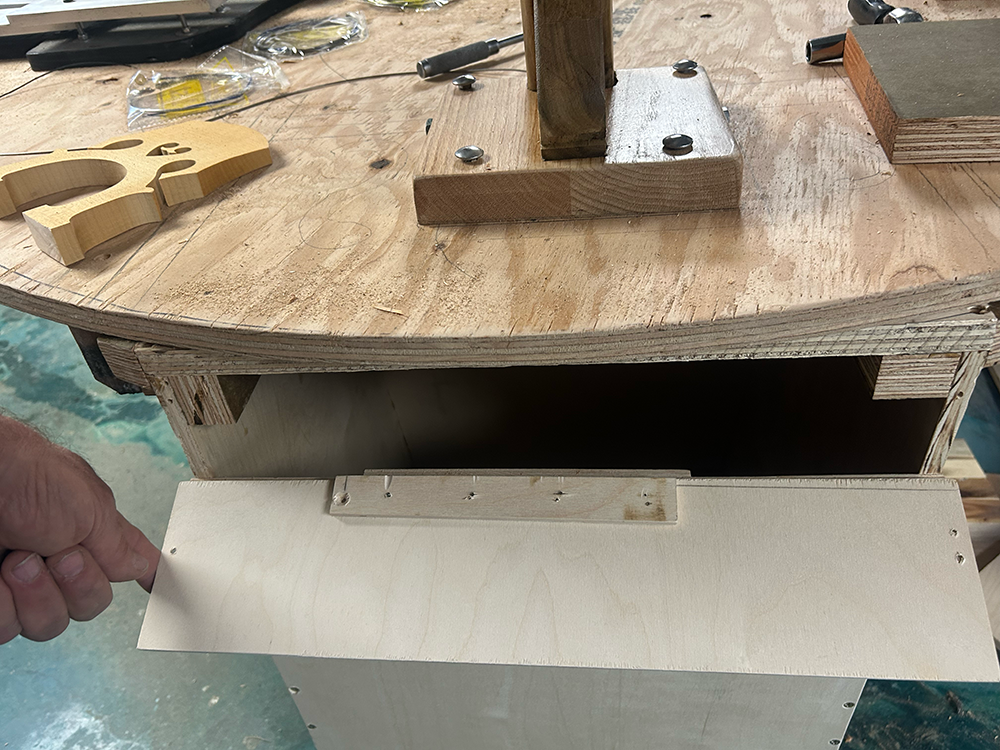
I used 1/2-inch birch plywood for the frame – glued and screwed – and then 1/8-inch plywood sheets for the front and rear resonant surfaces.
I slanted the front to be thicker at the bottom (to get as much resonant volume as possible) and thinner at the top (to clear the stainless steel tips of the table base where it flares outward).
The other goal was to have it align well with the angle of the neck and strings – which was going to be total guesswork until I could make a way to align it all.
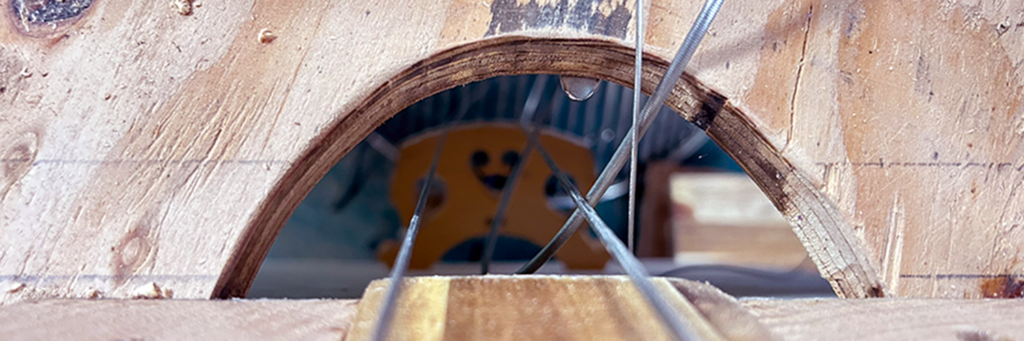
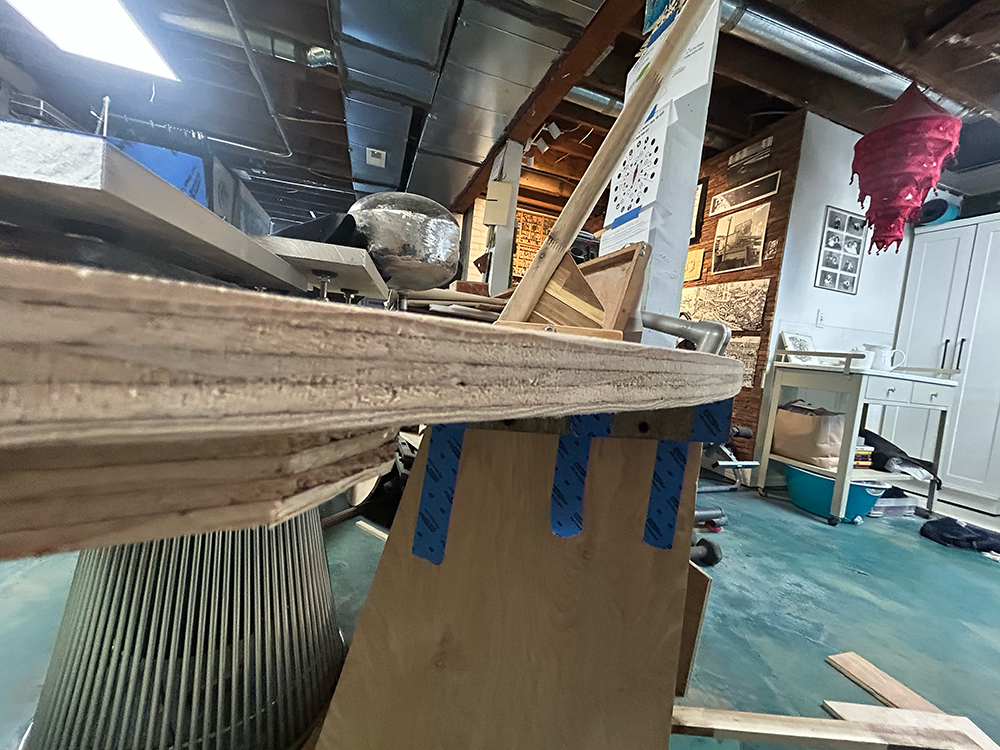
The next trick was to make it removable: I attached rails of thick 1.5-inch plywood to the underside of the table, and fins to the top of the sound box, allowing it to be slid into the rails and held flush with the table’s underside.
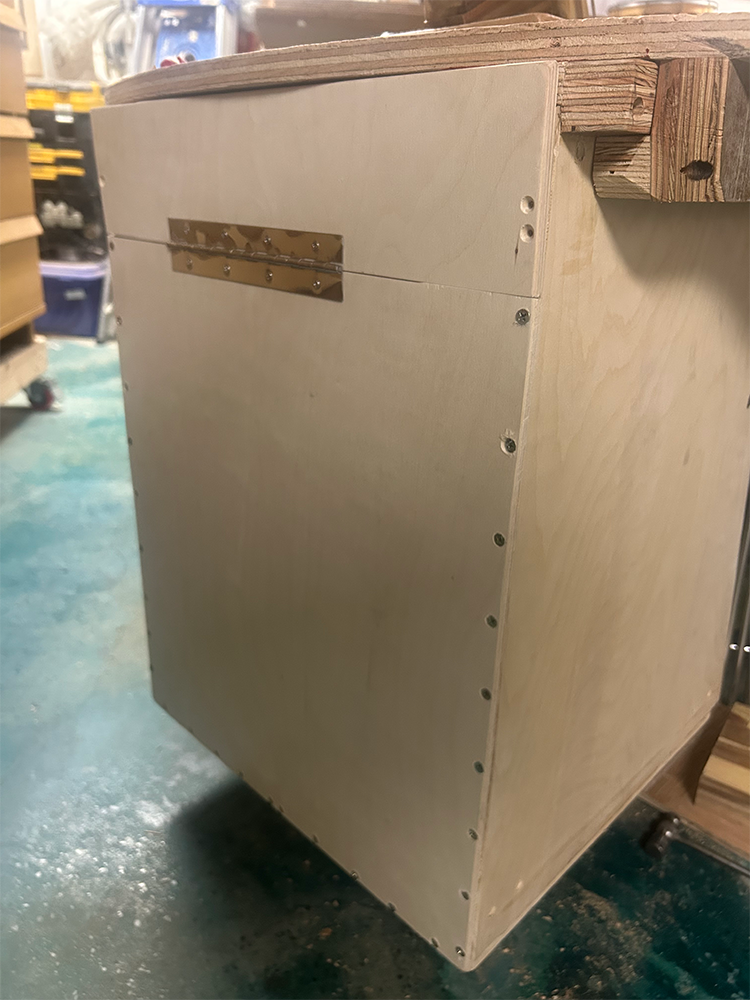
Finally – and this wound up being a little silly – I had to build an access hatch into the back of the box so that I can reach the bolts that attach the neck to the table top. I’m hoping that the gaps and non-air-tightness of the rear of the instrument doesn’t bleed off its resonance.
With all of this nonsense in place, I can now slide the box in or out to change the action on the strings.
Which turns out to be a good thing; Installing the strings was finicky, and messy.
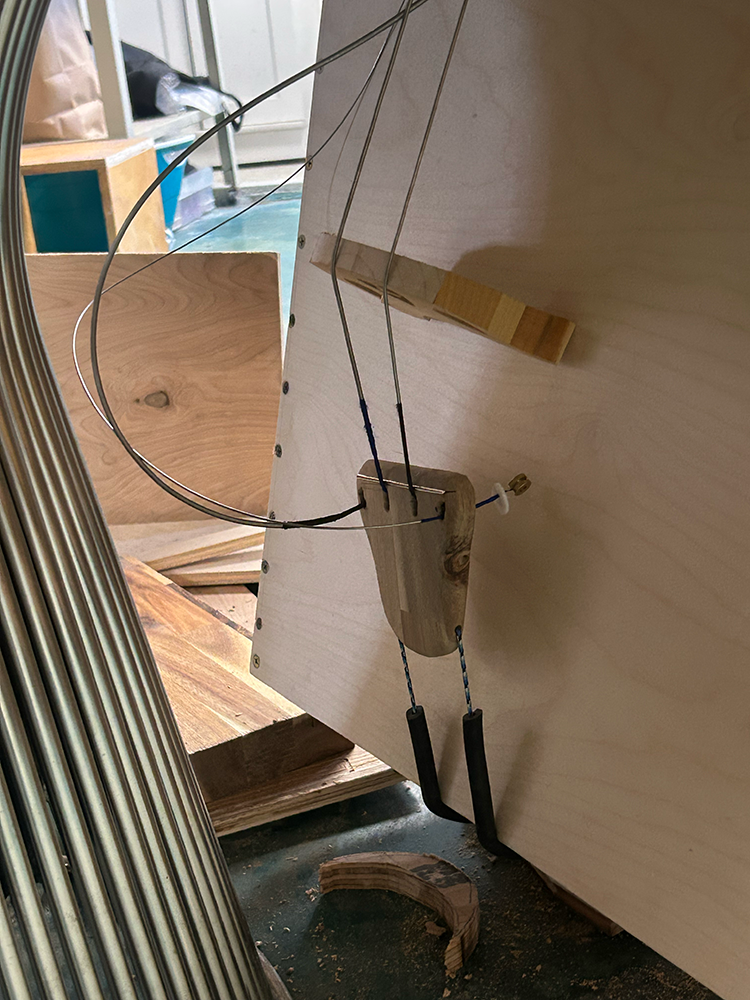
I made an adjustable end-pin (the metal dingus sticking out of the bottom of a double bass that lets it stand on the floor) out of a carriage bolt fixed with T-nuts into the bottom of the box.
Then I fashioned a tailpiece out of acacia to anchor the strings, and lashed it to the endpin with paracord (slipknots make it adjustable) and I started the finicky business of installing the strings.
This is not nearly as straightforward as stringing a guitar: The bridge is meant to float on the top of a double-bass so that you can be positioned at the right spot (43.5 inches or so from the nut). Once you start tightening the strings, they drag the bridge off plumb, and you have to readjust it (I tapped it back into line with a hammer).
The tension on the strings is hellacious; As the E comes into line, it pulls the other strings out of tune. Fix the D, and the E and A go flat. Fix them, and now the D and G go flat.
At the same time, the string tension starts pulling the peghead forward, slightly bowing the neck and changing the action; Before, the strings were nice and low – now there’s a 1-inch gap between them and the 12th-fret position.
I eventually pulled it all back into line, got the thing tuned, and it sounds proper. I just have to scooch the box forward a hair to lower the action.
Nor does one simply create the neck of a double bass. This Jam Table component does a *lot* of heavy lifting for this very complicated type of instrument, so it has a lot of structural and material requirements in order to work properly.
Full disclosure: I am not a luthier (as I have already made pretty obvious), and I have no earthly idea what I am doing here.
After studying numerous photos and architectural drawings of double-bass viols, I knew I would need a reliably sturdy way to keep the neck at a good playing angle so it can do its job – just as I would need the instrument’s body at a steady angle.
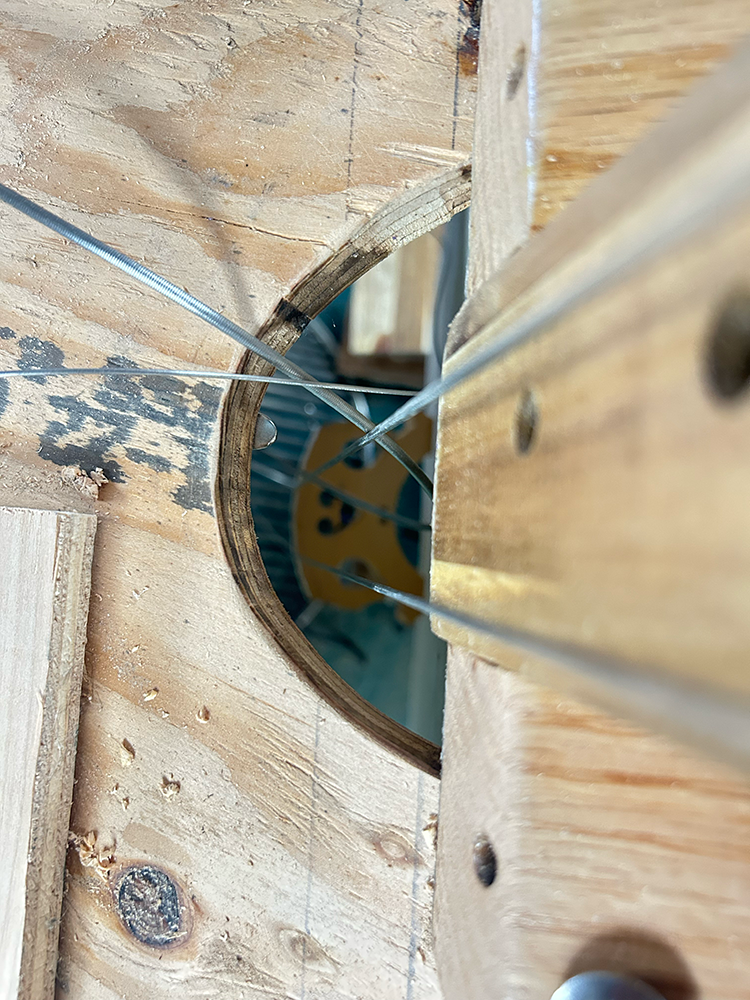
The table top would be sandwiched between them, with the strings stretched from the peghead through a hole cut into the plywood to the bridge and tailpiece attached to the body below.
In theory, anyway.
For the neck itself, I cut about 40 inches of the scrap of 1.75-inch-thick acacia-wood butcher block left over from building our countertop, then trimmed away the outside edges with a handheld jigsaw clamped to the bench. Whee.
Then I used coarse 80grit sandpaper on an orbital sander to whittle the living bejeezus out of it.
By the time I was done, I had shaped something resembling what the internets tell me is the approximate thickness, length, and
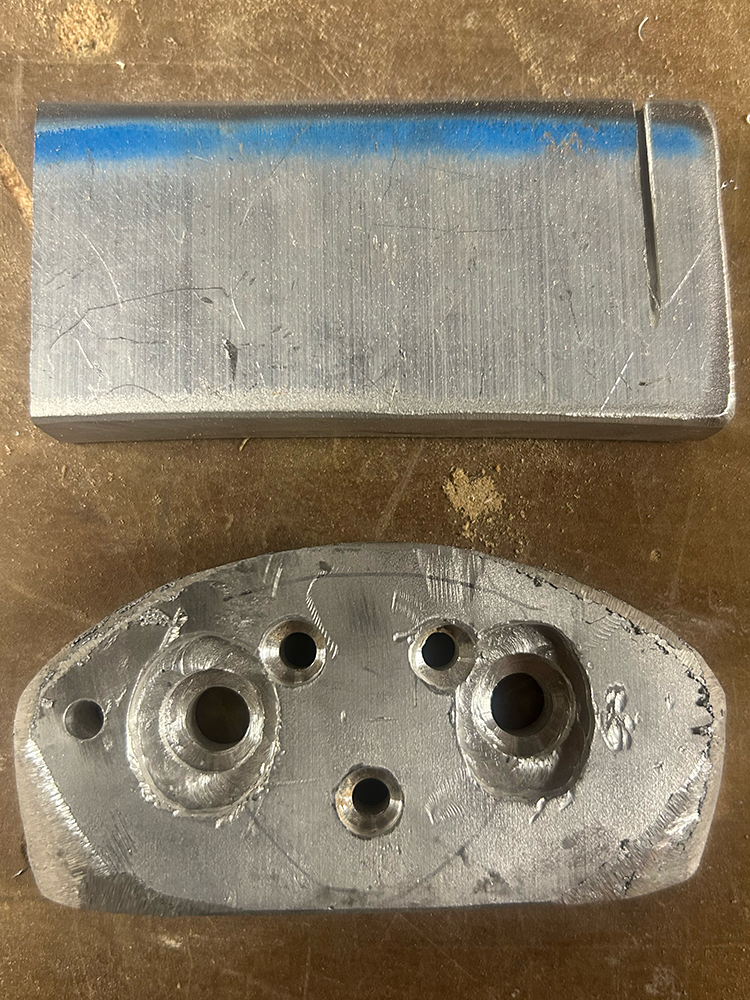
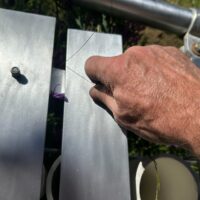
The nut and peghead->neck attachment plate, cut from a block of 1/2-inch-thick aluminum scrap.
taper of a double-bass neck and fingerboard. I think.
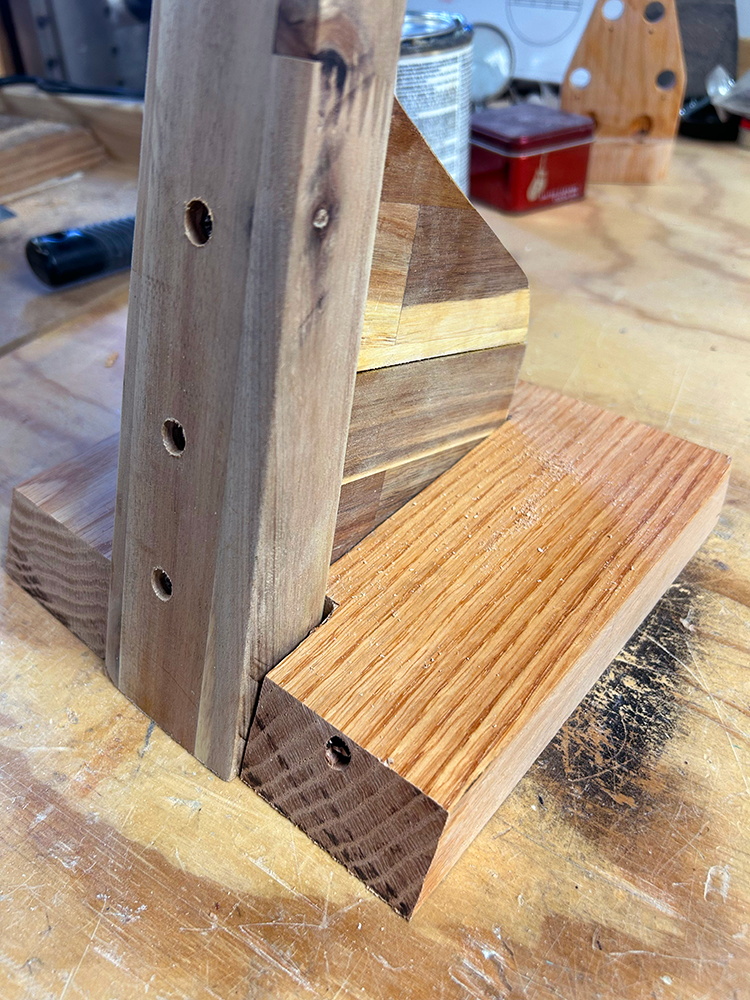
I fashioned a rear buttress for the neck from another scrap of acacia and screwed it onto the neck’s base. Then I carved out that assembly’s profile from another thick chunk of red oak, and I bolted the whole thing together with lengths of all-thread run parallel to the table surface through holes I drilled into the edge of the oak scrap and the base of the neck assembly.
Next up was the peghead. I salvaged the oak peghead from the failed Tube Bass, and flipped it over to put the machines at the proper level to take tension from the nut.
Now the tricky bit – attaching it to the top of the neck.
The best solution was to fashion a plate out of raw aluminum scrap that I’ve kept around since building XyloVan.
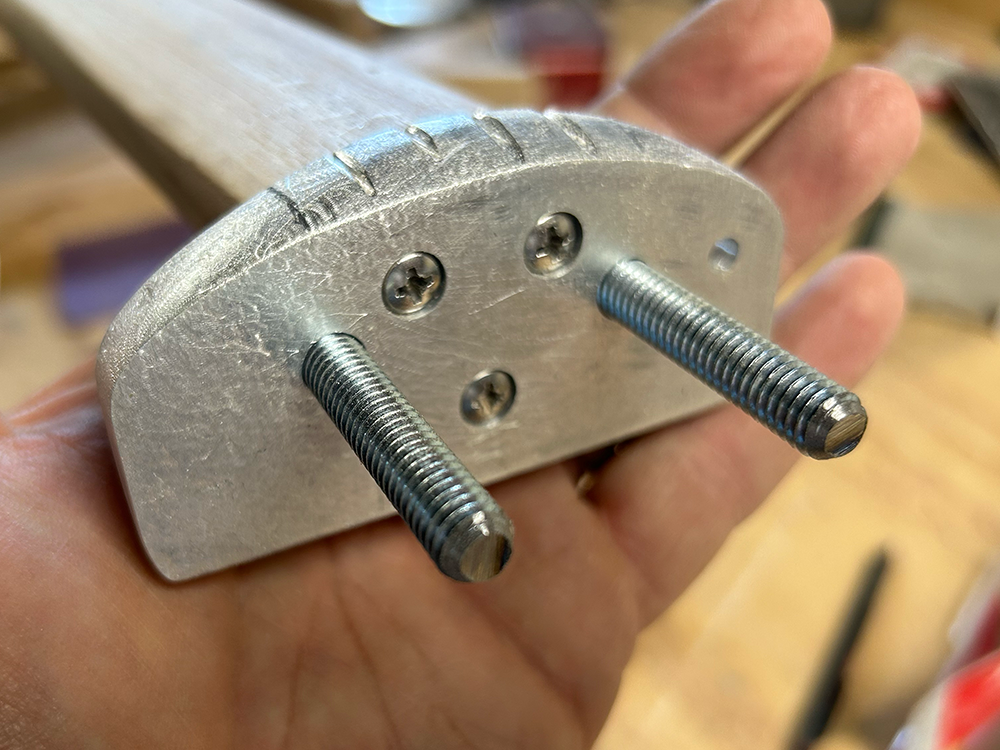
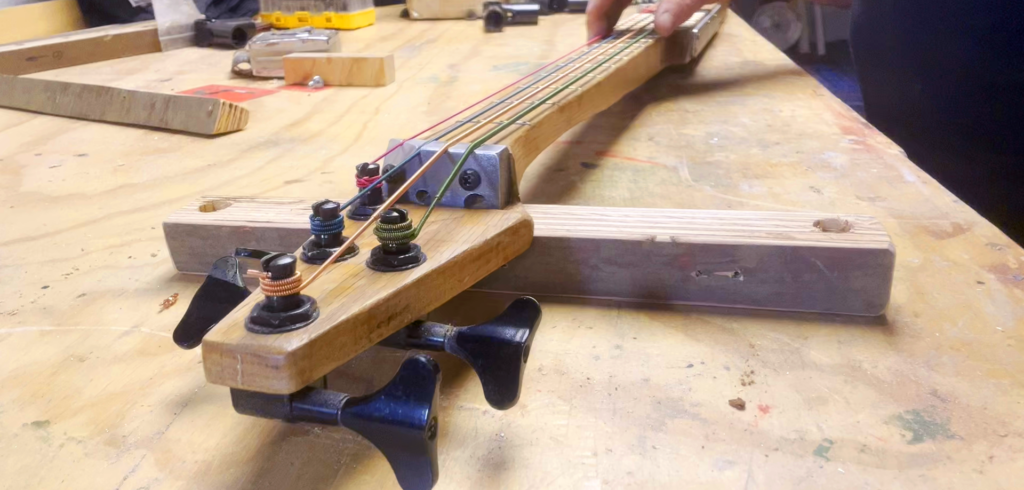
The wackiest hack that ever did stack: a half-inch slab of T6 aluminum scrap, drilled out and machined to function as the standup bass’ nut – and as a plate allowing the peghead to be mated to the neck. Paging Dr. Frankenstein …
I spent quite a few hours machining this thing – drilling a pair of holes that align with existing holes in the peghead – and a new set of holes allowing three screws to attach it to the neck.
I had some oval-profile bolts kicking around that could hold tension without being spun. I just had to machine out holes to accommodate their weird, flat heads.
Using it as a drill template, I drilled holes into the neck, then inserted three stainless-steel screws that I hope I never have to see again – and screwed/bolted the entire thing together, finishing it off with 5 coats of exterior urethane.
It wound up looking like this – ugly, but fully functional:
Sketch – neck of a standup bass. First idea was to have it connected to a resonator similar in shape to a washtub. This might have fit into the top of the table, but would have interfered with the kick drum. (Click to zoom)
The acoustic bass is a pretty simple instrument, mechanically speaking:
Strings stretch across a resonant box, making deep notes when plucked or bowed.
You can make one out of a washtub, a broomstick, and a nylon string if you like.
For the Jam Table, I would rather build something that any fool can fool with – but that any bass player will want to play.
So I started sketching, trying to puzzle out how to make the playing surface easy to reach – and how to stuff the body under the table surface without running into the table base’s stainless steel frame.
I had a few long strips of acacia butcher block left over from installing a new countertop. Acacia would seem to be strong enough to function as the neck of a standup bass, but I did wonder quite a bit whether it would need some kind of reinforcement or truss rod installed.
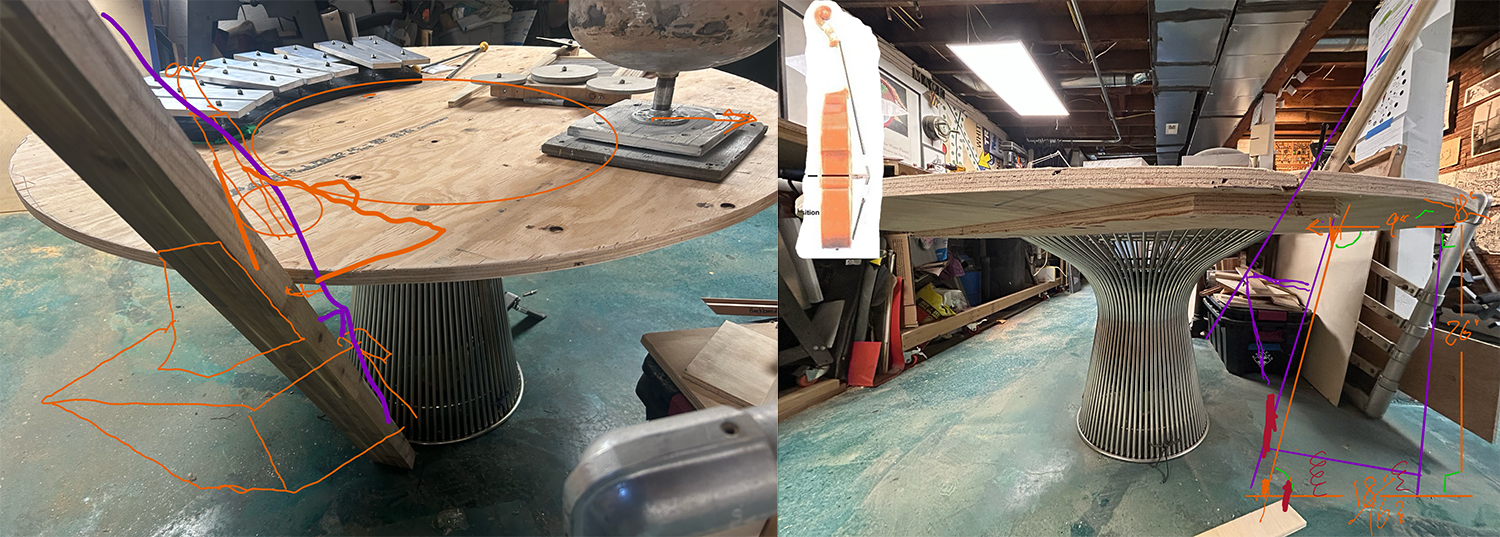
(Click to zoom): Early alignment sketches. (L) Using the scrap acacia plank to check the best angle for the neck and resulting space requirements for the resonant body. (R) Another sketch showing measurements of the room I had to play with for each element while squeezing in a distance of 43.5 inches between nut and bridge.
I have no way of drilling a hole the 36-inch length and 3/8″ diameter of the neck at all, let alone accurately to the line of the neck to insert a scrap stainless steel rod I have left over from another home project.
So I proceeded with this assumption: If the tension of the thick double-bass strings that I’m using does deform the neck, I’m gonna have to (hell, I dunno) groove the back of the neck with a router and insert the rod and tie it in with … bolts? Ugh. I’m not a religious man, but I am praying on this.
So, I decided after the Tube Bass failure to try something more orthodox: an electric slide bass.
Jack White’s demo in “It Might Get Loud” – slapping together an electric slide guitar and wailing on it within about 10 minutes – made it look almost simple.
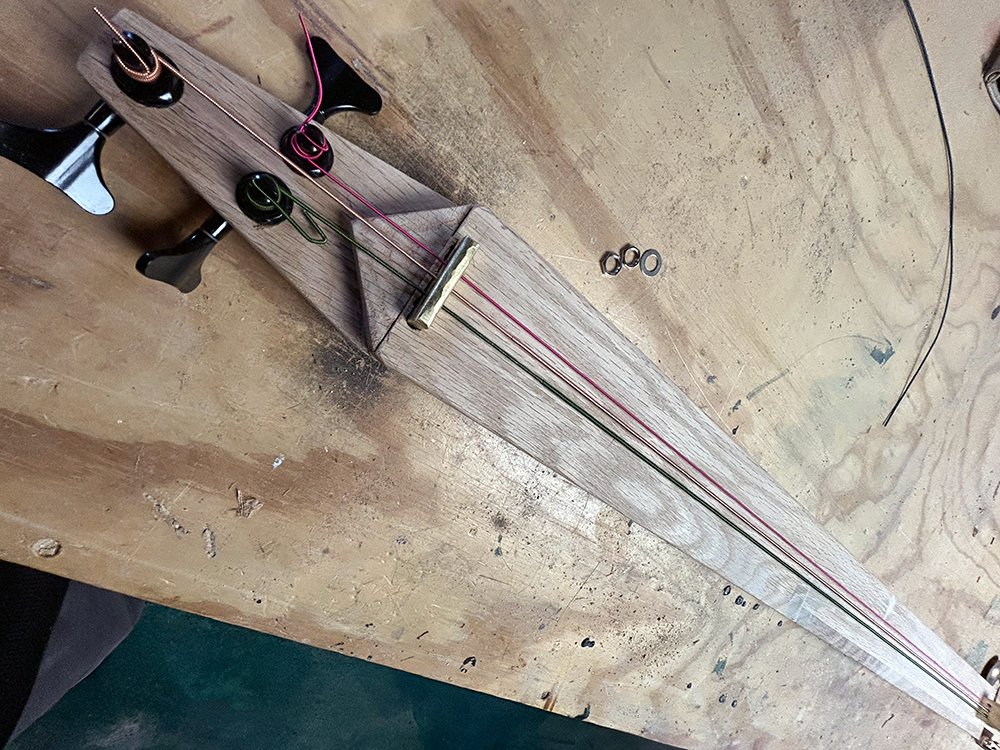
I used a slab of salvaged oak for the body, edge-cutting a wedge-shaped peghead into it with the radial arm saw (the most versatile and dangerous tool in the shop). Non-trivial but – mercifully – non-fatal.
Drilling the holes for the machines was even dicier: the damn barrels come in a just-a-bit-thicker size than my largest nice 3/8″ bit, so I had to bore them out to make them fit.
I settled on a 3-string layout, figuring that the open G-D-G tuning I once built on a cigar-box guitar kit might be fun to slide bass notes on.
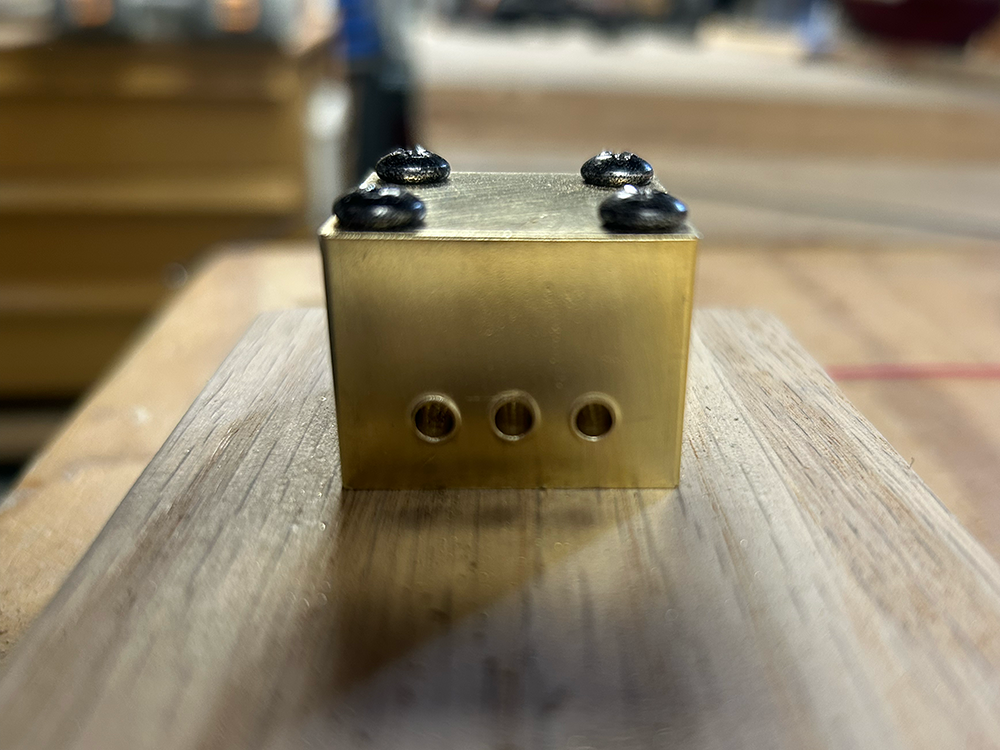
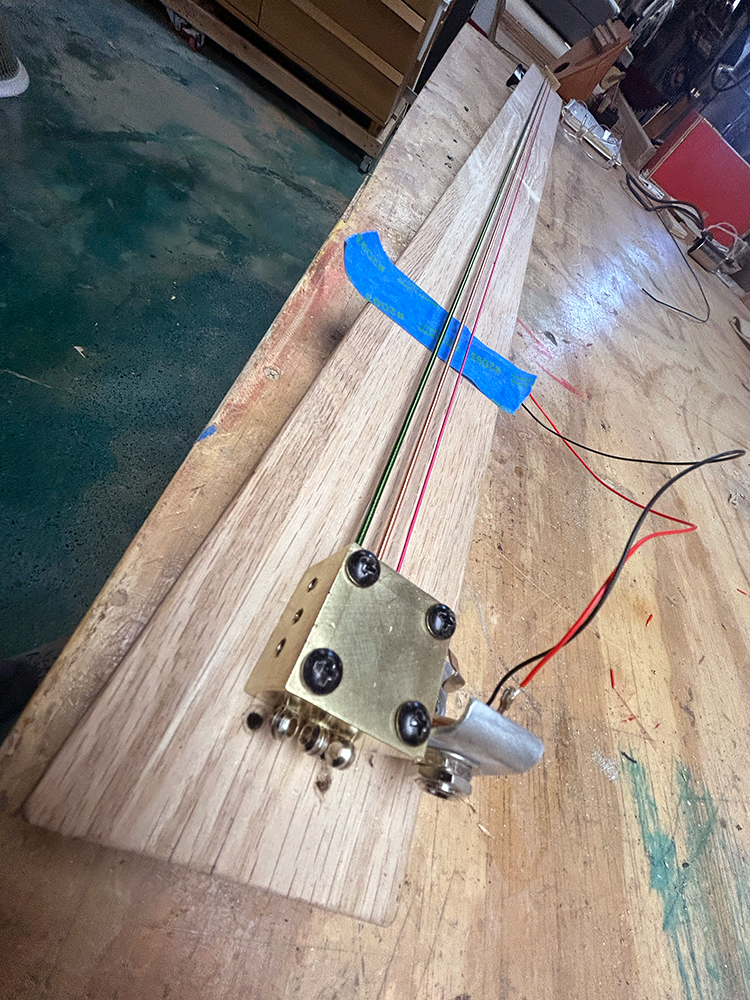
I fashioned the nut and bridge from blocks of brass from the scrap bin at my beloved Industrial Metal Supply (one of the few stores I really miss most from our life in LA a million years ago), and embedded them into the oak.
I then strung it up and tested with a piezo pickup taped to the body.
Open, the strings sounded great. But using the slide told me I had made a crappy choice: unfretted, the wooden neck fully deadened the string beneath the slide.
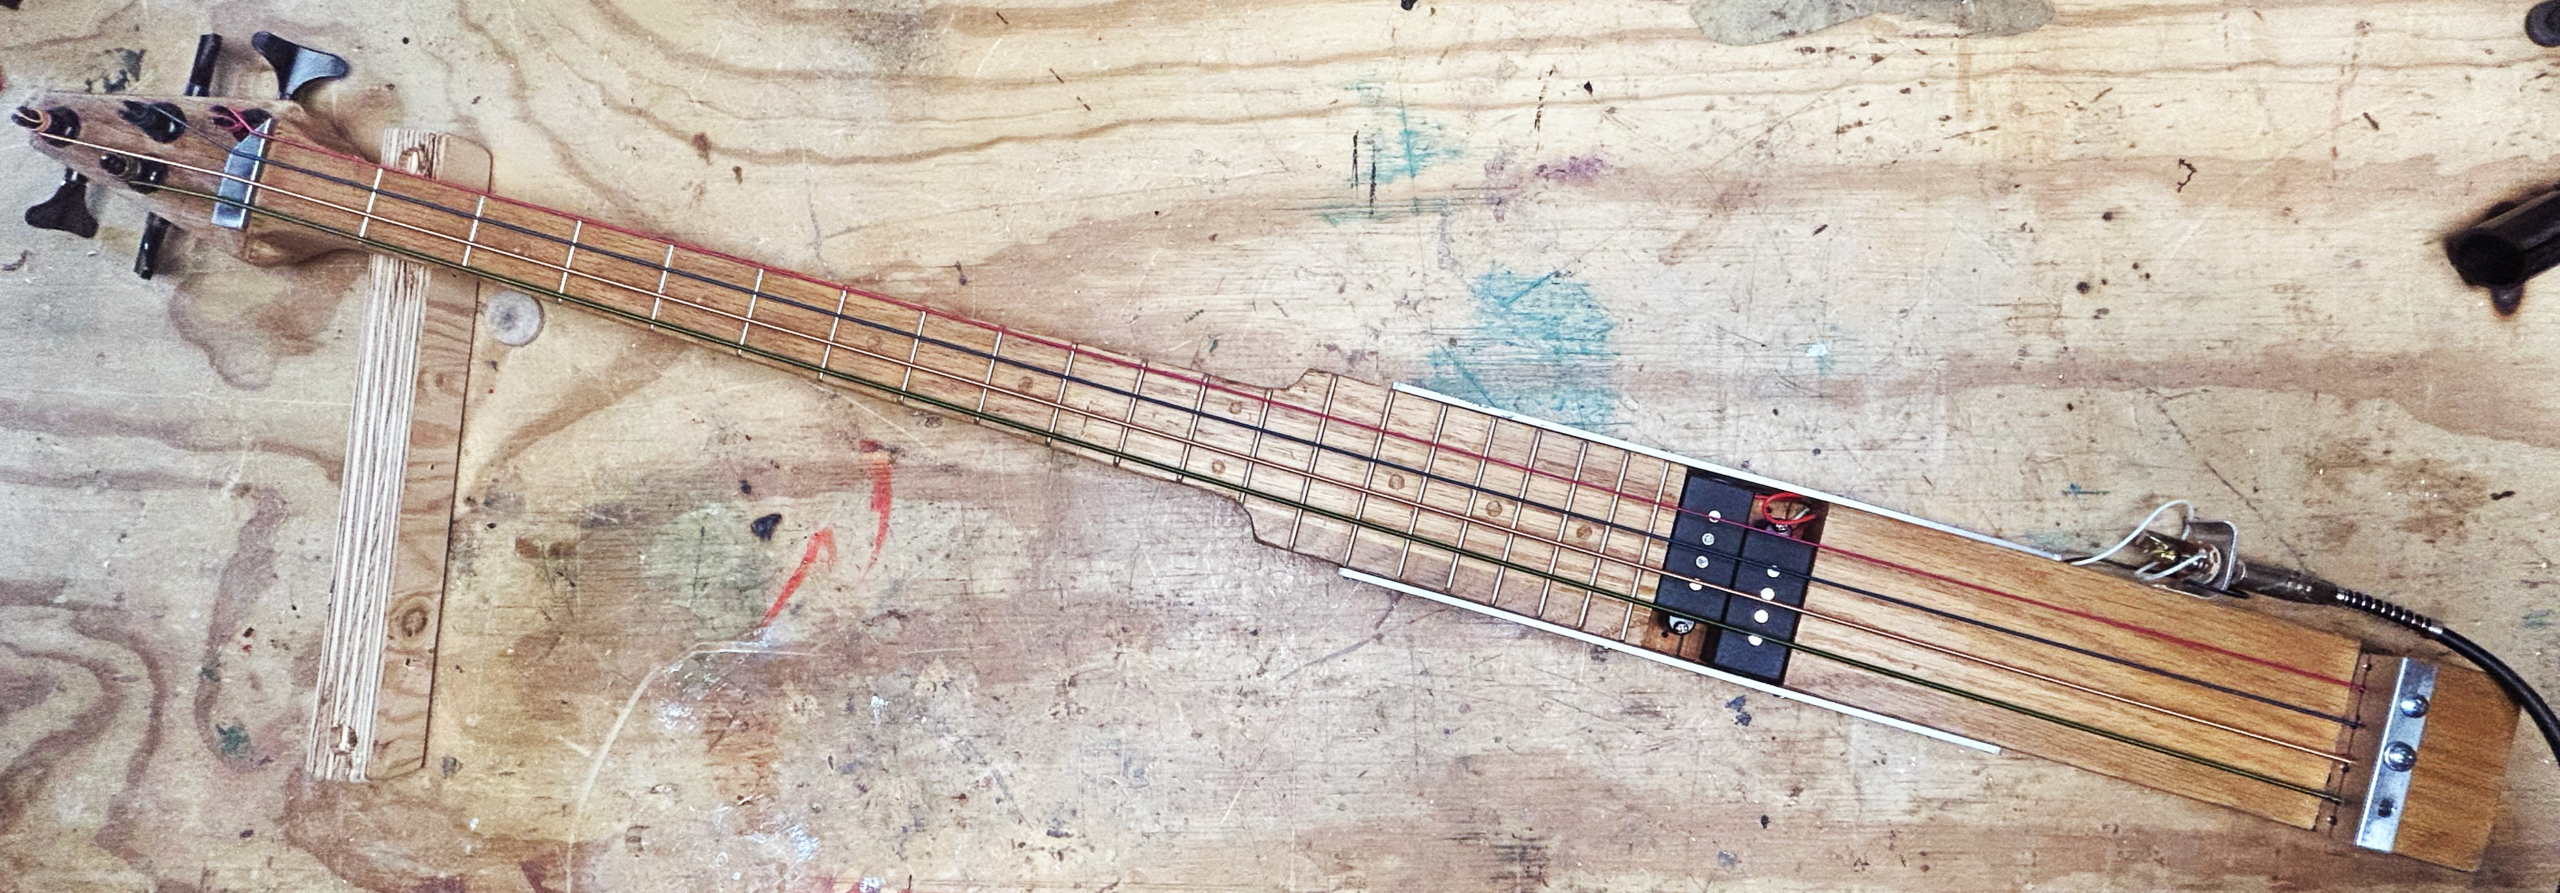
Sooo, I ordered a fret template and some fret wire, and soon set about building V.2.
This time, I cut the oak slab and shaped it more like a traditional bass neck – with the nut and bridge correctly spaced. I cut and inserted the fret wires according to the template.
Then I installed a set of bass-guitar pickups into the body, a jack on the bottom of the rail, and plugged the sucker in.
Note-wise, it sounds correctly tuned. But sliding requires a pro bass player’s finesse (which I lack), and I don’t want to daunt any casual musician who might walk up to the table to have some fun trying it out.
Plus, I cut the A groove too wide in the nut, which makes that string buzz like a sitar. It sounds much more annoying than cool, otherwise I’d just go ahead and just mis-cut the other grooves the same way.
What’s more, playing lap-slide bass might be just too weird for all but the most-dedicated bassist. (or would it?)
Anyway, in the end, I want the table to be fully acoustic with the option later to install piezos for each instrument so the whole table can be plugged into a mixer or recorder. So, what’s left to try?
Well, f*ck it. I guess I have to figure out how to install a standup bass directly into the table.
The table needs a bass. I have no idea how build that for a melodic bottom end; something anyone can plan, something that can survive Seattle weather like the other instruments can.
I knew exactly how to build the xylophones and propane tank drum for the Jam Table because I had built them before. And I knew I could throw together some array of percussion instruments that might delight someone with a pair of sticks.
This was terra incognita.
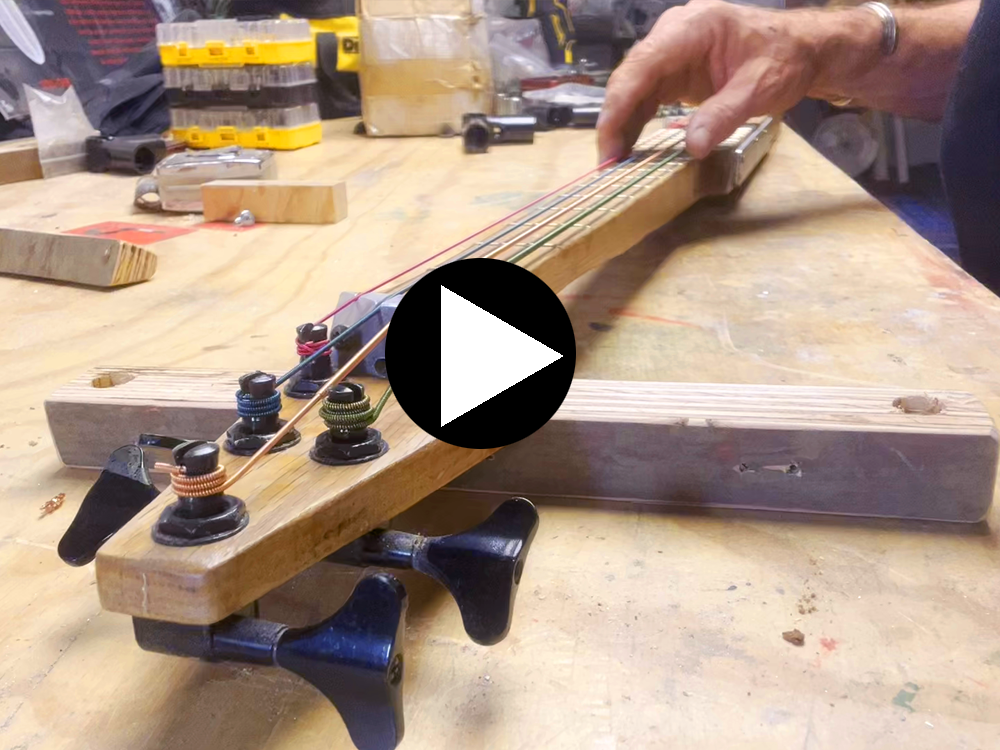
I settled on trying to create a slide bass, using rubber ukulele-bass strings. The trick was A) getting a slide to work and B) making it loud enough.
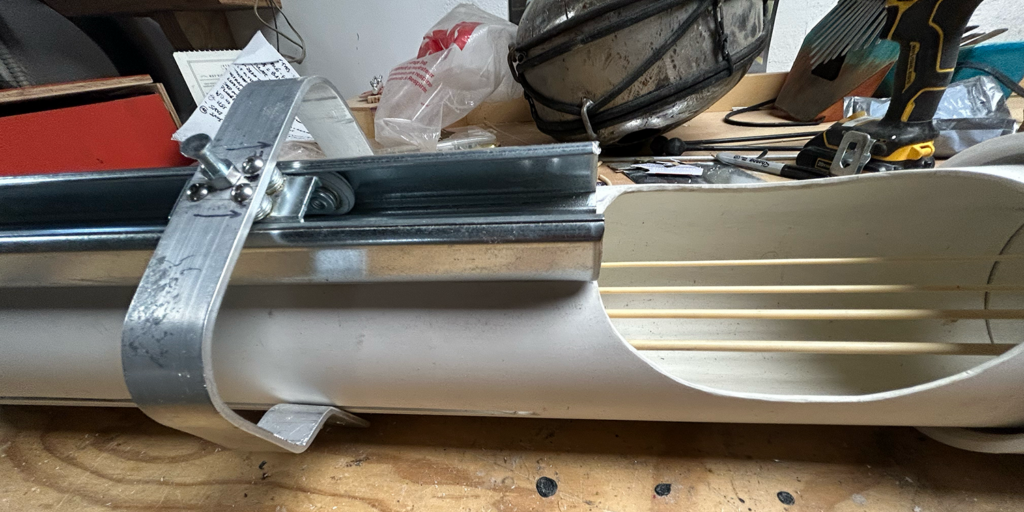
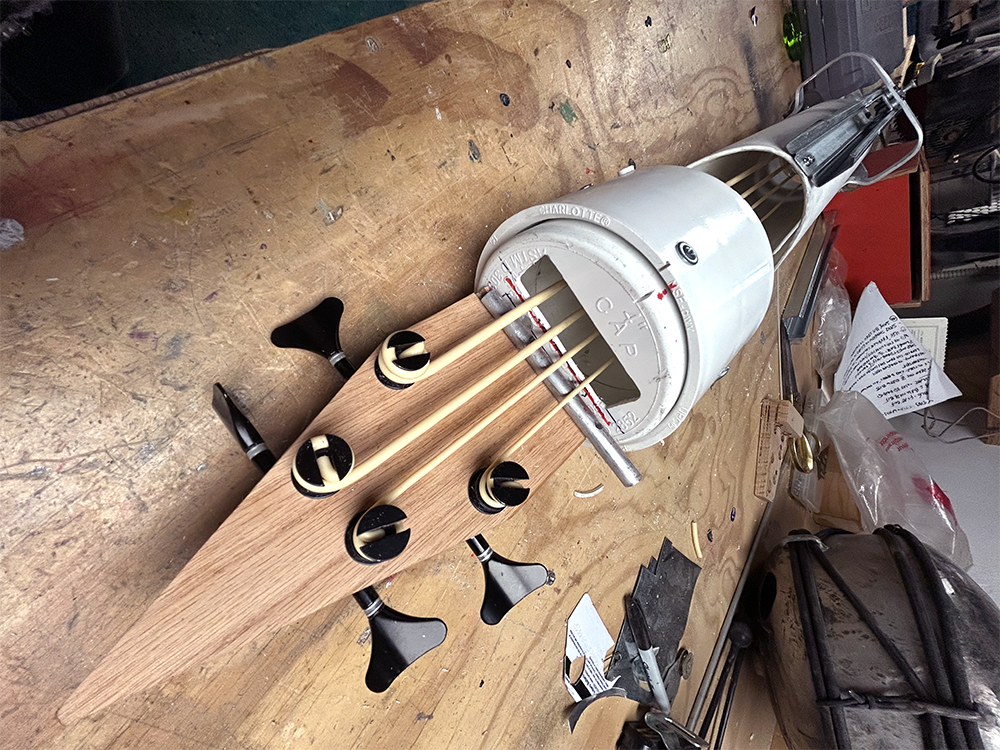
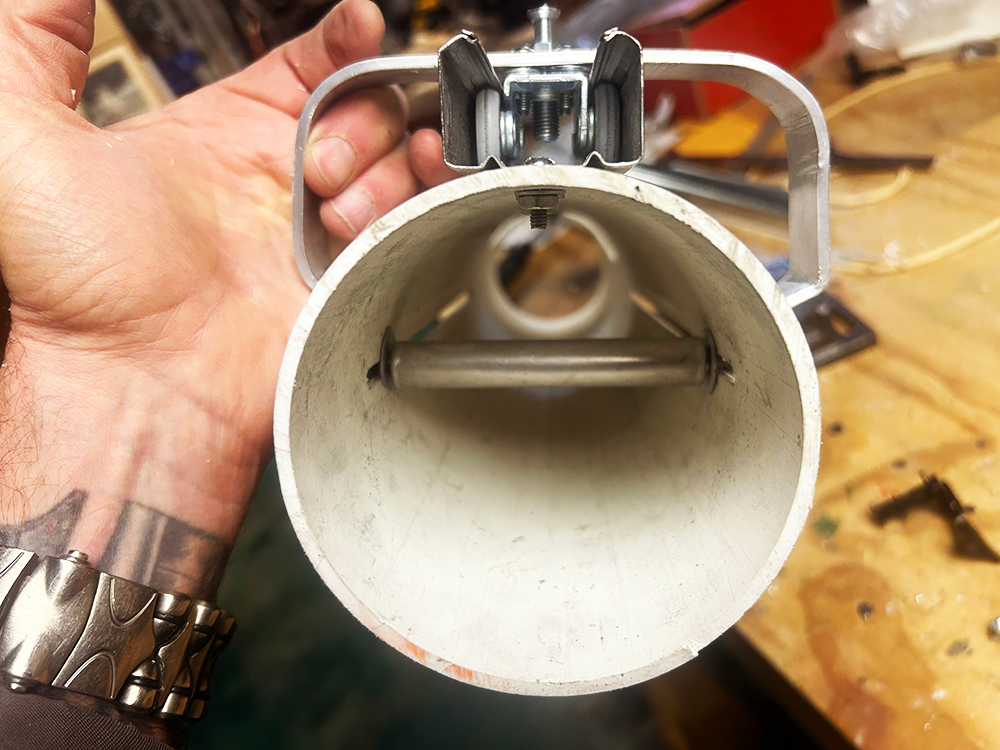
I hacked together a tubular frame of 3.5-inch irrigation pipe, built a peg head from scrap oak (from our recent remodel), and a tailpiece out of a strip of scrap steel to anchor the bottom end of the strings.
The slide was a challenge – I used the steel roller from a cheese slicer, suspended under the strings that the musician would slide along a repurposed chunk of sliding-door track to raise or lower the notes. Sort of a redneck slide guitar affair..
I blew a good 10 days trying to figure it all out, but it worked.
And it sounded like absolute shit. Just awful.
It sounded even worse when I added a piezo pickup and ran it through an amplifier. No volume, but you could hear the slide VERY CLEARLY.
And besides, it would require amplification, which meant either installing a cheap amp and surrendering it to the elements or requiring musicians to bring their own amps.
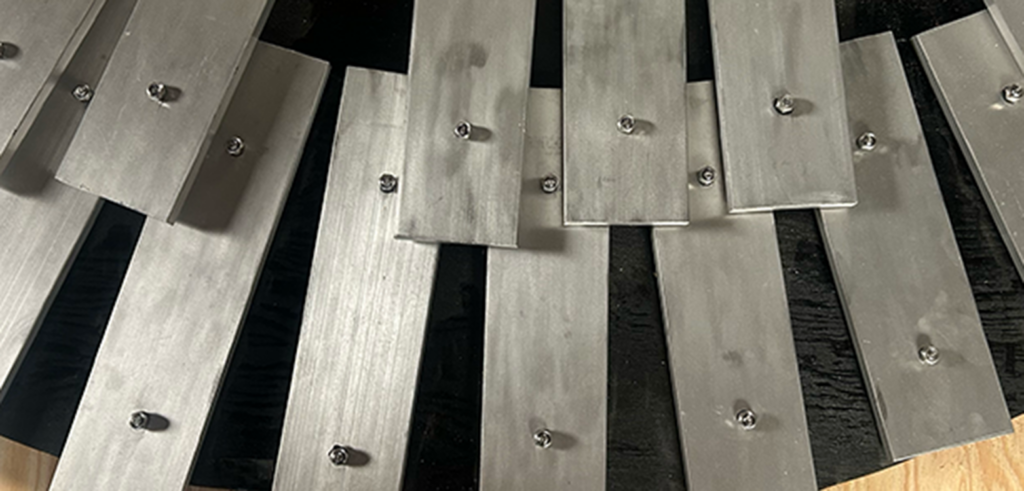
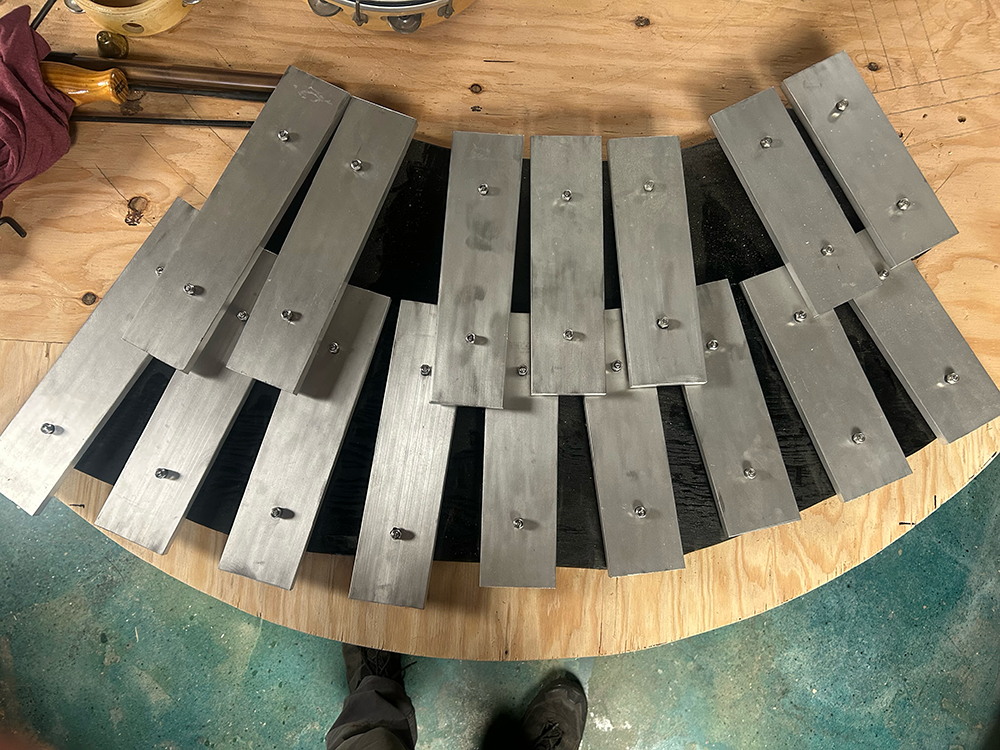
The second instrument I installed was the easiest to build: I pulled a set of keys from XyloVan’s Keyboard 3, the treble set that used to live on the van’s sliding door. C4 to Eflat5.
I wanted to shape the array to flow better visually with the circular table top, and speak to the position of the propane tank drum that will be mounted opposite it. I also didn’t want to let it dominate the real estate.
So I laid it out the keys on a curved keyboard, and then mounted the accidentals a quarter inch or so above the naturals, leaving (what I hope is) just enough room for easy play.
Fortunately, I didn’t have to buy new, longer screws for *all* the keys, just the accidentals since they needed to be mounted higher. For the naturals, I salvaged the original stainless steel M-6/1 screws from Keyboard 3, where they had lived happily since I built the thing (gulp) 16 years ago.
The kick drum had to come first. Since it is embedded in the table base and I’m going to have to figure out all the other instruments on the table top one by one, I wanted to get it out of the way.
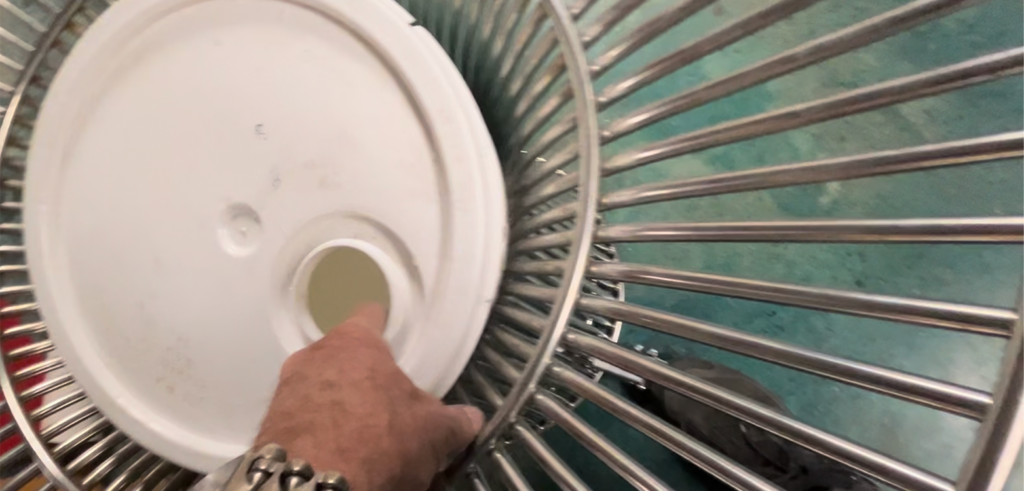
My goal has been to build everything out of salvaged materials: An old 5-gallon paint bucket is a great candidate for a kick drum: It has a natural sound hole. It’s made of durable polypropylene (or something like it). It’s cheap and easily replaced.
And, most importantly, it *fits*, which no normal bass drum would. I suspended it from the base using paracord.
The pedal mechanism was another problem entirely. The kick action needed to be standard (stomp = WHOMP). But since the drum surface is parallel to the floor, and the stainless steel of the table base can’t be modified, I had to get hacky.
I worked out a way to use the table frame as the pivot, and then spent the better part of a week fabricating the pedals, lever, and beater out of scrap aluminum slabs, scrap iron levers, screws, and a f*ckload of mistakes and cursing.
Anyway, it ain’t pretty, it ain’t comfy, but it works. I’m hoping the end users will give feedback and offer suggestions on how to do this better.
(I probably need to add a Suggestion Box to the table. Just a thought.)
I never thought about tables much – until a friend opened a door in my head:
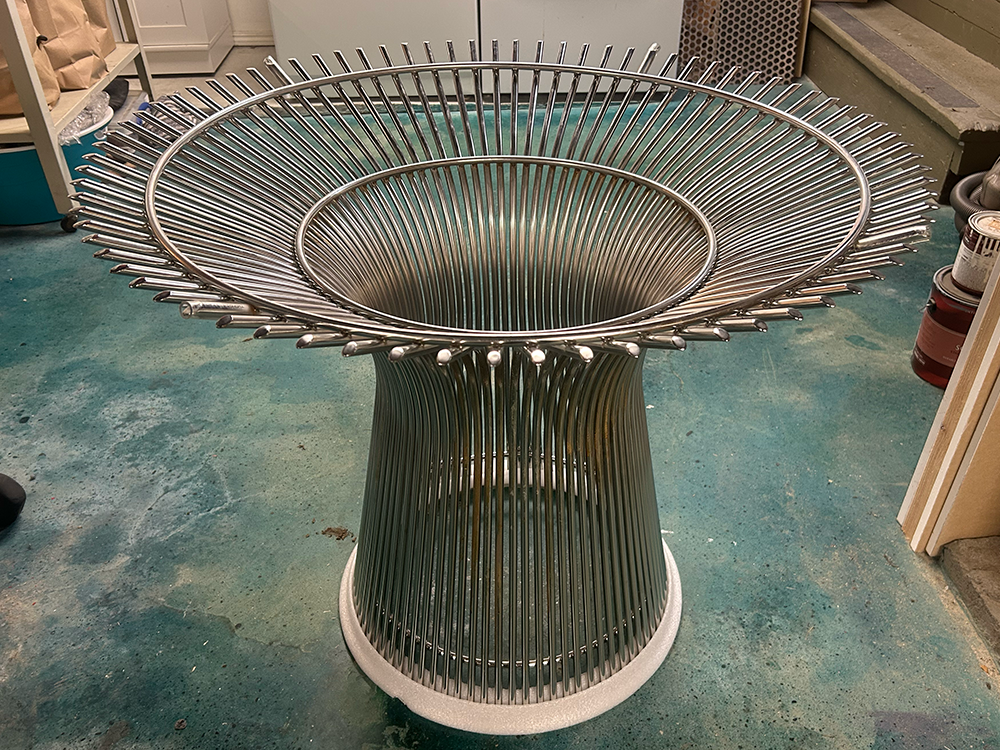
She wondered whether artists might enjoy building table tops to go with the fancy stainless-steel table bases that her friend had salvaged from a dumpster.
And suddenly for me, it clicked:
We gather at tables to eat, chat, and play.
We make plans, peace, and war there. We build things , we take them apart.
(click to zoom)
Sometimes we sit alone, but more often we sit with others, creating moments in time with deep meaning. (see my earlier project – Table 9, which I might get around to building some day.)
What would musicians create if they could sit down at such a thing?
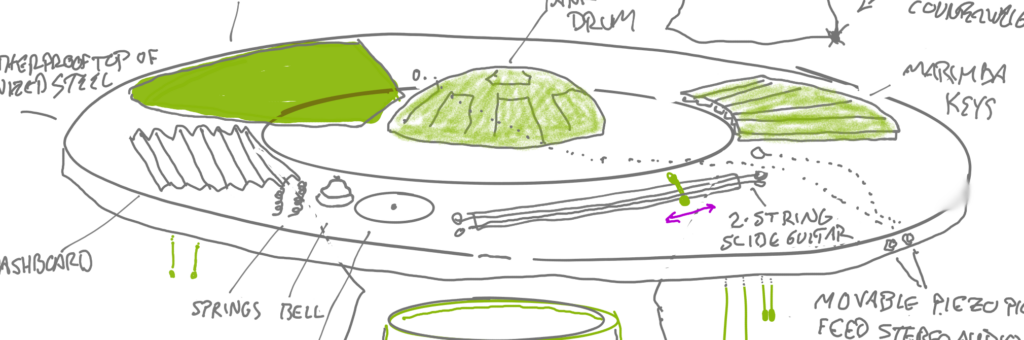
Here’s the initial concept sketch – I’ll post more photos as I build.
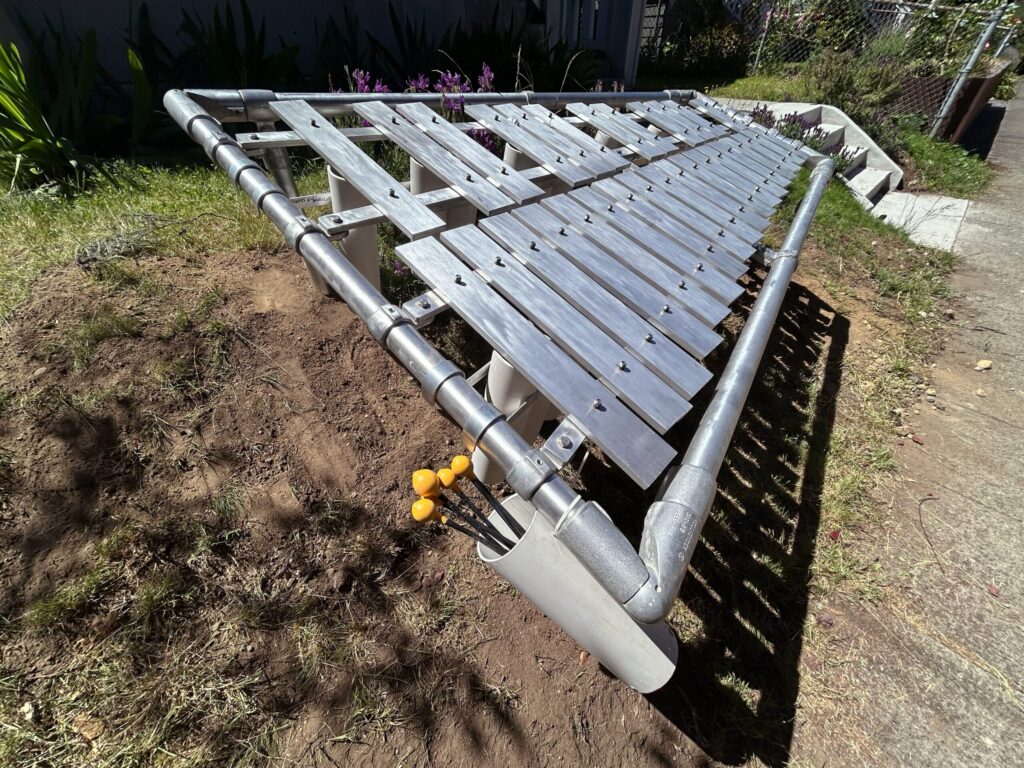
I’ve dreamed of installing XyloVan‘s big xylophone (8’x3’) in front of the house ever since we moved in five years ago.
My son and I finally picked up all the instruments from storage in LA and brought them home in January. I have another project in the works using keys from the other big keyboard (details to come as it falls together).
Over the past few weeks I polished up all the keys with a wire brush and then started work on the sound:
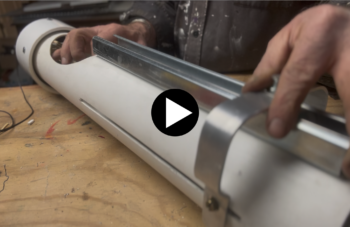
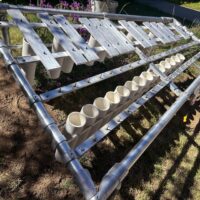
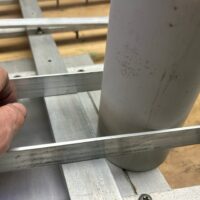
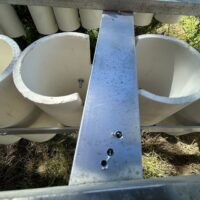
It used to be amplified by a pressure-zone mike installed on a plywood flat just under the keys, but that’s not a long-term plan for rainy Seattle. So I built, tuned, and installed tubular resonators under each of the keys, made of PVC pipe framed in custom brackets of 1/8″x1″ aluminum bar (photos below).
This involved calculating the right length for the tube (one-quarter the length of the wavelength for each note) and then cutting each tube precisely and plugging its bottom with a round of stiff corrugated plastic – drilled with a hole for drainage (because Seattle).
I also rebuilt the top end of the frame, reducing the angle at top left and pivoting the top rail downward to match the angle of the bottom rail. This fixed the ugly gap that used ride above the sharp/flat keys to allow the instrument to mount cleanly on the van’s flanks. It’s a lot purtier now.
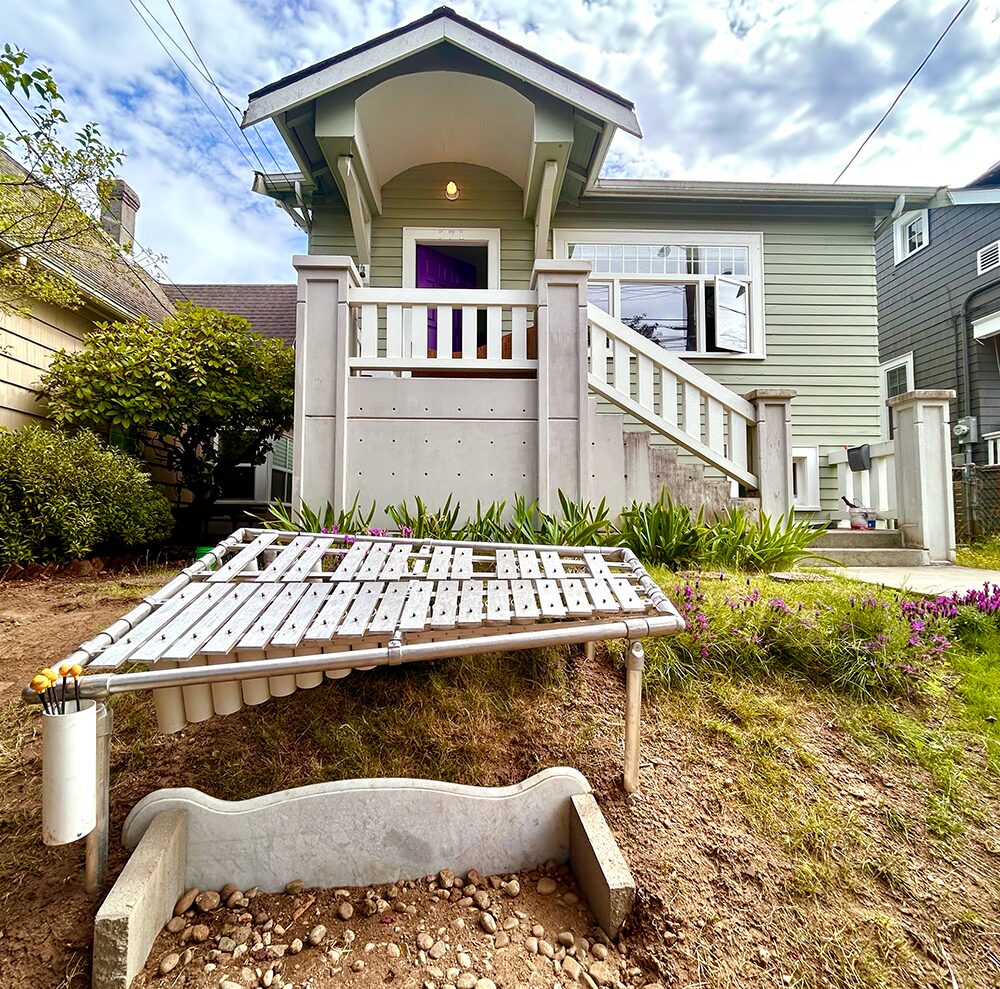
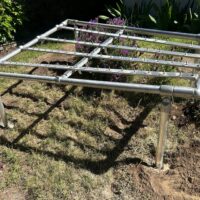
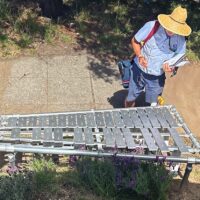
This week, I dug holes for the four legs with a posthole digger and then lowered the frame into place with the help of friends and neighbors.
I plumbed and leveled things with the frame parallel to the little slope in front of the house ( at a nice, playable 40-degree angle), set the legs in place with small stones to steady them, and poured in and then doused a bag of quickset concrete for each.
To help folks stand closer to play, but keep the structure off the sidewalk, my wife and I excavated the sloped front yard and embedded a salvaged marble mantelpiece (found at Ballard Reuse for just a few bucks), bookended by cement blocks to keep the slope stable.
To make it look a bit less gravestone-y, I’m thinking about painting a welcoming message on it in trompe-l’oeil carved letters if I can figure out the best weatherproof paint to use on marble. (recommendations, anyone?)
Anyway, kids are coming by to play daily, I’ve met a Burner friend who stopped to bang on it, and even the USPS letter carrier seems to like it. It’s lovely hearing random music from passersby float up through the living room window. (Here’s a little clip of me plinking around on it.)
With its massive 10,000-year clock mechanism now functioning inside a mountain in Texas, and the likes of Danny Hillis, Brian Eno and Jeff Bezos engaged, the organization has launched Long Now Labs: The goal is to extend our methods, frameworks, and lenses for long-term thinking.
The call for the first lab in the series “The Book of Time“, and I just submitted a proposal … (MORE)
Prototype table, chairs and figures are laser-cut from acrylic and birch plywood. I developed the project over 17 hours at the ElectricSEA Hackathon, March 27-28, 2026. Thanks to Griff Tucker for all his help optimizing and running my laser files.
This is an audio- and touch-reactive table designed for intentional conversation. Participants spin two concentric rings to align the themes and framing they intend to focus on, and begin.
The fact that the rings remain spinnable allows conversation to shift, as the participants’ discussion refocuses what’s most meaningful to them individually and collectively.
As new topics or framing lines up, the table emits a new soundscape or light display
I can manage the fabrication, but I’m seeking collaborators today at the Electric SEA hackathon. I’m looking for an illustrator, a sound designer and an interactive-circuit designer to help rough out the prototype – and then collaborate to deliver the end product.
I’ll be in the building for the duration of the hackathon – if you don’t see me, DM me on Discord.
This project is seeking:
Hardware/software sound and light artists to develop the interaction design
Visual artists to realize the look and iconography
The artist will fabricate the table and collaborate with the team to integrate their creations.
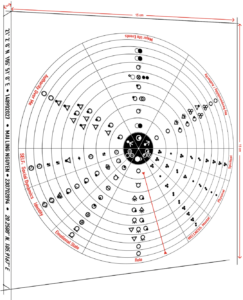
Original concept sketch. Click to expand full PDF.
Prototype (1:6-scale) for a 7-foot-diameter meeting node to inspire conversation among up to 9 random participants or focus a small team’s energies.
Behavior: As participants use the table to select topics and framing, embedded sensors trigger software to generate sounds and light patterns that match the selection. Light and sound can be tuned to be constant, intermittent, or timed, based on the participants’ needs and intention.
Planned materials: Inlaid, laser-cut, or painted wood or etched aluminum and embedded electronics, sensors, and sound/light emitters, coated with high-durability satin urethane.
HOW TO USE TABLE 9:
A) Arrive at the table with a group or team and your session framing in mind. Why are you here?
(e.g. Project development, brainstorming session, reverse-psychology exercise, problem solving, helpfinding, envisioning, story time, game)
OR
B) Gather up to 8 or more strangers and spin the rings to let the table drive.
The outermost ring is stationary to allow placement of coffee cups, phones, notebooks, etc.
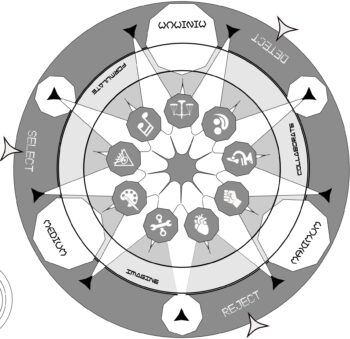
Each nested ring has a set of discussion parameters on it. These could be anything from topics to specific flavors, mythologies, or contexts, e.g.,
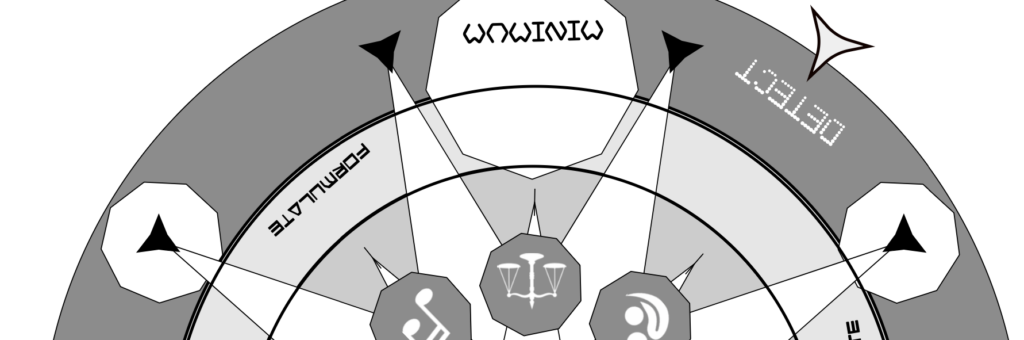
Intensity/Scope (Minimum, Medium, Maximum)
Intention (Select, Detect, Reject)
Framing/Topic (icons for Nature, Music, Art, Mysticism, Law, Politics, etc.)
and/or Role of the person seated by that symbol
e.g. Participant, Mediator, Scribe, Devil’s Advocate, Chaos Agent, etc.
Spin the center icons to set your framing or topic (or, let the group choose the framing)
Spin another ring to select the next parameter (Intensity, Intention, Role, etc.)
Talk amongst yourselves – and adjust the table as the conversation flows and evolves.
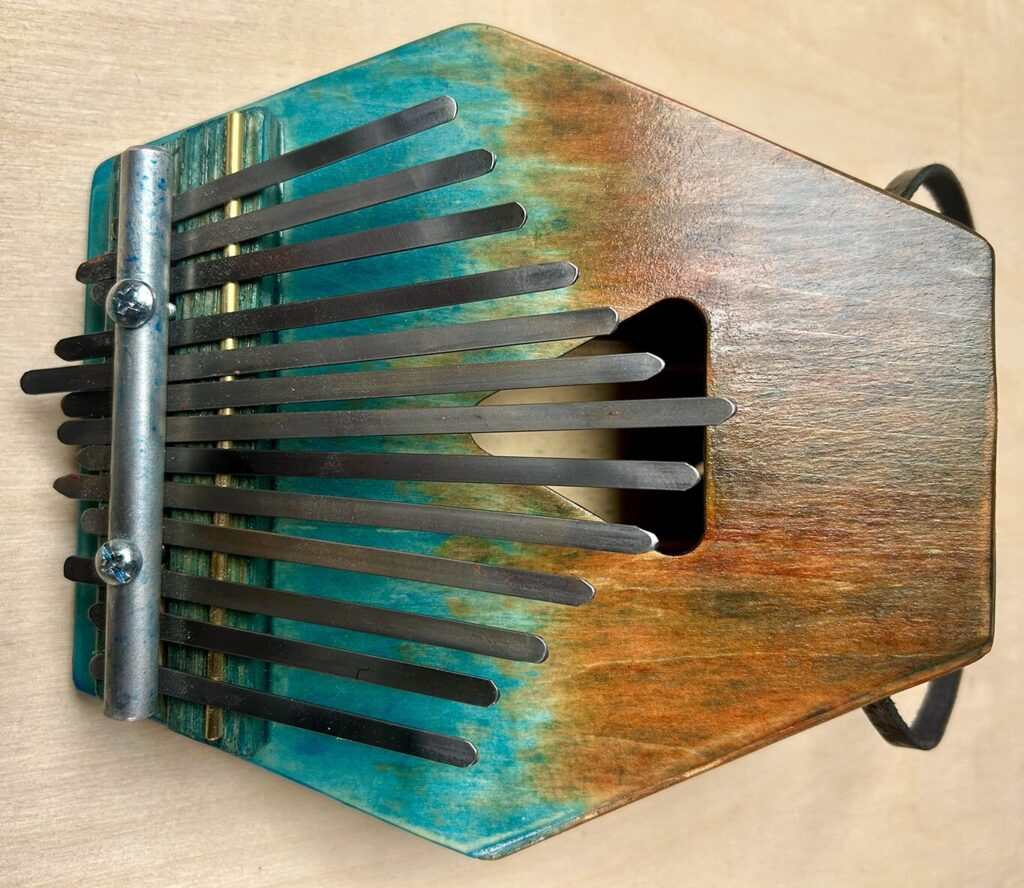
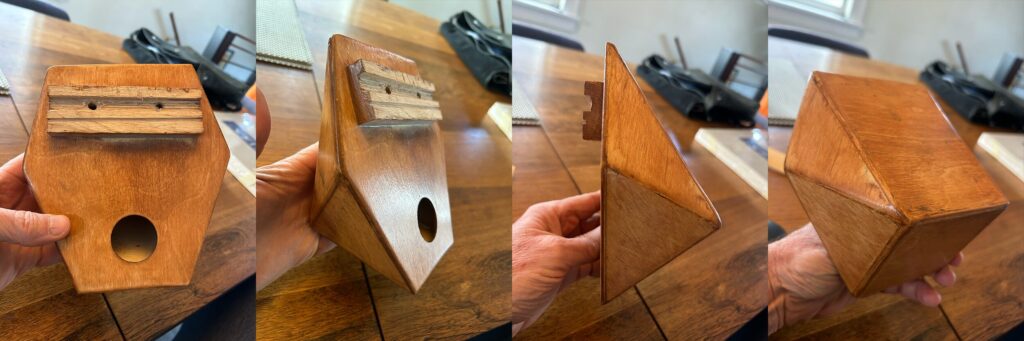
At one point last year, I had this vision of a kalimba made of 3- and 6-sided planes – an instrument that would be pleasing to the eye, but fit nicely in your hands to enhance the pleasure of plinking away in the sing-songy way of kalimbas.
After prototyping it in cardboard, I translated the pattern to 3mm birch plywood. This inspired me to join a makerspace so that I could learn how to use a laser-cutter and make the (extremely finicky, difficult-to-join) design repeatable and try out different finishes …
 Everything is (finally!) built, and any four musicians can step up and jam.